How to Use the Content Planner in RightBlogger
See how to review planned topics, edit posts before they go live, and retry failed publications from one calendar.
The Content Planner is the calendar for everything RightBlogger publishes to your site. Posts you schedule, topics your automations queue up, and posts that already went out all show on one calendar, one project at a time.
This guide explains what you see on the calendar and what you can do from it. For step-by-step instructions on adding posts and setting up schedules, see How to Schedule Posts and How to Use Automations.
Open the Content Planner
Pick your site in the site picker at the top of the sidebar, then click Content Planner. Each project has its own calendar, so switch projects in the site picker to see another site’s posts.
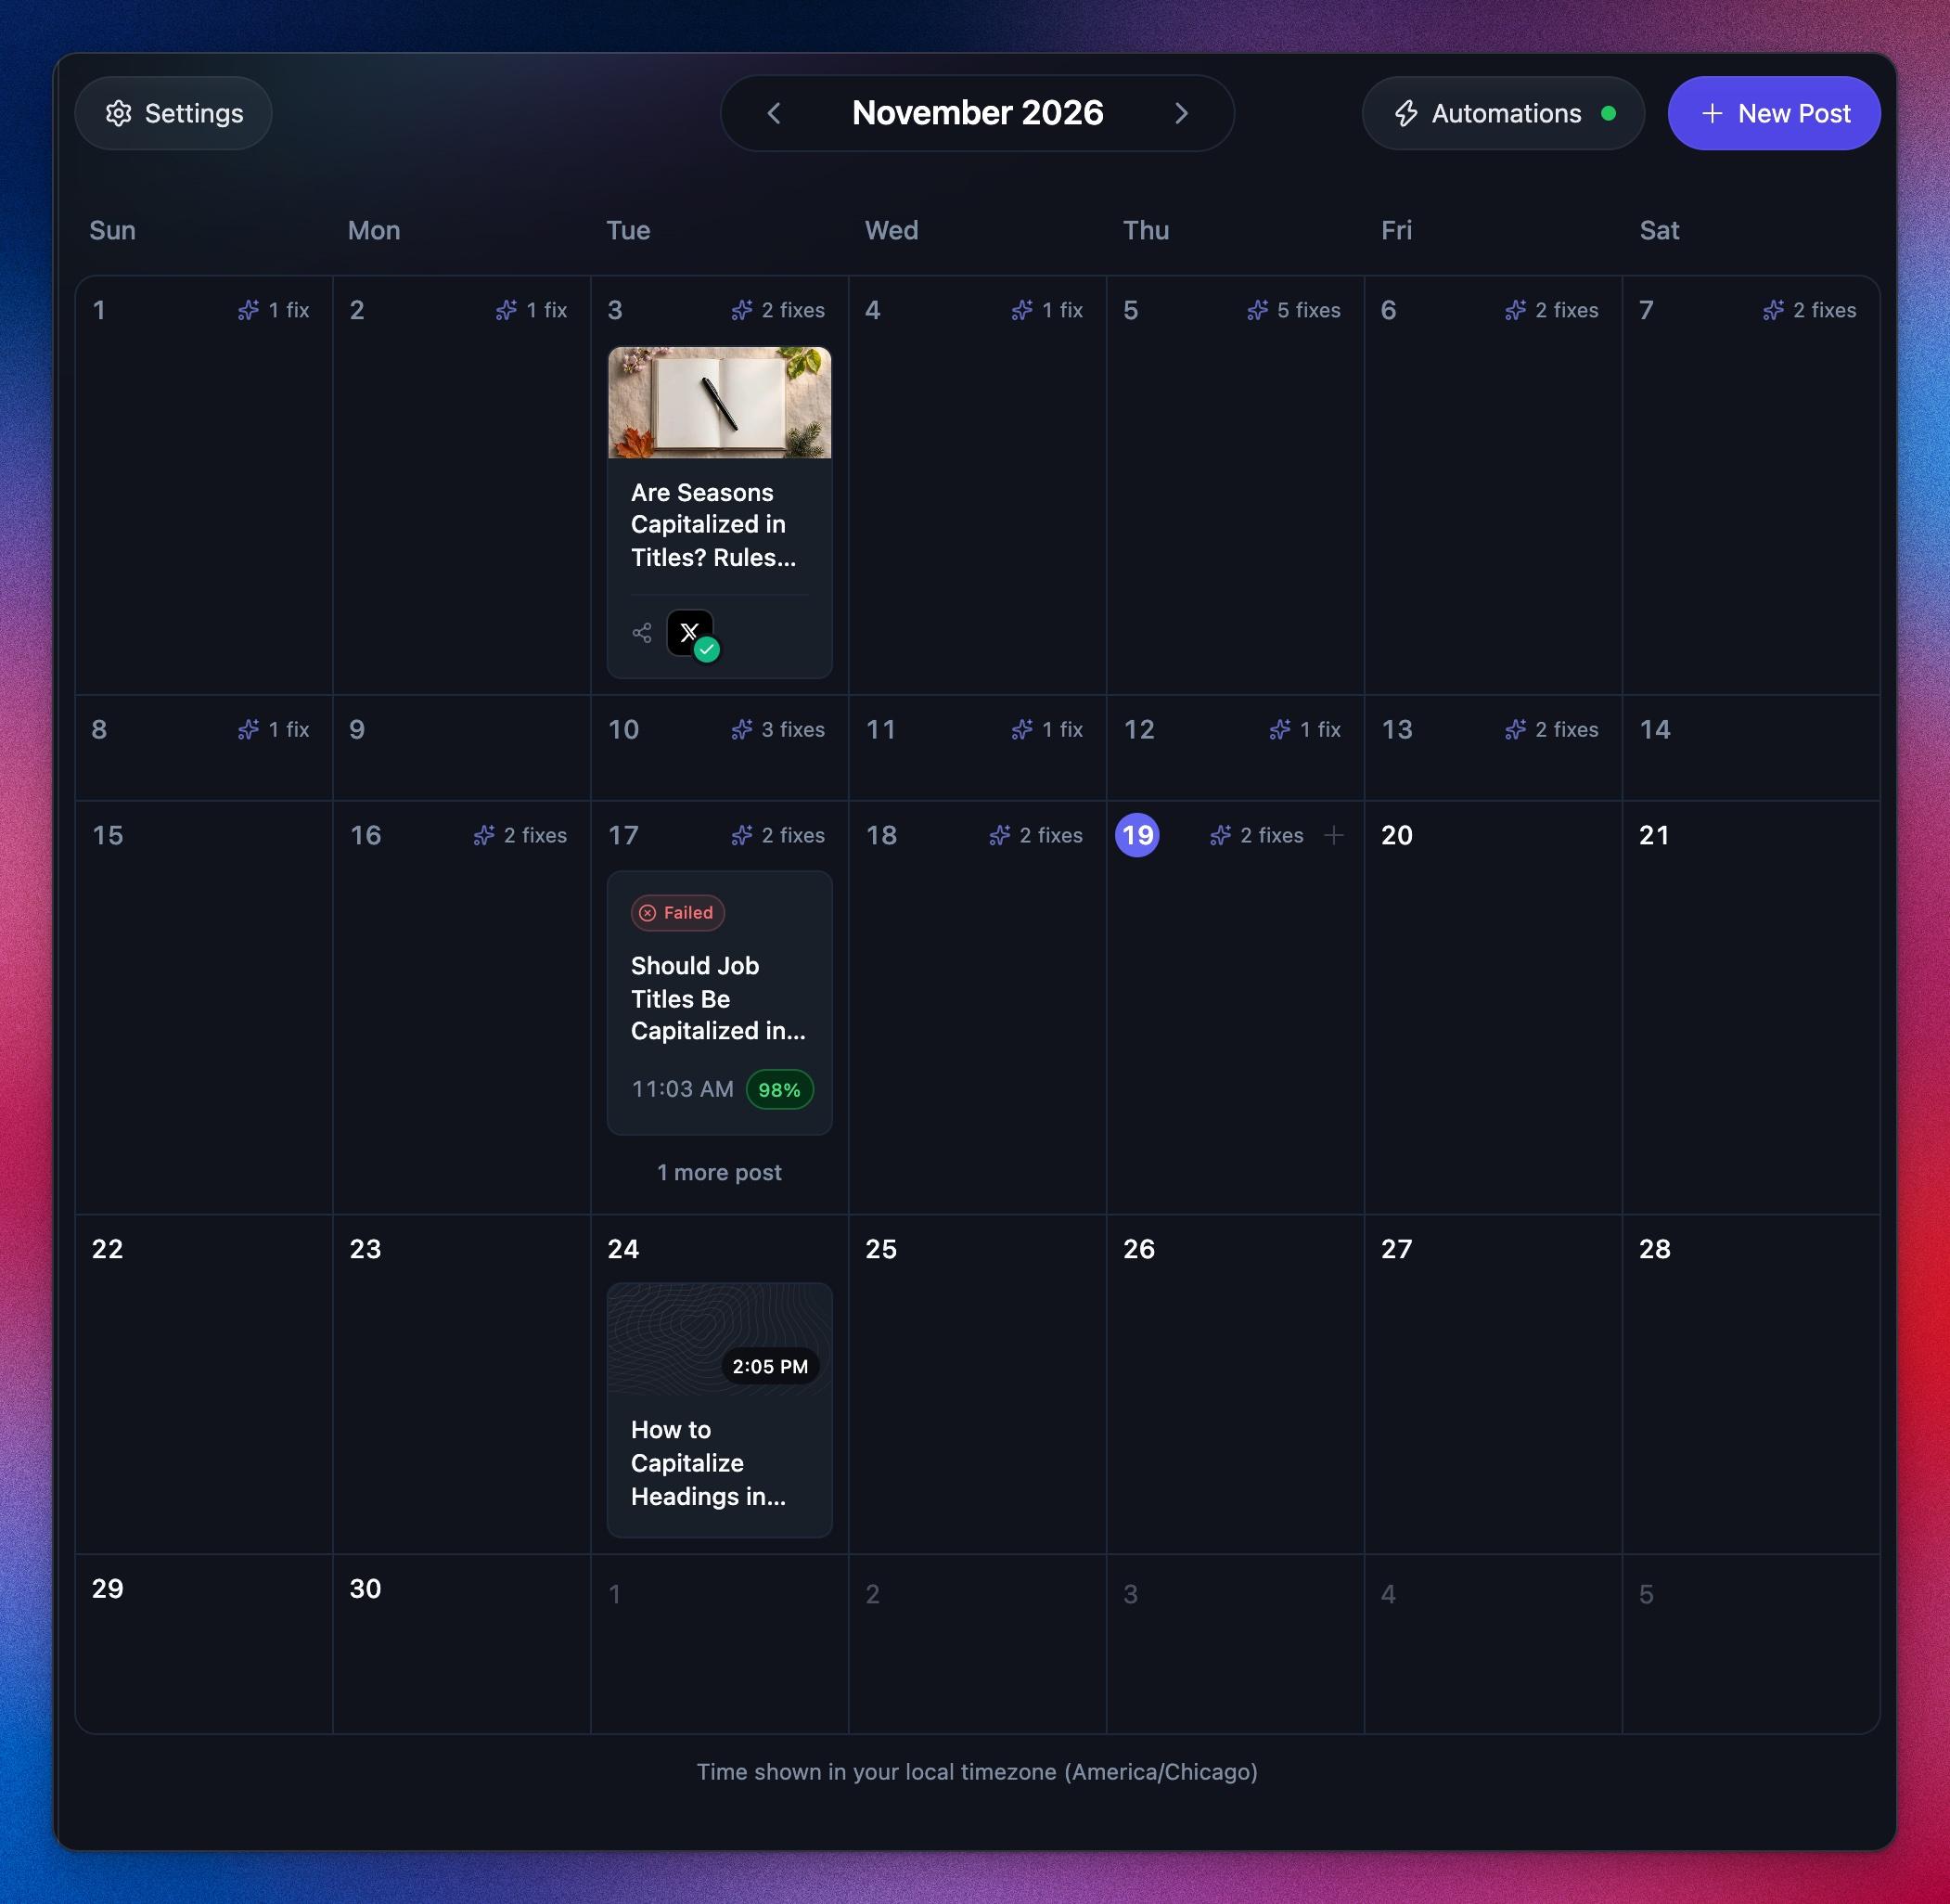
The toolbar has four controls:
- Settings opens Project Settings, Content Defaults, Planner Options, or Integrations for this project.
- The month in the middle. Use the arrows to move between months, or click the month name to jump to another.
- Automations opens your recurring schedules. A green dot means at least one automation is running.
- New Post adds a post. You can also hover over a day and click + to add a post on that date.
Times on the calendar use your local timezone, shown under the calendar.
Read the Calendar
Each post is a card on its publish day. A card shows the featured image, the title, the publish time, and the post’s SEO score once it is written. If a day has more posts than fit, click more posts under the cards to see the rest.
A small label on the card tells you where the post is:
- Planned: a topic an automation queued up. It has not been written yet, so it shows a pixel pattern in your brand color where the image will go.
- Paused: a planned topic from an automation you paused. It will not be written until you resume the automation.
- Idea: a suggested topic with a date but no destination. It never publishes until you schedule it.
- Scheduled: a post waiting for its publish time.
- Writing: RightBlogger is writing the article now.
- Sending: the finished post is being delivered to your site.
- Sent or Published: the post reached your site. Published means RightBlogger confirmed it is live; Sent means it was delivered, for example as a draft.
- Failed: the post did not publish. See When a post fails below.
Two more things can show on the calendar:
- Social icons under a card show which social accounts share that post. A check mark means the share went out.
- Fixes next to a past date count the edits Site Agent applied to your live posts that day. Click it to see them.
You can turn card images, keyword data (difficulty and search volume), and Site Agent fixes on or off under Settings > Planner Options.
Add Posts to the Calendar
Click New Post to open Schedule a post. From there you can:
- Type a topic or paste a YouTube URL, then click Continue to pick the date, time, and destination.
- Click Find ideas for my site for topic suggestions based on your site.
- Choose Add multiple topics to paste several topics, keywords, or YouTube URLs at once.
- Choose Use an existing article to schedule something you already wrote in RightBlogger.
- Choose Create automation to add posts on a recurring schedule instead.
You can also schedule straight from the editor after you write an article with the Article Writer: click the arrow next to Publish and choose Schedule, or choose Schedule to Content Planner from the ⋯ menu. How to Schedule Posts covers every option.
Automations
Automations fill the calendar for you on a daily, weekly, or monthly schedule, from your keywords, a topic, or a YouTube channel. Their upcoming topics show on the calendar about a week ahead as Planned cards, so you can check and change them before they are written. Click Automations to create, edit, or pause one, and see How to Use Automations for the full walkthrough.
Change an Upcoming Topic
Click a Planned card to open Edit planned topic. You can rewrite the topic, change the date or time, and click Save changes.
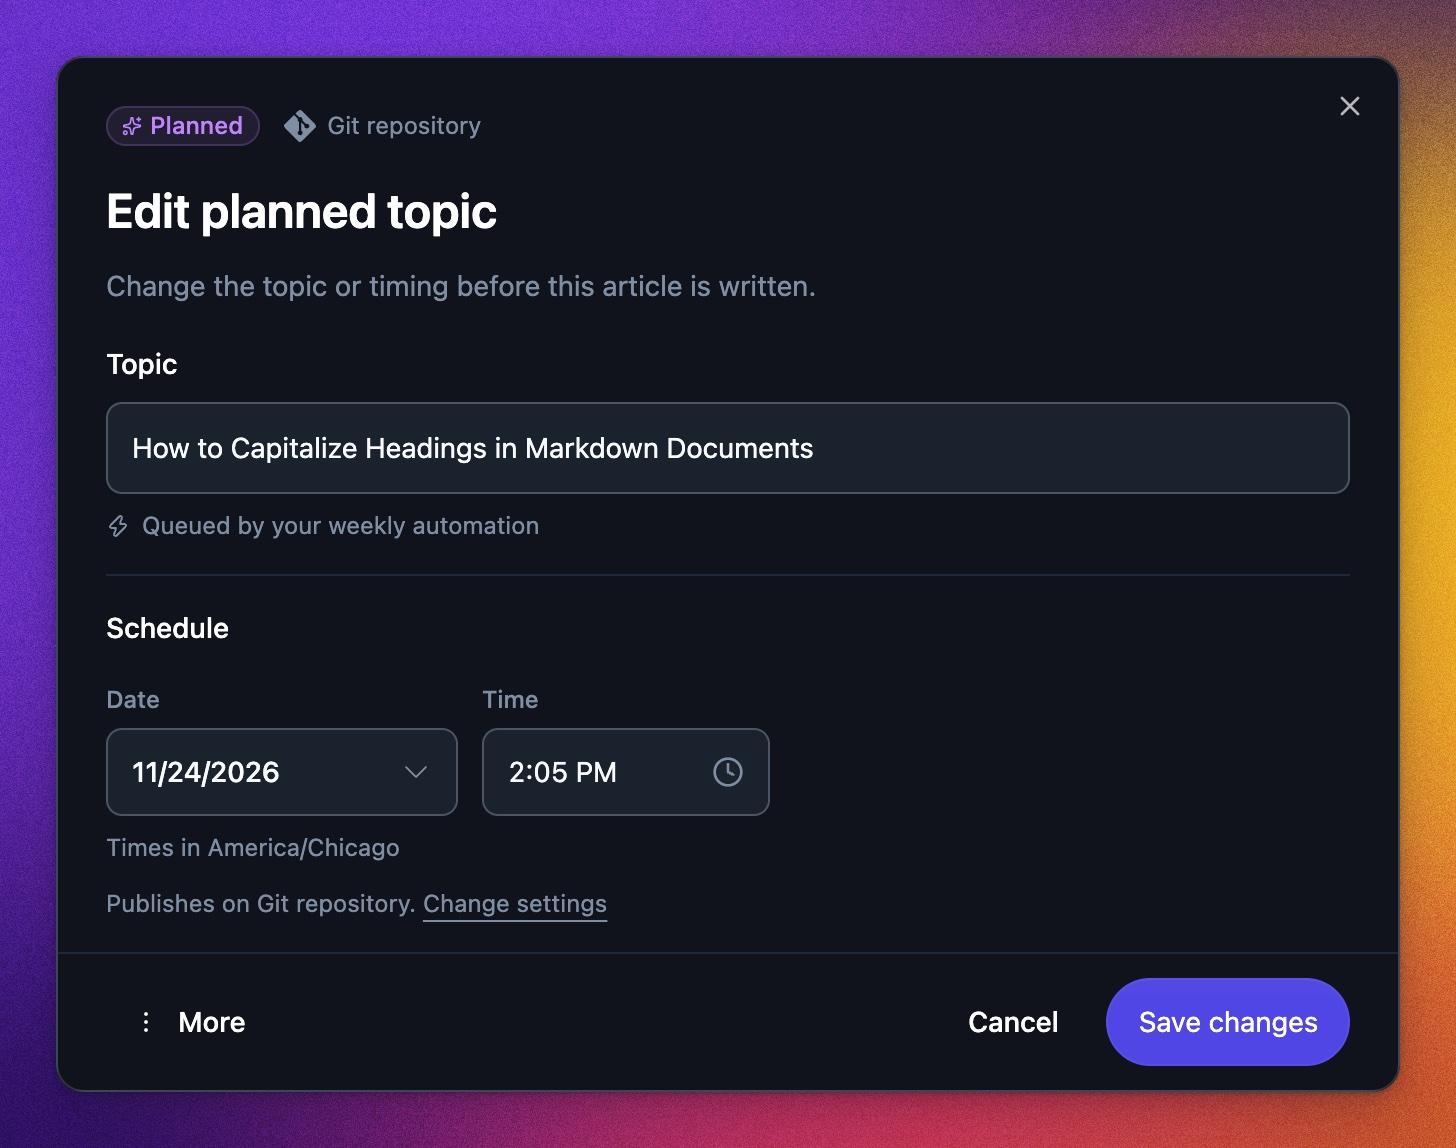
Under More you can also:
- New idea: swap the topic for a different one.
- Publish now: write and publish it right away instead of waiting for its date.
- Delete: remove the topic from the calendar.
Open a Post
Click any written post to see its details.
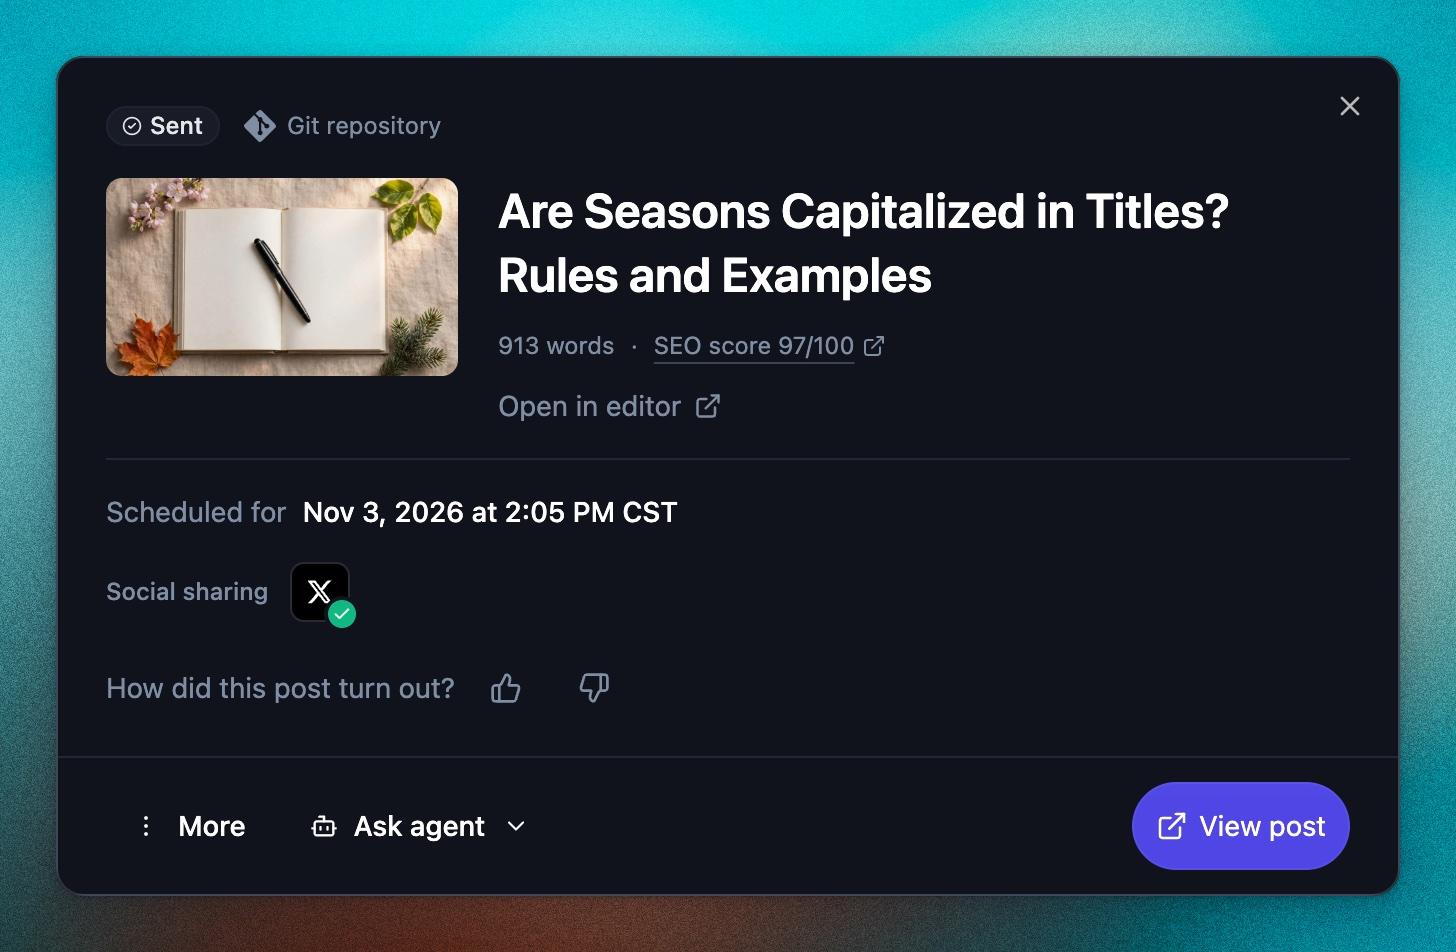
- SEO score opens the post’s SEO report.
- Open in editor opens the article so you can add your own examples or make changes.
- Social sharing shows the accounts that share this post.
- How did this post turn out? Give it a thumbs up or down. RightBlogger learns from this for future posts in the project. See How to Teach the AI.
- Ask agent gives Site Agent a task for this post once it is on your site, such as checking for outdated content or improving the title and description.
- View post opens the live post on your site.
For a post that has not gone out yet, the details show its date and time, which you can change and save. To move a post to another day, you can also drag its card on the calendar.
When a Post Fails
A post that could not publish shows a red Failed label. Open it to read why it failed, fix the cause, then click Retry publishing, or pick a new date and time and click Save changes.
The most common cause is a broken site connection, such as a changed password or a security plugin blocking RightBlogger. Check the connection under Settings > Integrations. WordPress users can find fixes for specific errors in Troubleshooting WordPress Errors.
Review Posts Before They Go Live
Every post can be opened and edited on the calendar before its publish time. If you want to check posts on your own site first, set your integration to save posts as drafts instead of publishing them. Your CMS keeps them as drafts until you publish them there.
To keep posts in RightBlogger without sending them anywhere, choose Draft in RightBlogger as the destination. The post is written on its date and stays in the planner for you to review, edit, and send yourself.
Planner Settings
Click Settings > Planner Options to change:
- Default posting time: the time new posts and automation schedules use.
- Calendar cards: whether cards show featured images, keyword data, and Site Agent fixes.
A few other project settings shape what the planner writes and where it goes: Integrations decide where posts publish, Content Defaults set the tone, language, and length, and CTA links add your calls to action to each article.
Using the Planner With a Team
Anyone you add to a project can view, create, and manage its scheduled posts. Only the project owner can change integrations and project settings. See Projects for adding teammates.
Related Guides
Still need help?
Ask the AI assistant for an instant answer, or reach us directly and we will get back to you as soon as we can.
Automated SEO Blog Posts for Your Site
Research, write, publish, and share from one account.
7-day free trial. Cancel anytime.