How to Use the Article Writer in RightBlogger
Set your tone, research sources, outline, and SEO options, then review and publish or schedule the finished post.
The Article Writer turns a topic or keyword into a full, SEO-optimized blog post. You pick the settings, check the outline, and RightBlogger writes the article with headings, images, and links. The finished article opens in the editor, where you can check its SEO score, make changes, and publish or schedule it.
Open the Article Writer
Click New Article at the top of the sidebar. You can also find Article Writer under All Tools.
Pick your site in the site picker at the top of the sidebar first. The Article Writer then starts from that project’s Content Defaults (tone, language, length, links, and more), so you don’t have to set them every time. Settings that differ from a plain article are marked with a dot on their section.
Enter Your Topic
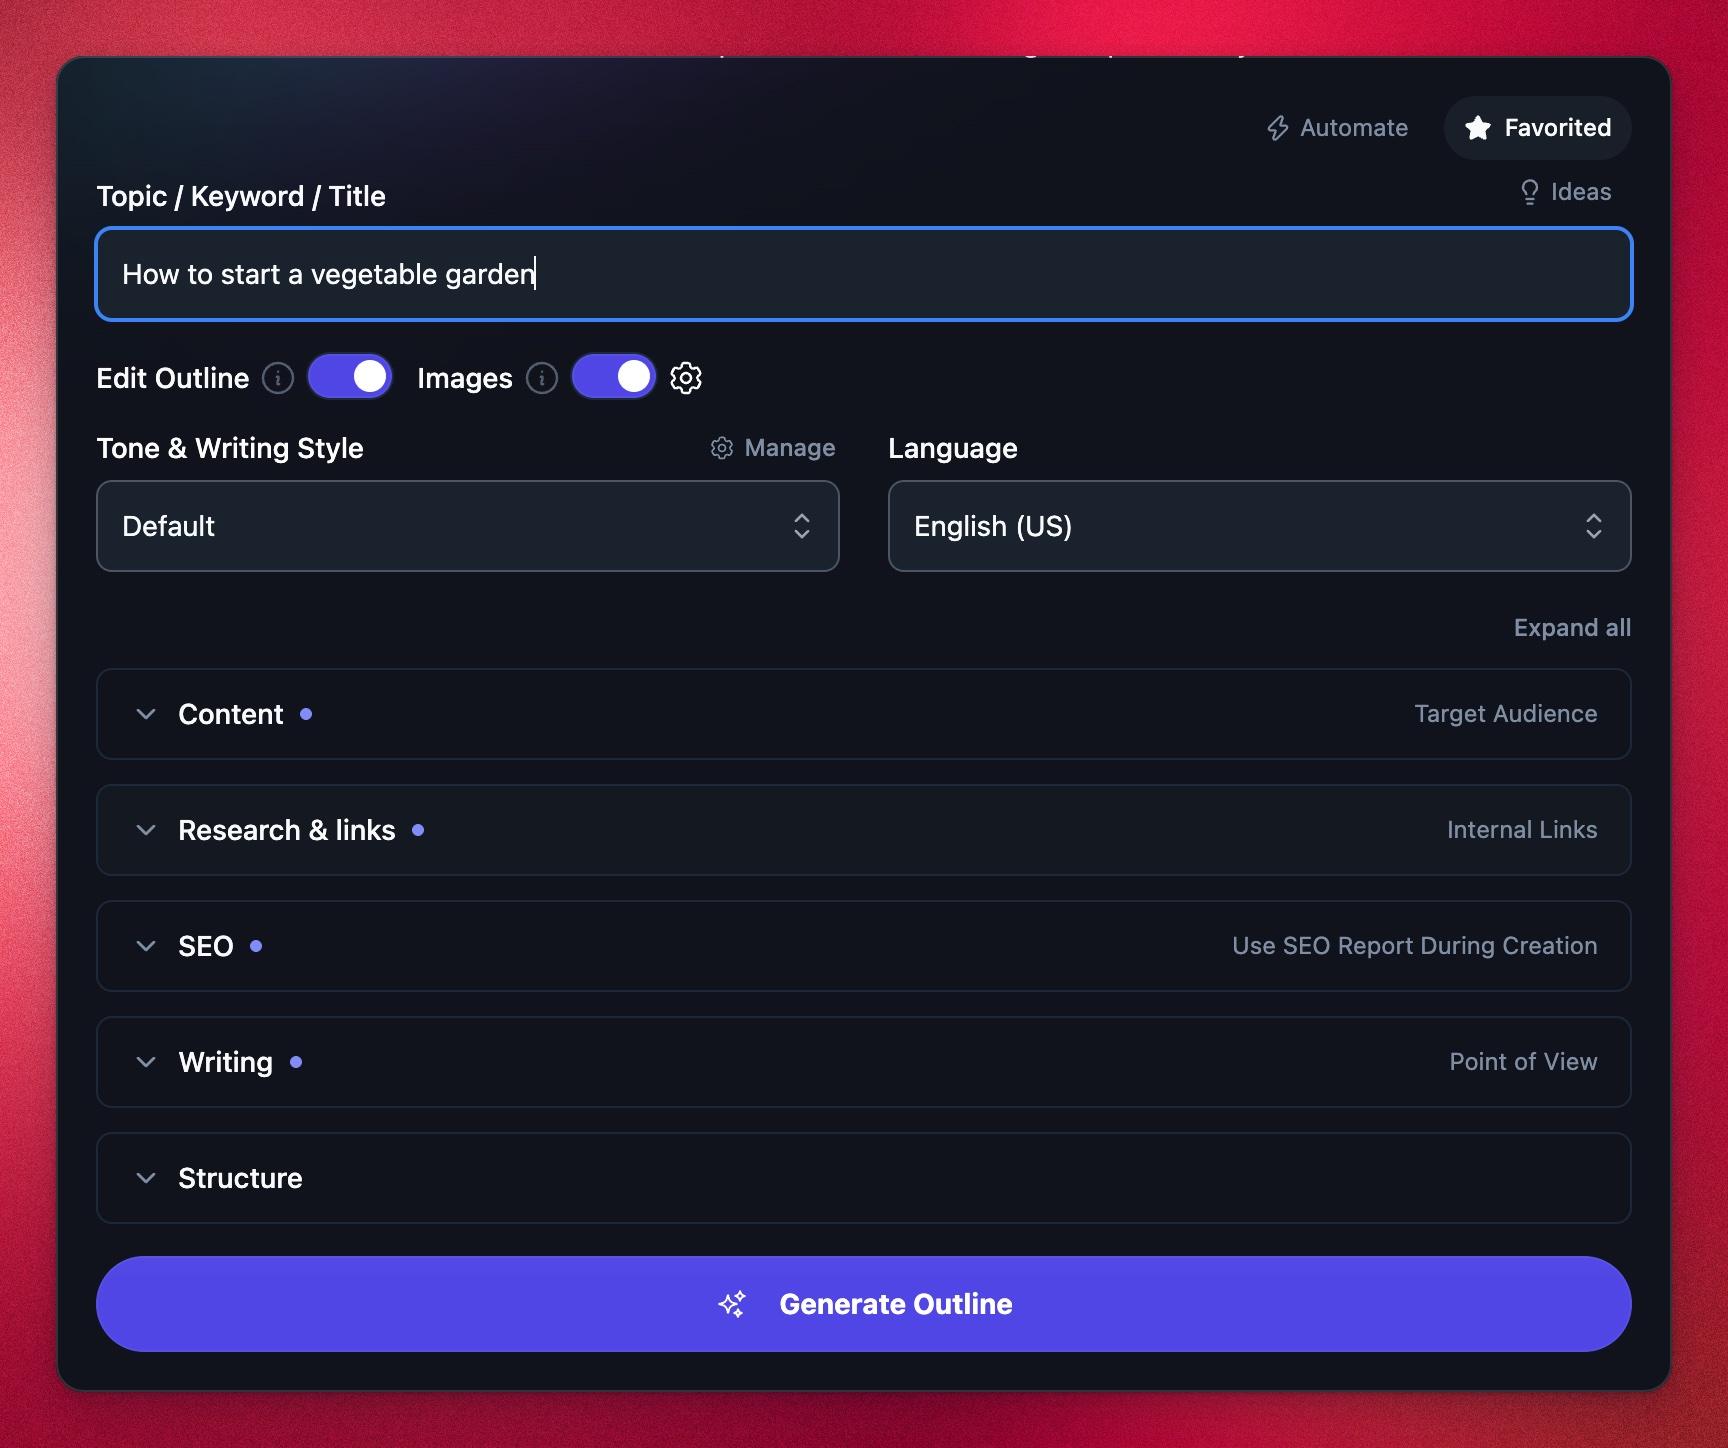
Type a topic, keyword, or title in Topic / Keyword / Title, such as “how to start a vegetable garden”. The AI writes its own title from it. To use your text as the title word for word, turn on Use Exact Title in the Structure section.
Not sure what to write? Click Ideas above the field. It lists topic ideas saved in your Content Planner and can find fresh ideas your site has not covered yet.
Choose the Main Settings
- Edit Outline: when on, you see and edit the outline before the article is written. See Edit the Outline below.
- Images: adds images to the article. Click the gear icon to choose stock photos, AI images, or both, set the number of images (or leave it on Auto), and change the image style.
- Tone & Writing Style: pick a tone, or one of your MyTone voices so the article sounds like you. Click Manage to set one up. See How to Use MyTone.
- Language: the language the article is written in.
Fine-Tune the Advanced Options
Below the main settings, the advanced options are grouped into five sections. Click a section to open it, or click Expand all. All of them are optional.
Content
- Additional Instructions for Article: anything the AI should know or include, such as “mention that our course has a free trial”. Click Saved prompts to reuse instructions. See How to Use the Additional Instructions Field.
- Target Audience: who the article is for, such as “beginners with a small backyard”.
- Add knowledge: attach documents or pages from your Knowledge Library so the article uses your facts. Only the parts relevant to your topic are used. See How to Use the Knowledge Library.
Research & links
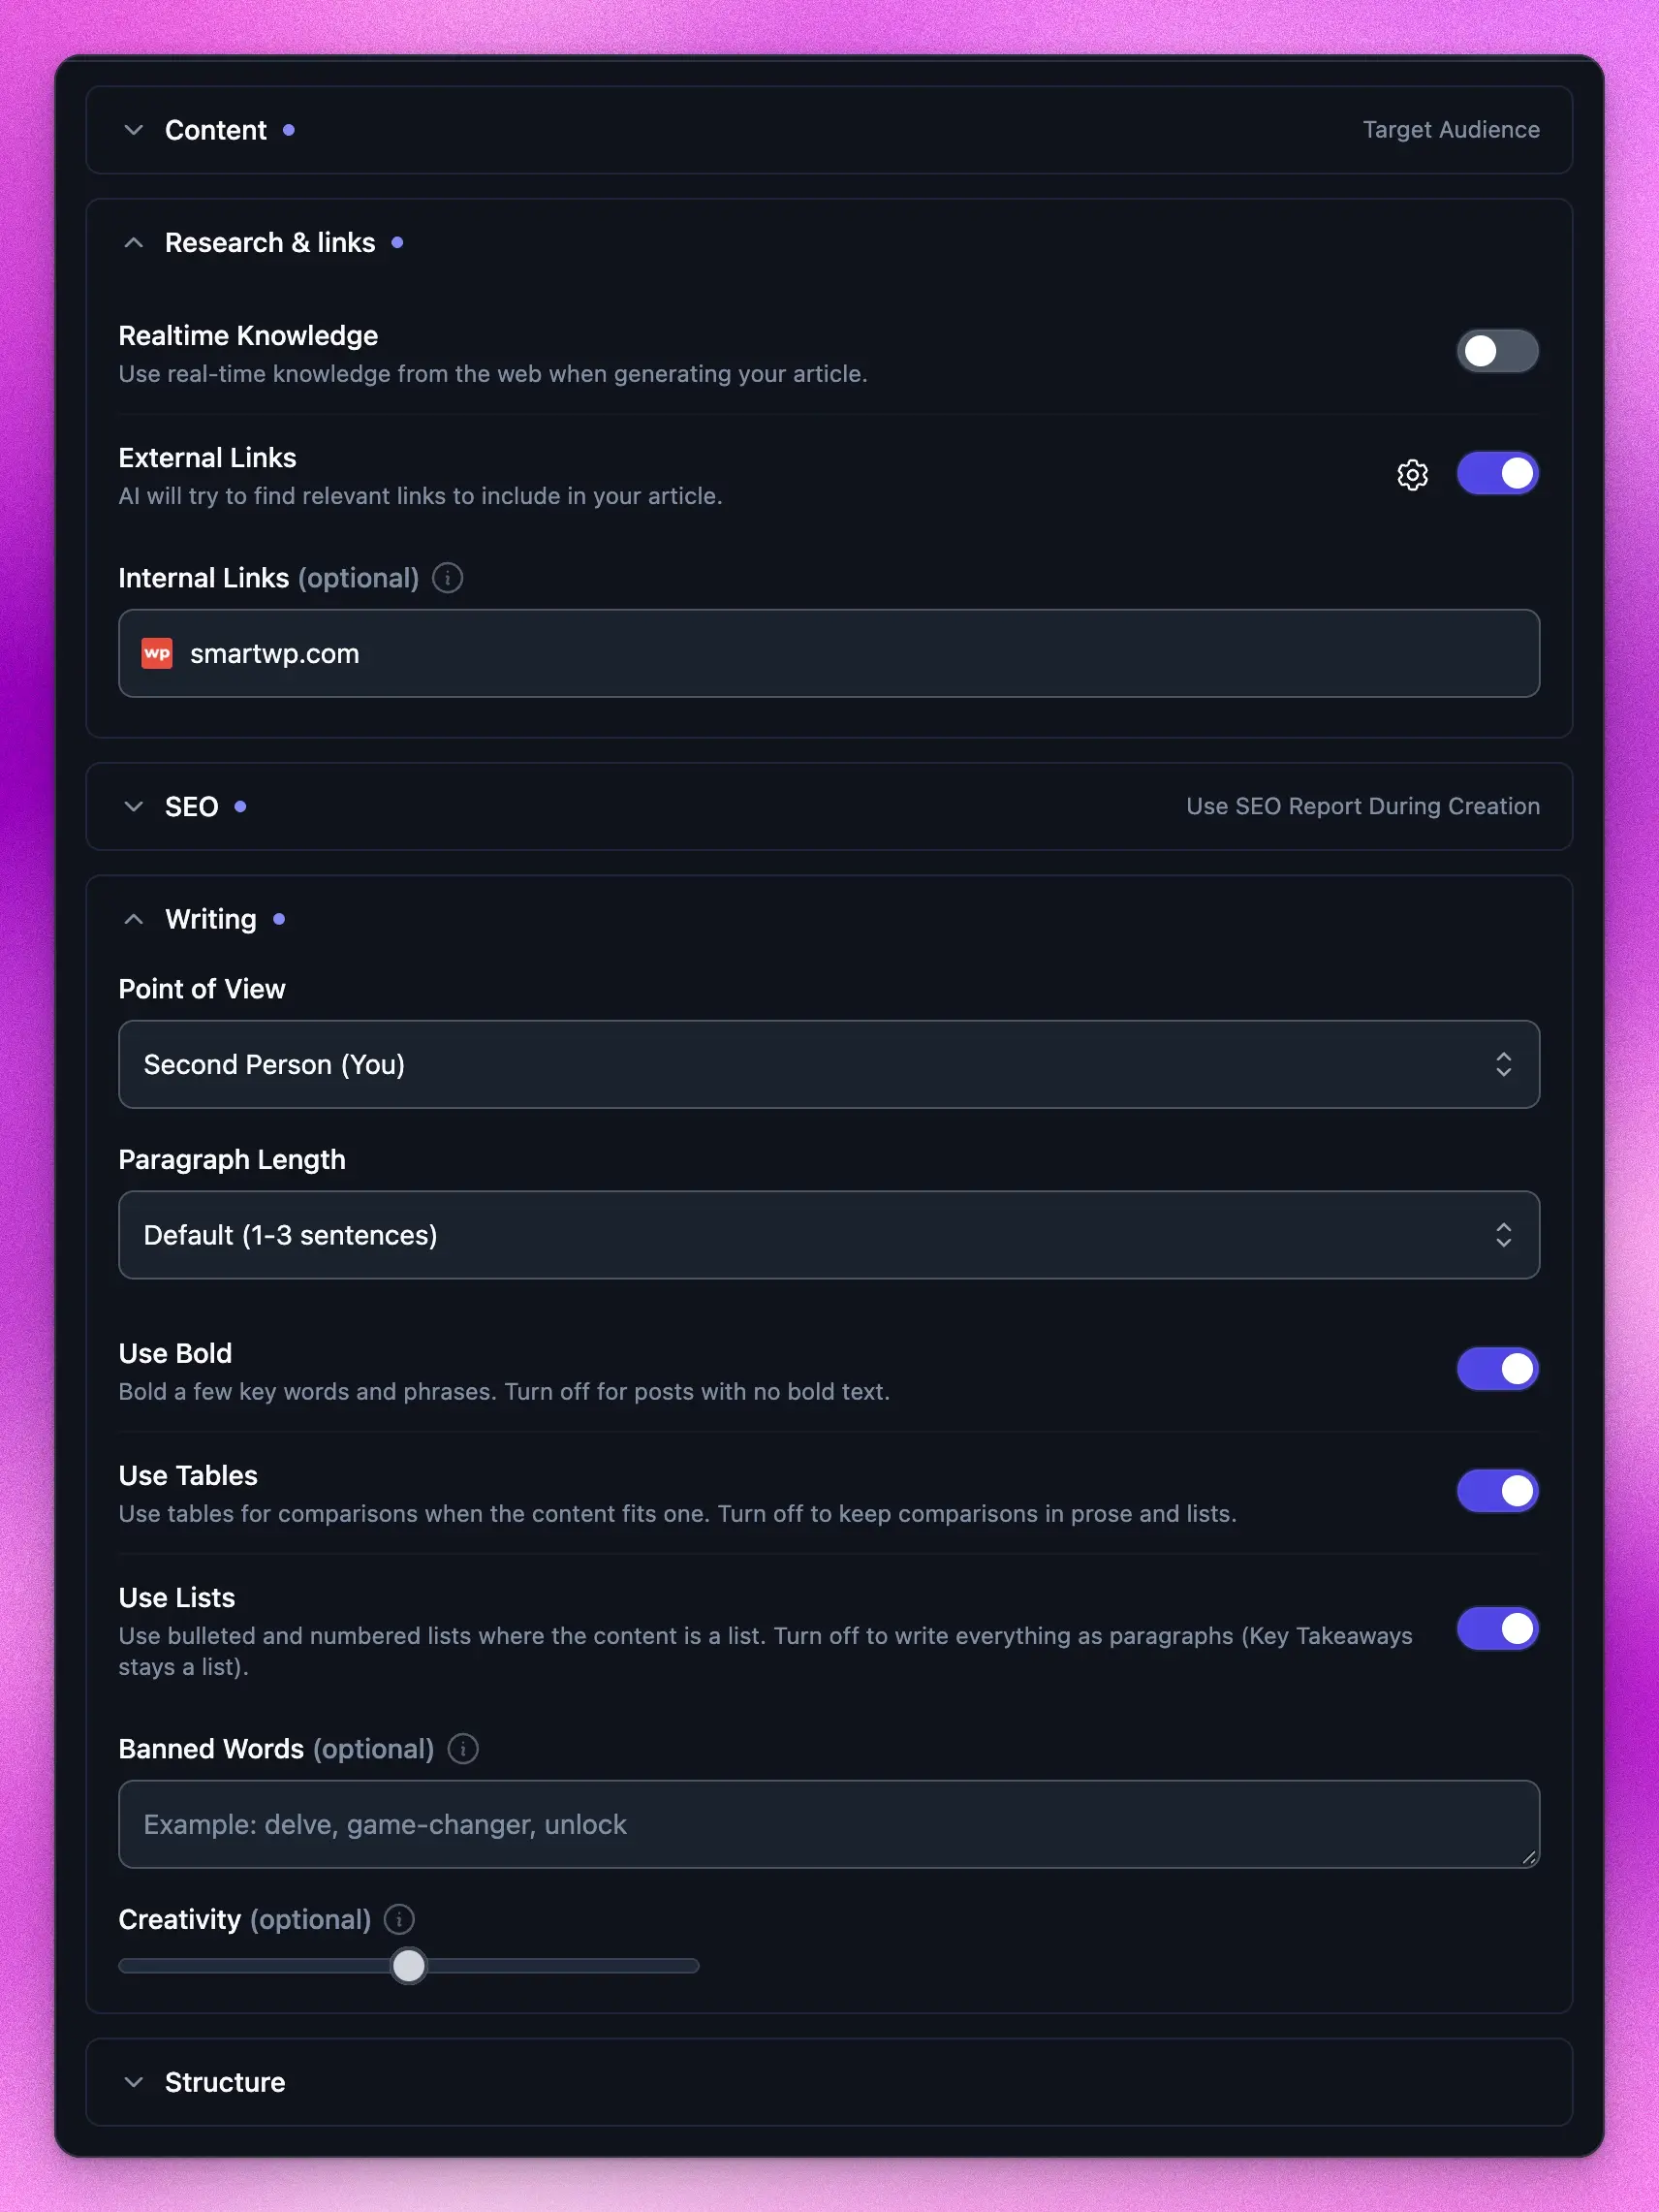
- Realtime Knowledge: researches the web while writing, for topics that need current information.
- External Links: links to relevant outside sources. The gear icon lets you pick a target country, exclude domains, prefer certain sites, limit how old sources can be, and set how far apart links are.
- Internal Links: enter your site’s address (for example, yoursite.com) to link to your own related posts. You can enter more than one domain, separated by commas.
SEO
- Primary Keyword: the search term the article should target, if it differs from your topic.
- Use SEO Report During Creation: runs an SEO report on the finished article and automatically optimizes it. This uses one SEO Report credit. See How to Use SEO Reports.
Writing
- Point of View: Automatic, first person (I), first person plural (We), second person (You), or third person (They).
- Paragraph Length: short, medium, or long paragraphs. The default is 1 to 3 sentences.
- Use Bold, Use Tables, and Use Lists: turn any of these off if you don’t want bold text, tables, or lists in the article.
- Banned Words: words and phrases the article must never use, separated by commas.
- Creativity: lower for more predictable writing, higher for more variety. The middle setting works best for most articles. See How to Use the Creativity Slider.
Structure
- Article Length: from Micro-form (about 500 words) to Ultra Long-form (about 4,500 to 5,500 words). Automatic writes more than 2,000 words.
- Use Exact Title: uses your topic as the title, word for word.
- Include Key Takeaways: adds a short summary right after the introduction.
- Include FAQs: adds a Frequently Asked Questions section near the end.
- Include Relevant Video: tries to find a related YouTube video to embed.
- Flat Outline (H2 Only): uses only H2 headings, with no H3 subheadings. Good for shorter posts.
- Blank Outline: starts you with an empty outline to fill in yourself instead of a generated one.
- Additional Instructions for Outline: guidance for the outline only, such as “include a section on raised beds”.
To use these settings for every article in a project, set them once in the project’s Content Defaults. Your automations use the same defaults.
Edit the Outline
With Edit Outline on, click Generate Outline. RightBlogger writes an outline of headings, and you can change it before the article is written:
- Drag a heading to move it, or drag it under another heading to make it a subheading.
- Click the pencil icon to rename a heading or give it its own instructions.
- Click the trash icon to remove a heading.
- Click Add Outline Item to add a new section.
Adding or removing sections changes the article’s total length. When the outline looks right, click Generate Article.
If you turn Edit Outline off, the button says Generate Article and RightBlogger writes the outline and article in one go.
What Happens When You Generate
The article writes itself on screen, section by section. You can hover over the button and click Stop to cancel and go back to your settings.
When it finishes, the article opens in the editor and is saved to your content library automatically. Under the article, a sources list shows the web pages and Knowledge Library documents the writer used, with pages from your own site grouped separately.
To try again with different settings, open the … menu and choose Edit & run again.
Edit and Improve Your Article
The bar at the top of the article shows its title, its status on your site (for example, live or a draft), its SEO score, and the main action, such as Publish. Below it are four views:
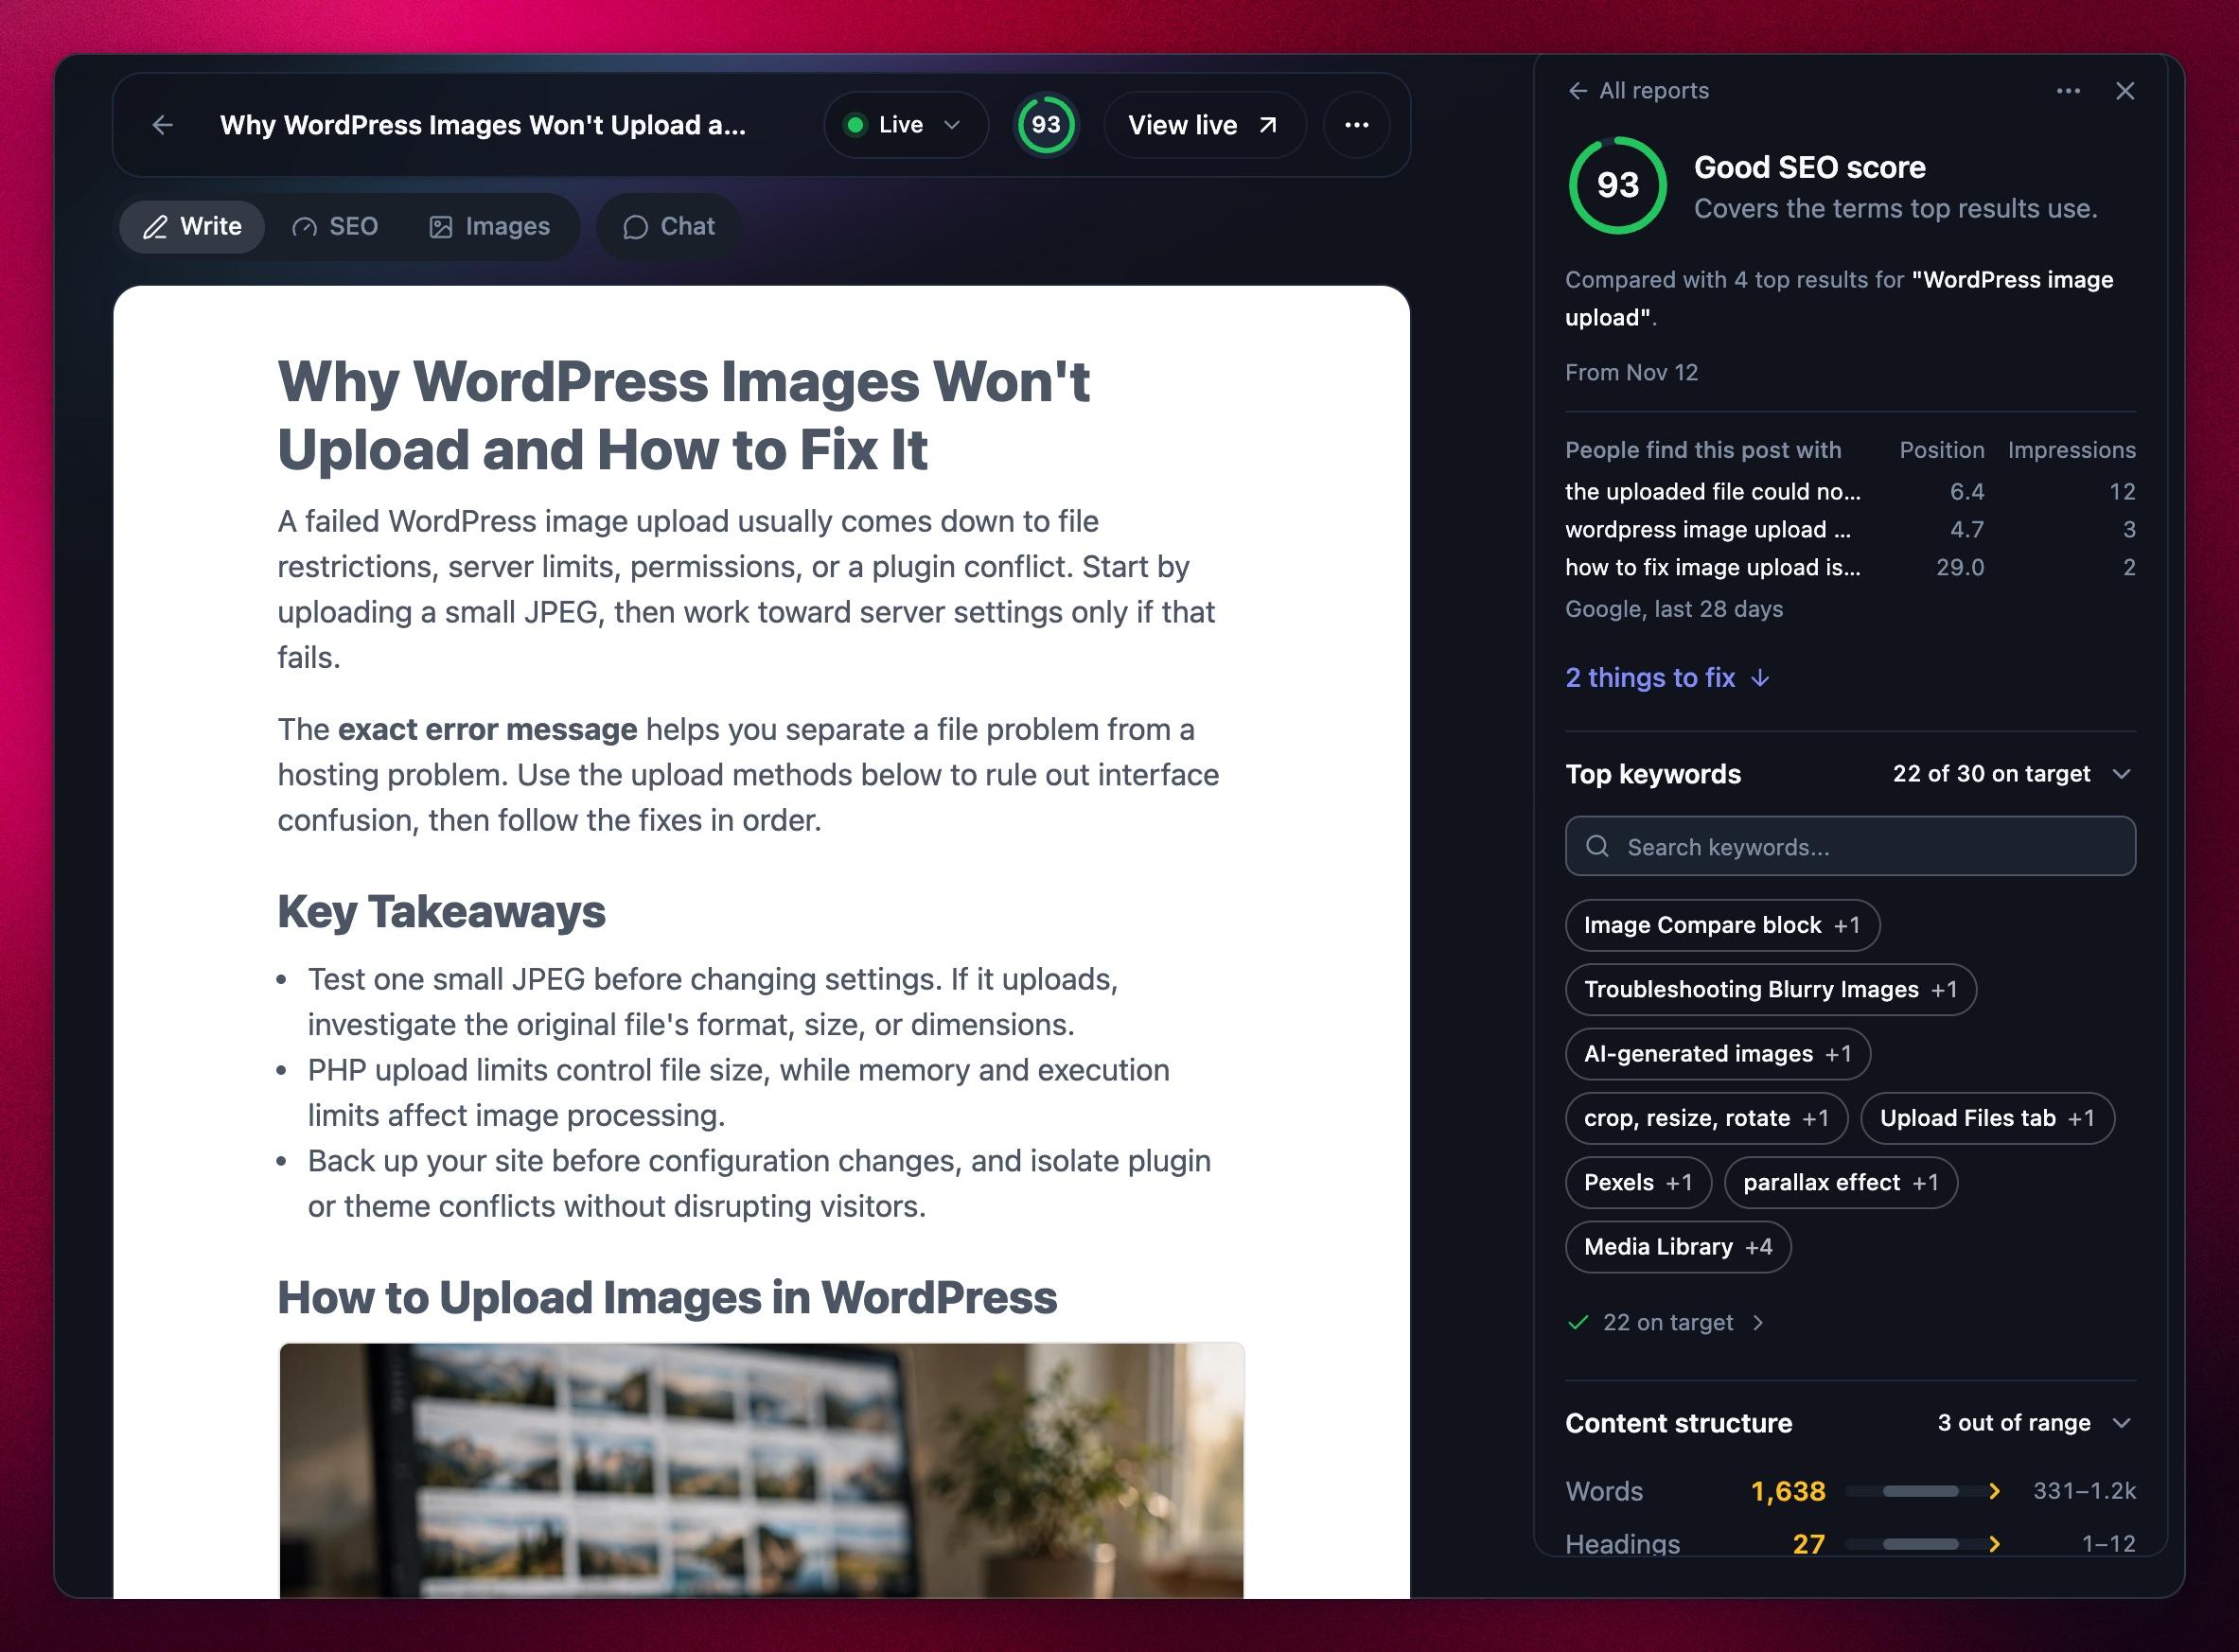
- Write: edit the article like a document. Use the outline on the left to jump between sections. Each image has Choose Image to swap it and Style image to frame it.
- SEO: the meta title, meta description, permalink, primary keyword, and featured image your site will use.
- Images: make a social sharing image from the title, set one as the featured image, or browse free stock photo sites.
- Chat: ask questions about the article or ask for changes. Chat suggests edits that you review and apply with one click. You can also select a passage and choose Ask AI to work on just that part.
Click the SEO score to open the article’s SEO report. It compares your article with the pages ranking for its keyword and lists what to fix, such as missing keywords or questions. Fix them yourself, or click Auto optimize to let RightBlogger make the changes. See How to Use SEO Reports for the full walkthrough.
Your edits save as you go. To go back to an earlier version, open the … menu and choose Version history.
Publish or Schedule Your Article
Connect your site first so RightBlogger can send posts to it. See CMS Integrations.
- Publish now: click Publish in the top bar and pick a destination. You can also open the … menu and choose Send to. Whether it arrives as a draft or goes live depends on your integration settings.
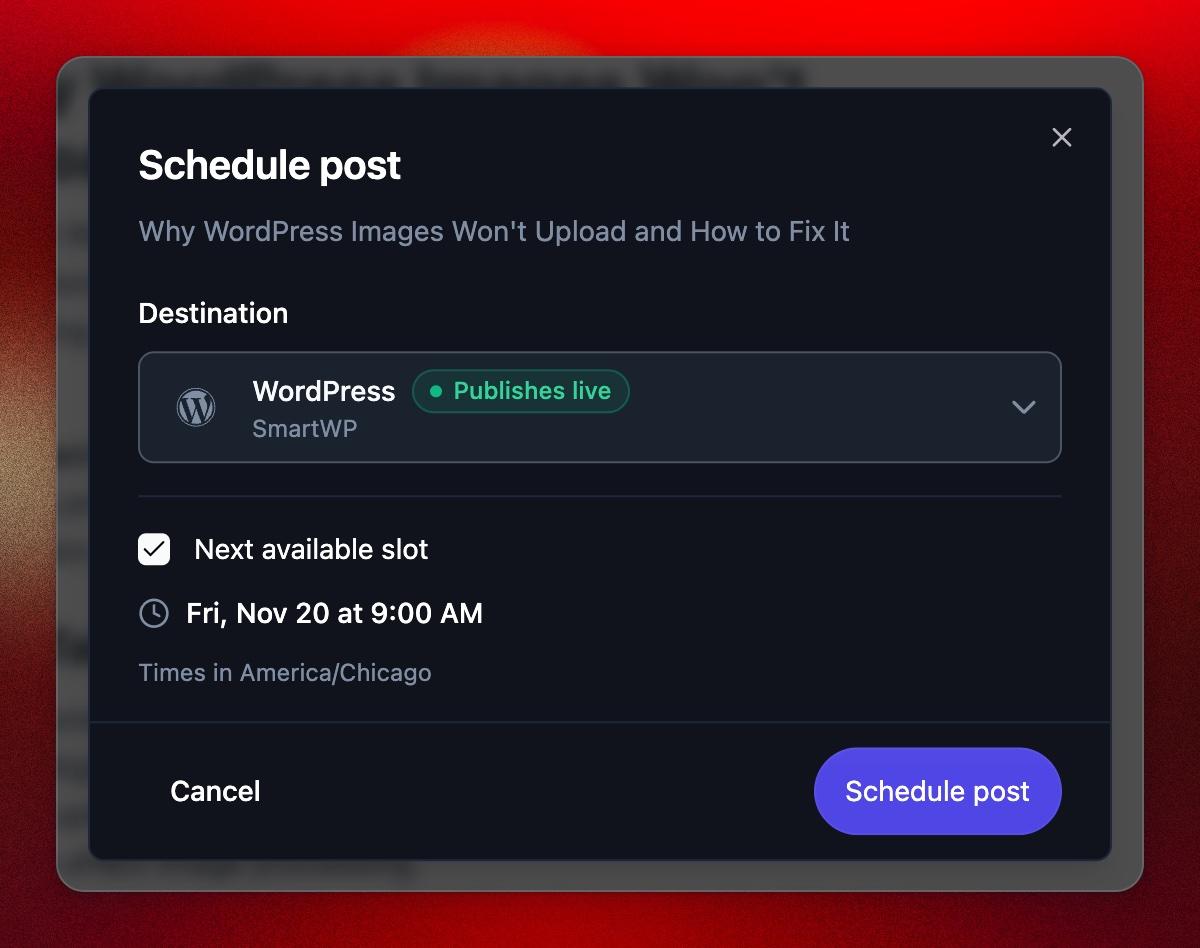
- Schedule it: open the … menu and choose Schedule to Content Planner. Pick a destination, then keep Next available slot checked or uncheck it to choose a date and time. Click Schedule post. See How to Schedule Posts.
After a post is sent, the top bar shows where it is live. If you edit the article later, the bar shows Unsent edits and offers to update the live post.
Tips for Better Articles
- Set up MyTone and your Knowledge Library once. Every article then sounds like you and uses your facts.
- Add call-to-action links to your project so articles point readers to your offers.
- Rate results with Like this result or Dislike this result in the … menu. See How to Teach the AI.
- Read and fact-check every article before you publish it, and add your own examples and experience.
- Want articles written on a schedule? Click Automate at the top of the Article Writer to set up an automation from the Content Planner.
Related Guides
Still need help?
Ask the AI assistant for an instant answer, or reach us directly and we will get back to you as soon as we can.
Automated SEO Blog Posts for Your Site
Research, write, publish, and share from one account.
7-day free trial. Cancel anytime.