How to Use CMS Integrations in RightBlogger
Connect your site at the project level to publish, draft, schedule, and auto-blog.
To get the most out of RightBlogger, you’ll want to connect your blog or website so you can publish content directly from your account. Once your CMS is connected, you can send posts from the AI Article Writer, schedule content with the content planner, and turn on auto blogging for fully automated publishing.
This guide walks you through how CMS connections work in RightBlogger and links out to step-by-step instructions for each supported platform.
Why Connect Your CMS to RightBlogger
When your CMS is connected, you can:
- Publish posts directly from RightBlogger to your site
- Save articles as drafts for review before they go live
- Use the content planner and auto blogging to schedule posts in advance
- Turn YouTube videos into blog posts and send them straight to your CMS
- Keep all your content creation and publishing inside one workflow
If you’re planning to use auto blogging or calendar-based scheduling, connecting your CMS is the first step.
Where to Manage Your CMS Connections
All CMS connections are managed at the Project level inside RightBlogger.
Each project can have its own set of integrations, making it easy to run multiple sites from a single account.
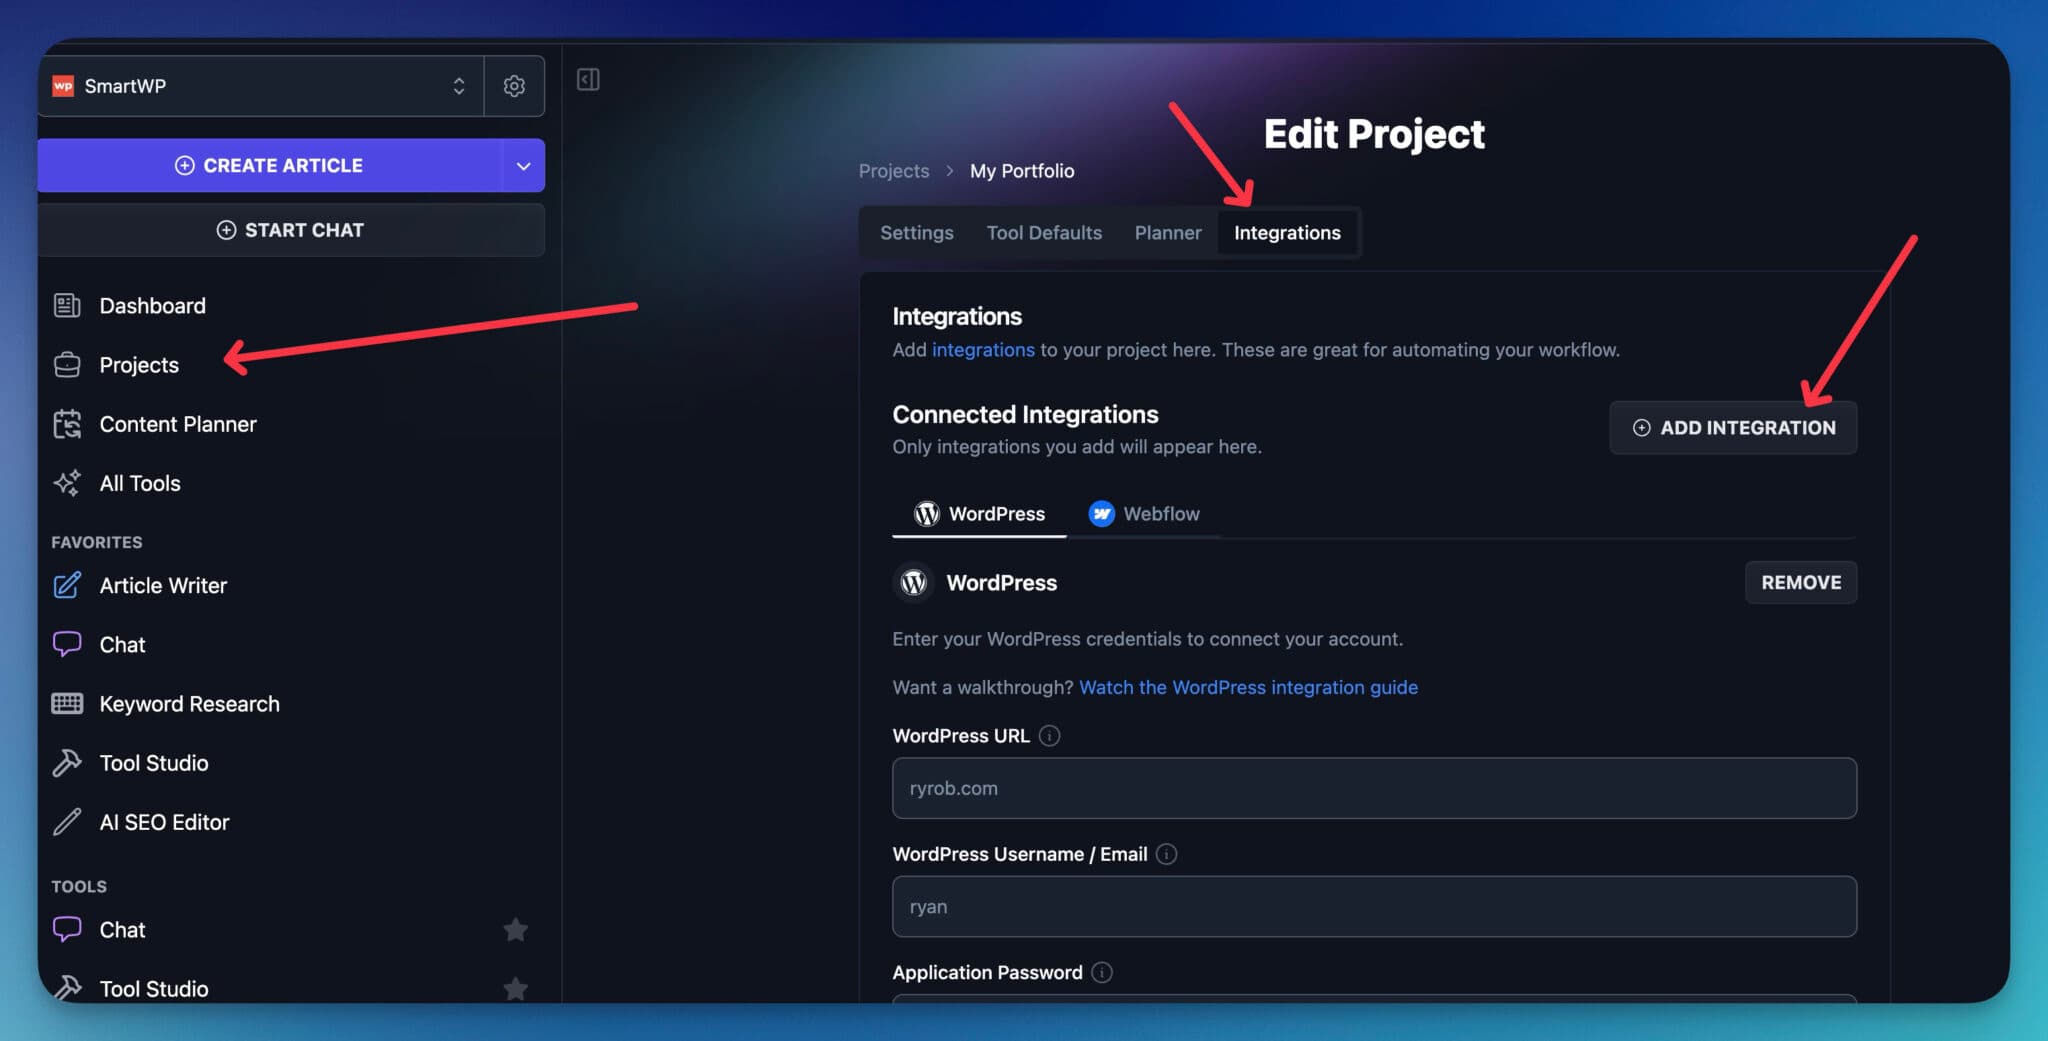
- Open your Project
In your top navigation, select the project that matches the site you want to connect. - Go to Integrations
Inside your project, look for the Integrations section. This is where you’ll see all available CMS options and any connections you’ve already added.
From here, you’ll be able to add, edit, or remove connections for your site.
Supported CMS Platforms
RightBlogger integrates with several popular platforms, plus a flexible webhooks option for custom setups (developers will love this).
Choose your CMS below to follow the detailed setup instructions:
- WordPress
Perfect for most bloggers and content creators running WordPress sites. Includes automatic IndexNow pings for faster search engine indexing.
Follow the full guide: WordPress Integration Guide
Learn more: RightBlogger + WordPress - Webflow
Great for designers and creators using Webflow’s visual builder.
Follow the full guide: Webflow Integration Guide
Learn more: RightBlogger + Webflow - Shopify
One of the most popular eCommerce platforms.
Learn more: RightBlogger + Shopify - Wix
Ideal for users who want a simple Wix-powered website with AI-driven content.
Follow the full guide: Wix Integration Guide
Learn more: RightBlogger + Wix - Duda
Built for agencies and site builders serving multiple client sites.
Follow the full guide: Duda Integration Guide
Learn more: RightBlogger + Duda - Ghost
For users who use Ghost as their blogging platform.
Follow the full guide: Ghost Integration Guide
Learn more: RightBlogger + Ghost - BlogMaker.app
If you use BlogMaker you can easily connect with API key.
Learn more: RightBlogger + BlogMaker - Custom Sites and Other Platforms (via Webhooks)
If you’re using another CMS that isn’t directly listed, you can still send content from RightBlogger using webhooks or a custom integration.
Follow the full guide: Webhooks in RightBlogger
Learn more: RightBlogger Webhooks
If you don’t see your exact platform listed, reach out to our help section and we’re always open to supporting more CMS.
How to Connect Your CMS
While each platform has its own specific instructions (and screenshots) in the guides above, the general flow is similar:
- Choose the Correct Project
Make sure you’ve selected the project that matches the site you’re connecting. - Open the Integrations Page
Go to Integrations from your project settings or sidebar. - Select Your CMS
Click on WordPress, Shopify, Ghost, Webflow, Wix, Duda, or Webhooks, depending on your setup. - Authorize or Add Your Credentials
- For hosted platforms, you’ll typically authorize RightBlogger and confirm access.
- For webhooks or custom sites, you’ll paste in the endpoint URL and any required keys or secrets.
- Note that the settings for each CMS are different so we recommend using one of the detailed guides above.
- Save and Test
Save your integration and, if recommended in the platform-specific guide, send a test post or draft to make sure everything is connected correctly.
Using Your CMS Connection in RightBlogger
Once your CMS is connected for a project, you’ll be able to:
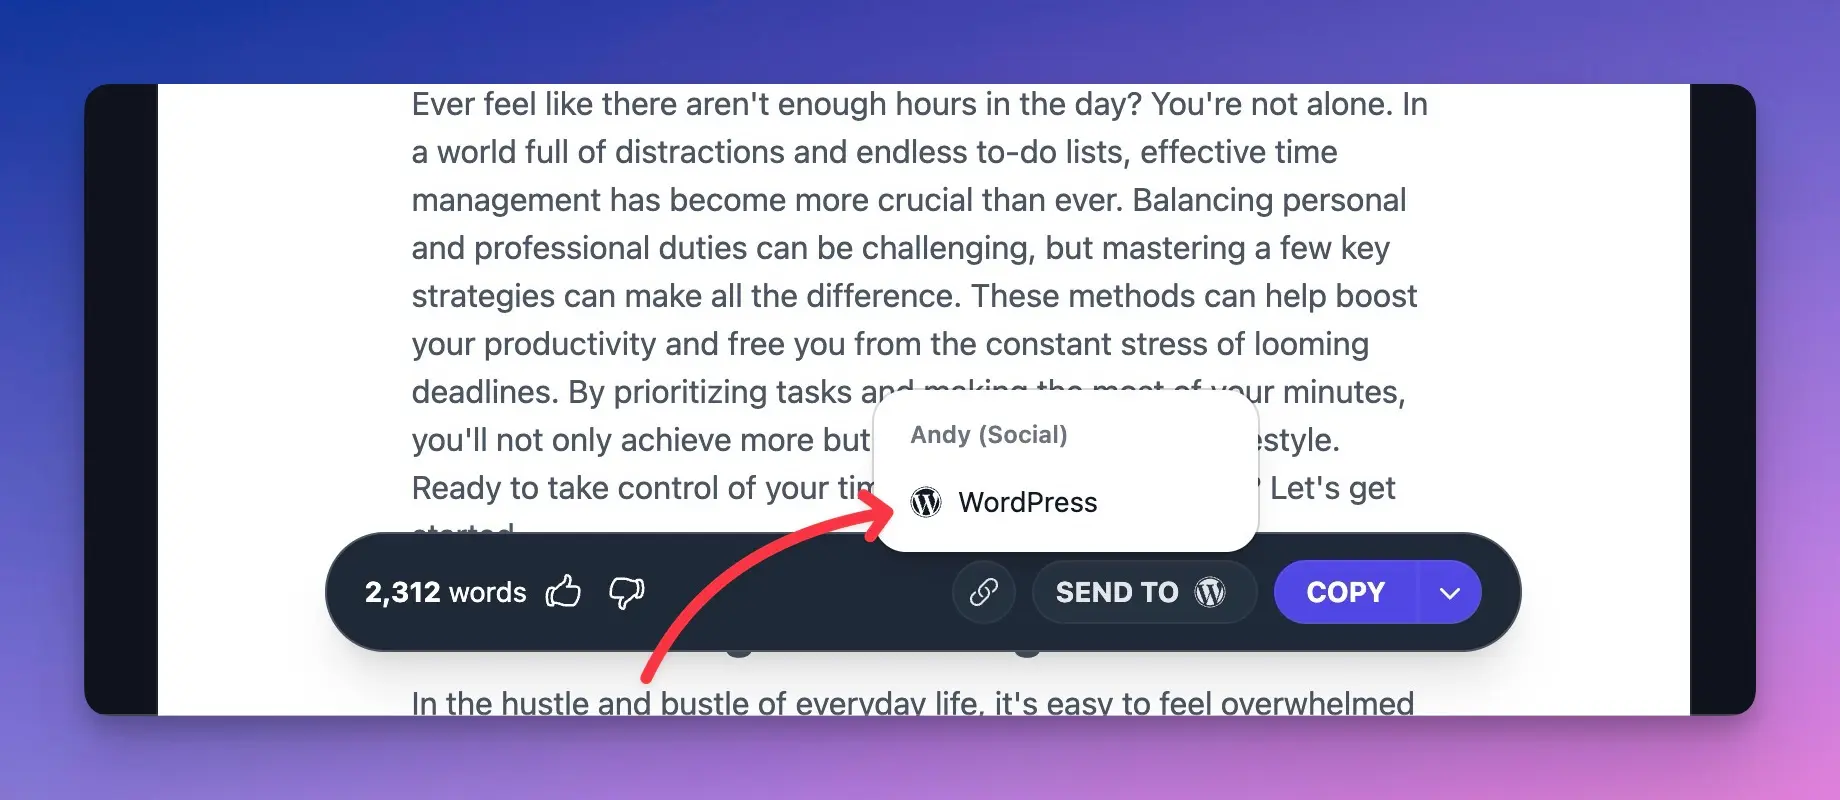
- Select your integration when generating content in tools like the Article Writer or YouTube to Blog tools.
- Choose “Publish” or “Save as draft” when sending articles to your site.
- Use the content planner and auto blogging to schedule posts on a daily, weekly, or monthly basis.
- Create automations that take care of publishing for you (see: How to Create My First Automation).
Your connected CMS acts as the destination for everything you create and schedule inside that project.
Troubleshooting and Next Steps
If you’ve followed the integration guide for your CMS and something isn’t working as expected:
- Check the platform-specific help article again for common issues.
- For WordPress, review: WordPress Errors & Fixes
- Make sure you’re using the correct project and integration when publishing.
- Confirm that your CMS credentials, URLs, and permissions are still valid.
If you’re still stuck, you can always reach out to support from inside your RightBlogger account.
Connecting your CMS is the foundation of publishing with RightBlogger. Once your site is linked, you’re ready to turn on auto blogging, build a content calendar, and let AI help you stay consistent with your publishing schedule.
New:Site Agent
Automated SEO Blog Posts That Work
Try RightBlogger for free, we know you'll love it.
- Automated Content
- Blog Posts in One Click
- Unlimited Usage


