How to Use CTA Links in RightBlogger
Set up to five contextual links, with AI matching each to relevant content.
CTA Links let you define call-to-action links that are automatically included in AI-generated articles. Instead of pasting HTML into your instructions every time, you set up your CTAs once and the AI weaves them naturally into your content as inline links.
This guide covers how to set up CTA Links, what each setting does, and tips for getting the best results.
Adding a CTA Link
To get started, go to your Project and open the Content tab. You’ll see a card labeled “Call-to-Action Links” with an option to add your first CTA.
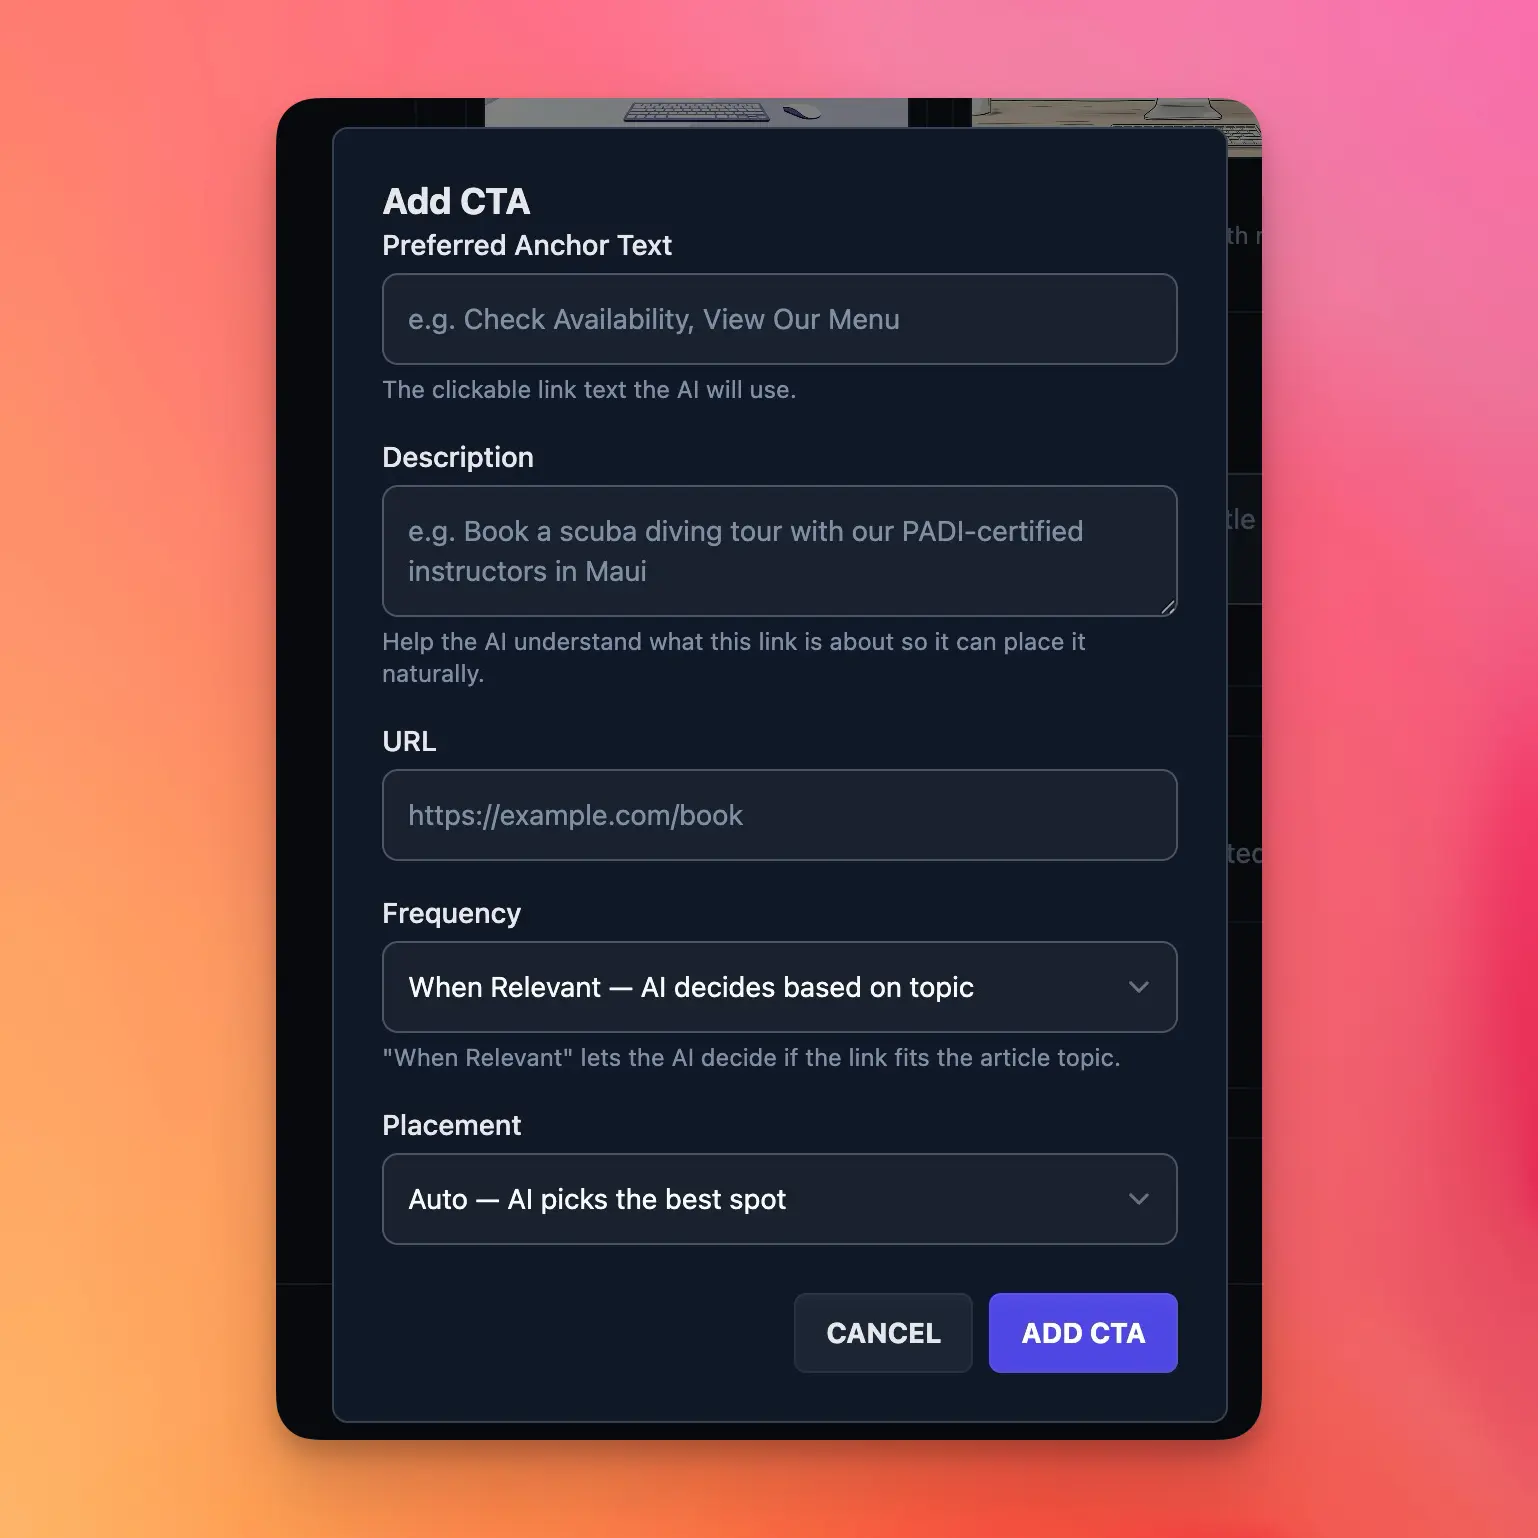
Click Add Your First CTA and fill in the following fields:
- Preferred Anchor Text: The clickable link text that appears in your article. Keep it short and descriptive, like “Check Availability” or “Try RightBlogger Free.” The AI may adjust the surrounding sentence slightly to make the link flow naturally, but it will use your preferred anchor text as closely as possible.
- Description: This is the most important field for good placement. It tells the AI what your link is about so it can decide where in the article it fits best. Be specific. Instead of “my product page,” write something like “Book a scuba diving tour with our PADI-certified instructors” or “Sign up for our free blog writing toolkit.” The better your description, the more naturally the AI places your link.
- URL: The destination URL where readers go when they click the link.
Frequency and Placement
Each CTA has two additional settings that control how and where it appears.
Frequency
Frequency controls how often the CTA gets included in your generated articles:
- Always: Included in every article, regardless of topic.
- When Relevant (default): The AI decides whether the CTA fits based on the article’s topic. This is the best option for most use cases since it keeps your links contextual.
- Only When Instructed: Only included if you specifically mention it in the additional instructions for that article. Good for CTAs you want available but rarely used.
Placement
Placement tells the AI where in the article to put the link:
- Auto (default): The AI picks the best spot based on the article’s flow and the CTA’s description. This usually produces the most natural results.
- Introduction: The link gets placed in the intro section.
- Conclusion: The link gets placed in the conclusion or closing section.
Managing Your CTAs
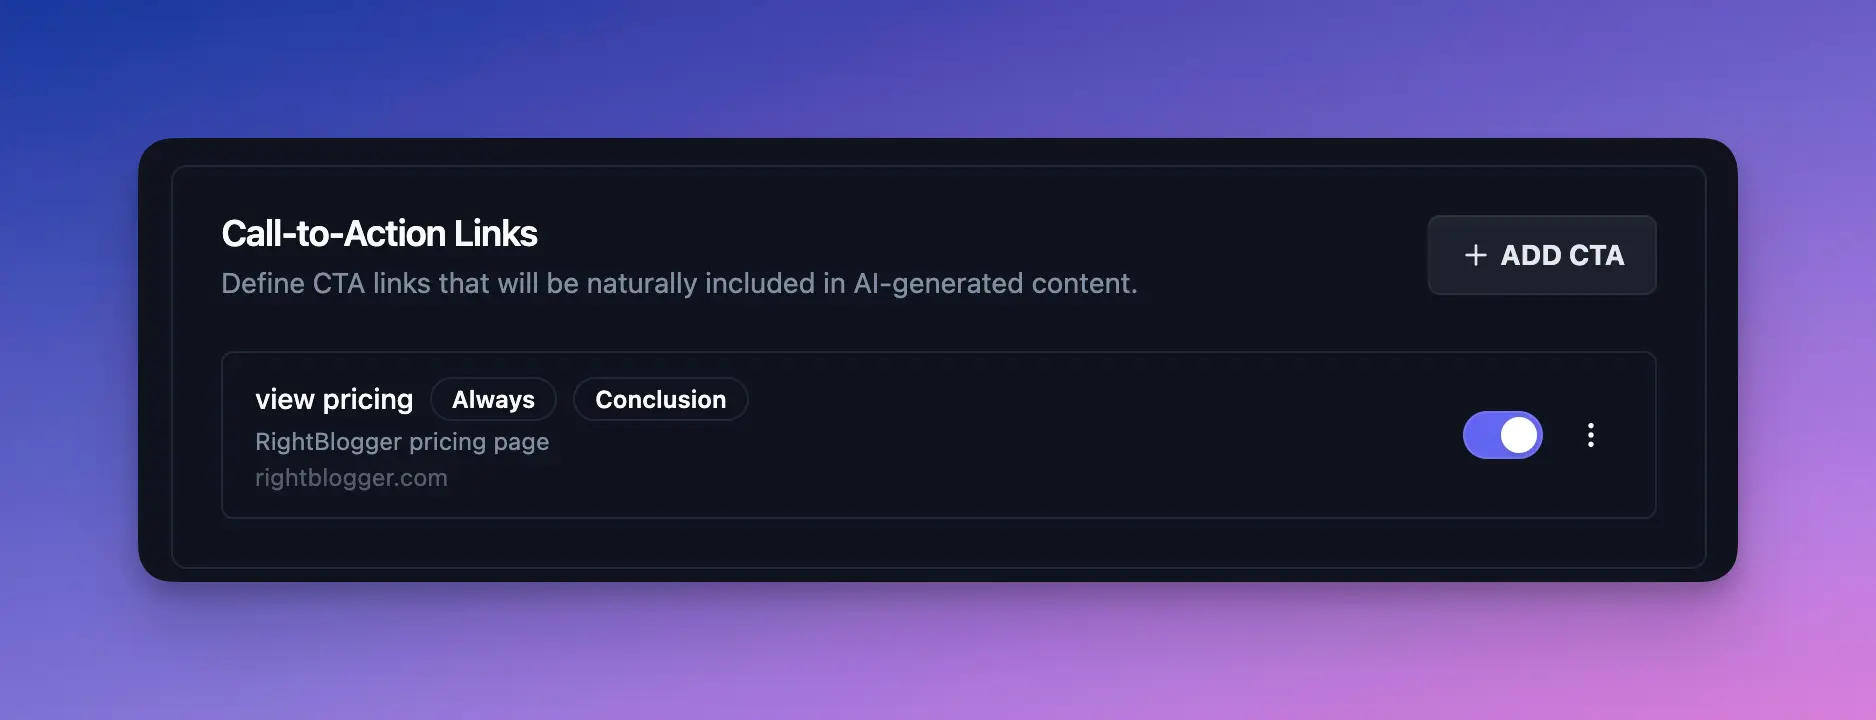
You can have up to 5 CTAs per project. Each CTA has an active/inactive toggle that lets you quickly disable it without deleting it. This is handy for seasonal promotions or links you want to pause temporarily.
How CTAs Appear in Articles
When you generate an article (through the Content Planner or any of RightBlogger’s article writing tools), the AI receives your CTA details behind the scenes. It checks each CTA’s frequency setting, uses the description to understand what the link is about, and places qualifying CTAs as natural inline links within relevant paragraphs.
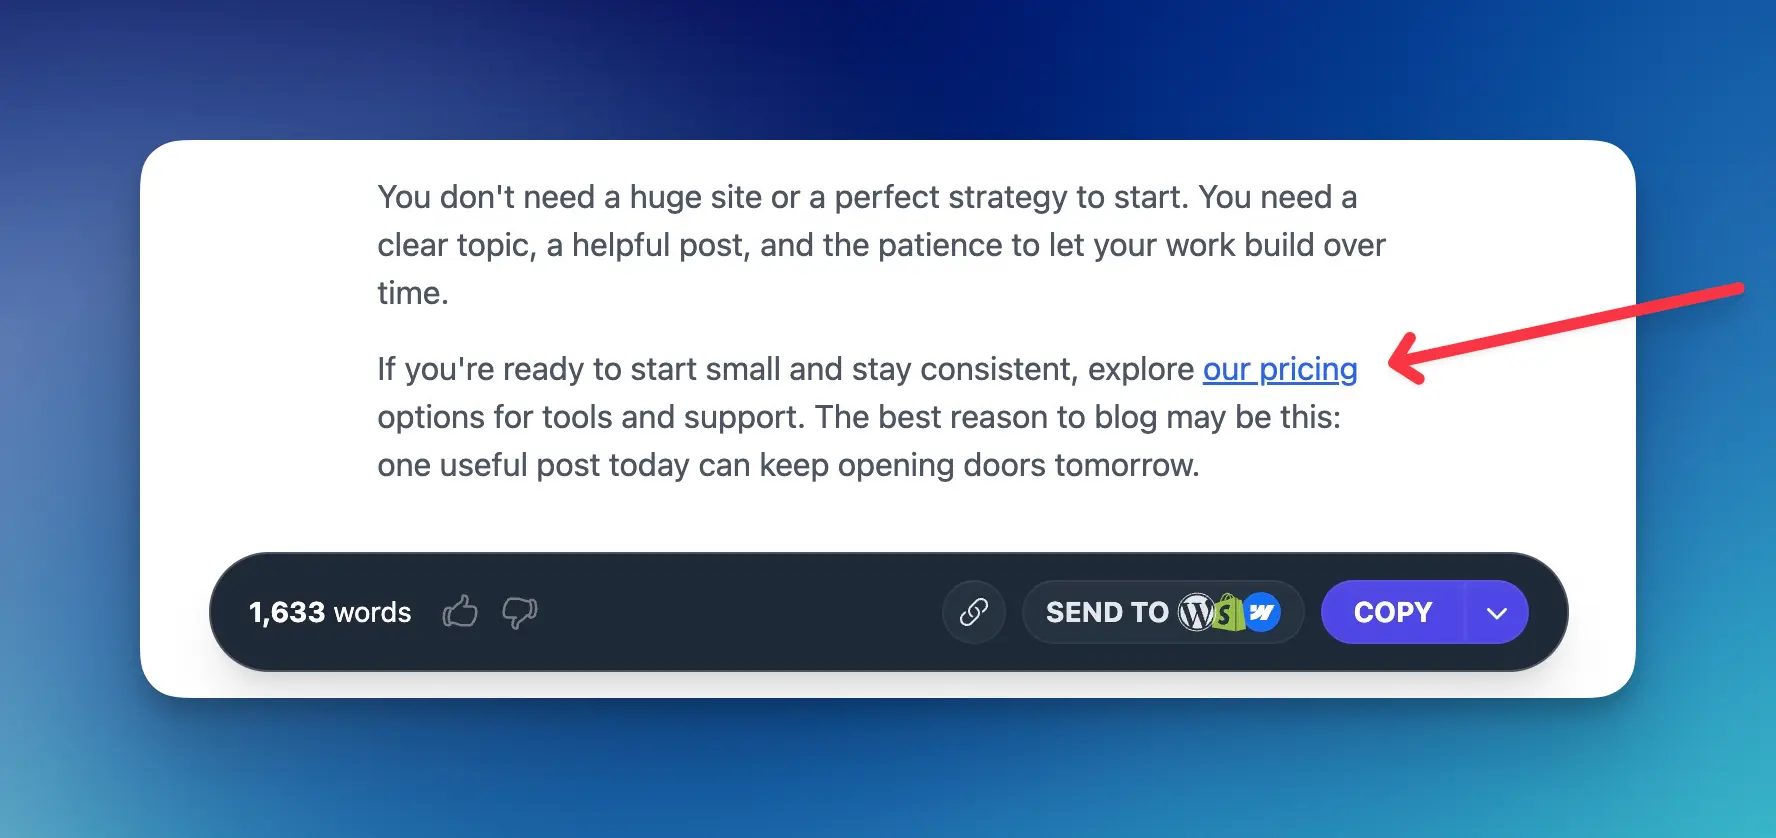
The result is a link that reads like it was written into the article from the start. No buttons or banners, just a contextual link woven into the content where it makes sense for the reader.
Tips for Better Results
- Write detailed descriptions. “Our product” is vague. “Free AI-powered keyword research tool for bloggers” gives the AI much more to work with when deciding placement.
- Use “When Relevant” for most CTAs. Forcing a CTA into every article can feel unnatural if the topic doesn’t relate. Let the AI make the call.
- Keep anchor text concise. Two to four words is the sweet spot. “Start your free trial” reads better than “Click here to start your free trial of our blogging platform today.”
- Start with 1 or 2 CTAs. See how the AI handles them before filling all 5 slots. You can always add more once you’re happy with the results.
- Use the active toggle for promotions. Running a limited-time offer? Create the CTA, toggle it on, then toggle it off when it ends. No need to delete and recreate it.
- Pair CTAs with automations. If you’re publishing content on autopilot, CTA Links ensure every generated article includes your key links without any extra setup per post.
Automated SEO Blog Posts That Work
Try RightBlogger for free, we know you'll love it.


