How to Schedule Posts in RightBlogger
Use the planner, Send To, or Auto Blogging to fill the next slot.
RightBlogger helps you plan your content ahead of time. You can build a steady posting schedule, keep several sites organized, or use auto blogging to save time. With our scheduling tools, you can send content straight to your Content Planner, pick the exact day a post goes live, or let RightBlogger choose the next open spot for you.
This guide will show you every way to schedule posts inside RightBlogger.
Why Scheduling Matters
Scheduling lets you control when your content goes live, giving you more consistency and better results across your blog or business. With a steady publishing rhythm, you’ll see improvements in:
- SEO performance
- Traffic from Google and AI platforms
- Content organization across multiple projects
- Your ability to plan content weeks or months ahead
Whether you’re manually scheduling content or using Auto Blogging, your planner handles everything for you.
Scheduling from the Content Planner

The Content Planner is your central hub for controlling when posts get published.
Inside your planner, you can:
- Automatically populate posts through automations
- Add new posts directly to the calendar
- Click any scheduled post to edit, optimize, or update its publish time
Adding a New Post From the Planner

To manually add content to your schedule:
- Open the Content Planner from the left sidebar.
- Click New Post in the top-right corner.
- Choose one of two options:
- Select from your existing content library, or
- Generate a brand new article with AI
- Choose the integration (WordPress, Wix, Webflow, Duda, etc.) you want to publish to.
- Select:
- Next available slot, or
- Custom date & time
- Click Schedule.
Your post will now appear on the calendar.
Scheduling Using the “Send To” Button
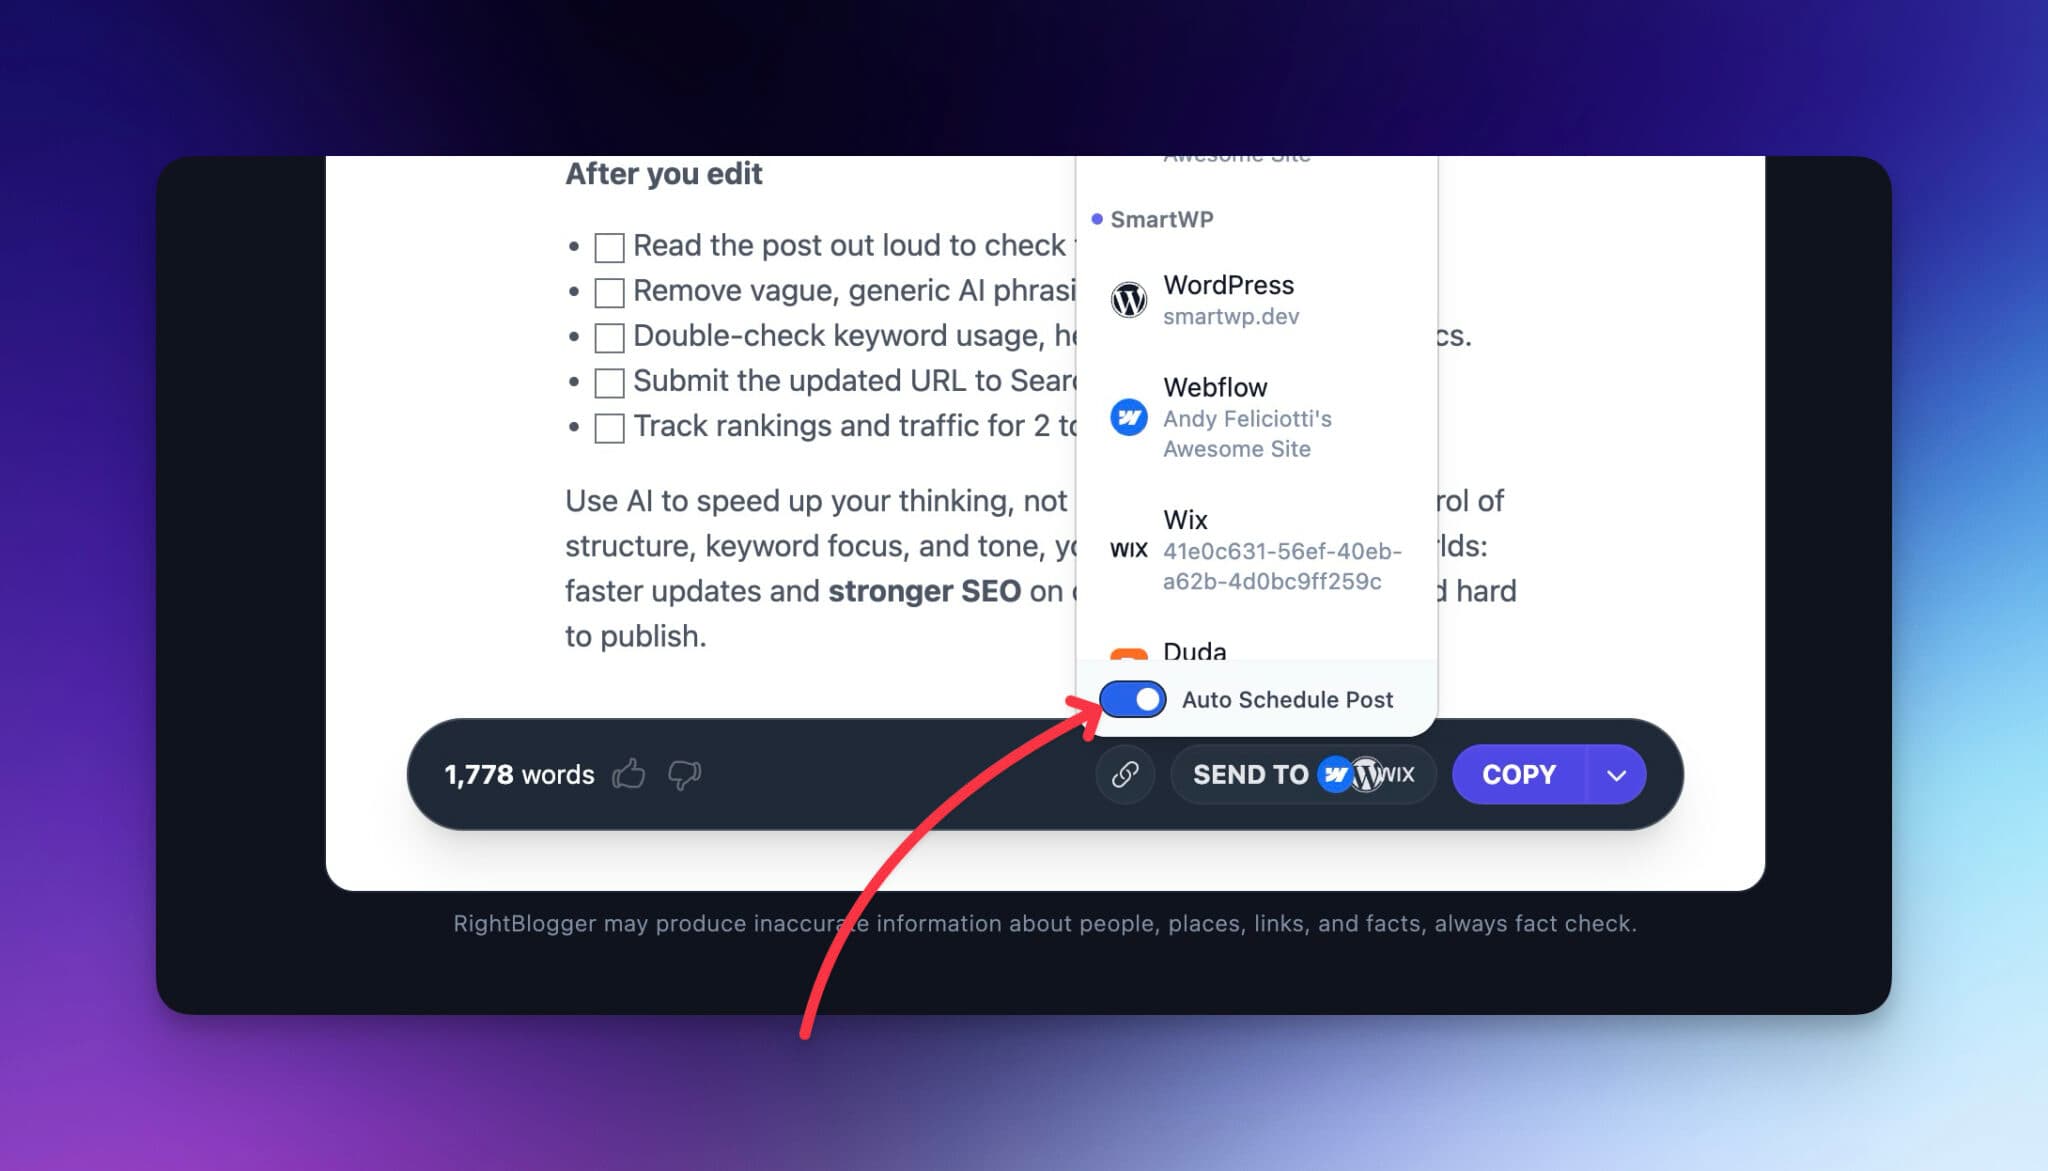
You can also schedule content from almost anywhere inside RightBlogger, including generated articles, rewritten content, YouTube to Blogs, and more.
At the bottom of most tools, you’ll see a Send To button.
Here’s how to use it:
- Click Send To.
- Choose your connected CMS in the dropdown.
- Toggle Auto Schedule Post on.
- When enabled, your post will be sent to the planner instead of being published immediately.
What Auto Schedule Does
When the Auto Schedule Post switch is turned on:
- Your content is sent directly to the next available slot in your Content Planner.
- This works even if you’re not inside the planner.
- It gives you the same scheduling control but from any tool.
This is perfect for creators who want to generate content in bulk and schedule everything without jumping between screens.
Rescheduling a Post
To change when a post publishes:
- Open your Content Planner.
- Click the post you want to adjust.
- Edit the date, time, integration, or content.
Easy.
Using Scheduling with Auto Blogging
If you’re using Auto Blogging, RightBlogger will automatically generate content and add it to your planner based on the frequency you choose:
- Daily
- Weekly
- Monthly
Your scheduled content will appear on your calendar with an icon showing which automation it belongs to.
You can still edit, move, or optimize these posts at any time. For a full walkthrough on setting up automated publishing, see our guide on how to automate blog posts.
All scheduled times are based on your account’s timezone setting. If posts are publishing at unexpected times, double-check your timezone in your project settings.
Best Practices for Scheduling
To get the most out of your planner:
- Review posts before they go live (especially AI-generated content)
- Use SEO Reports + Auto-Optimize for better rankings
- Maintain a consistent publishing rhythm
- Keep each project organized with its own content schedule
- Use Auto Schedule when generating content across multiple tools
Conclusion
Scheduling posts in RightBlogger gives you full control over your publishing calendar, whether you’re posting manually, creating content in bulk, or using Auto Blogging to automate everything. With tools like the Content Planner, “Send To,” and Auto Schedule, you can keep your blog active, optimized, and organized with just a few clicks.
Start scheduling your content today and stay consistent without the stress.
New:Site Agent
Automated SEO Blog Posts That Work
Try RightBlogger for free, we know you'll love it.
- Automated Content
- Blog Posts in One Click
- Unlimited Usage


