Find & Fix Redirect Chains on Large Blogs: SEO Guide
Combine crawler, sitemap, and server-log data to map every hop, then route valuable URLs directly to relevant destinations.


Redirect chains are a common hurdle on large blogs, where a single clean URL request can turn into a slow, multi-step trip through several outdated pages. These issues often accumulate during complex website migrations or years of redesigns, category changes, and deleted content. From a technical SEO perspective, these extra hops can negatively impact performance and crawl efficiency.
The fix is not to replace redirects at random. Instead, you need to map the full path, decide which URL should be the final destination, and update every important internal reference to point there directly. Here is how to identify these chains at scale and clean them up without breaking your valuable traffic.
Key Takeaways for Fixing Redirect Chains
- Redirect chains occur when one URL redirects to another, which then redirects again, potentially harming your site performance.
- Crawl your site with both internal links and XML sitemap URLs, as either source can reveal different technical issues.
- Replace multi-step paths with one direct 301 redirect whenever the destination is permanent, as these direct paths help preserve your site link equity.
- Update internal links, canonical tags, XML sitemaps, and structured data after changing redirect targets.
- Large blogs need a repeatable process to manage redirect chains, rather than relying on a one-time cleanup after every migration.
What Redirect Chains Are and Why They Matter
A redirect chain occurs when there are at least two redirects before a user or crawler reaches the final destination page.
For example:
/best-seo-tools -> /seo-tools -> /marketing-tools -> /tools/seo/The initial URL does not point straight to the live page. Instead, each server response instructs the browser or search engine crawlers to request yet another URL.
A redirect loop is a separate issue that never actually reaches a final page:
/guide -> /resources -> /guideIn the case of redirect loops, the browser eventually gives up and displays an error message. Unlike redirect loops, a chain eventually hits a destination, but it requires extra requests to get there. Because redirect loops prevent content from being indexed entirely, they should be prioritized over standard chains.
A redirect hop can use several HTTP status codes. Permanent moves usually involve 301 or 308 responses, while temporary changes often use 302 or 307 responses. While the status code is important, the length and path of the chain are what matter most when diagnosing performance issues.
Google’s documentation on permanent redirects in Search explains how redirects help consolidate signals between old and new URLs. This consolidation works most effectively when the destination is clear and direct.
Why do these chains appear so often on large blogs? Every content change creates another opportunity for one to form. A blog might first move a post from /blog/post-name to /guides/post-name, then change the slug, and finally move it into a new topic folder. Each update can add an additional rule instead of replacing the original one.
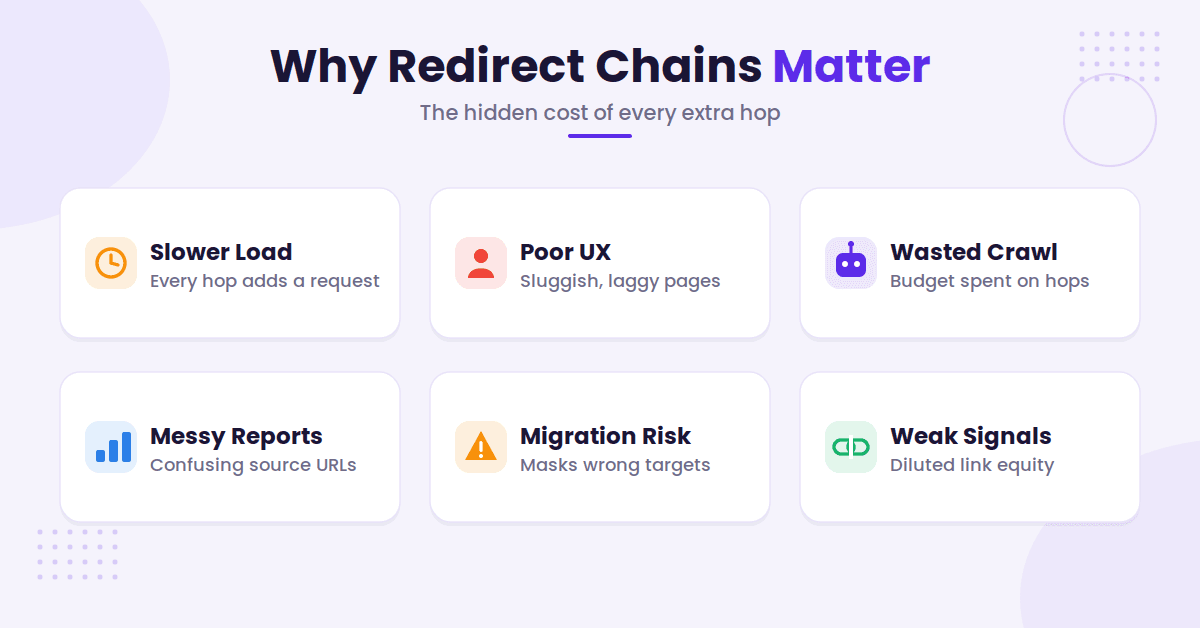
Redirect chains create several significant problems:
- Slower page load time: Every hop adds a new request, which delays the initial content delivery to the user and harms overall page load time.
- Degraded user experience: Because each hop adds latency, visitors may experience a sluggish site, which negatively impacts the overall user experience.
- Wasted crawl budget: Search engine crawlers have a finite amount of time to spend on your site. When these bots are forced to follow long chains of redirects, you waste your crawl budget on low-value requests rather than discovering your actual content.
- Poorer reporting: Analytics and crawl tools often show confusing source and destination URLs when data is filtered through multiple redirects.
- Migration risk: A chain can mask an incorrect final destination or a forgotten legacy redirect rule.
- Weaker internal signals: Internal links that point to redirected URLs are not as efficient as direct links, diluting the authority passed to your final pages.
A single chain on a low-traffic URL may not matter much. However, thousands of chains across a large site create a maintenance burden that negatively impacts your site performance and technical health.
How to Find Redirect Chains on a Large Blog
You won’t find every issue in one report. Use several sources because each one shows a different part of the site. Identifying redirect chains requires a multi-layered approach to ensure you capture every problematic hop.
Start with a crawler that can follow redirects. Tools such as Screaming Frog SEO Spider, Sitebulb, and similar enterprise crawlers can request URLs, record each response, and show the full path from the initial URL to the final destination.
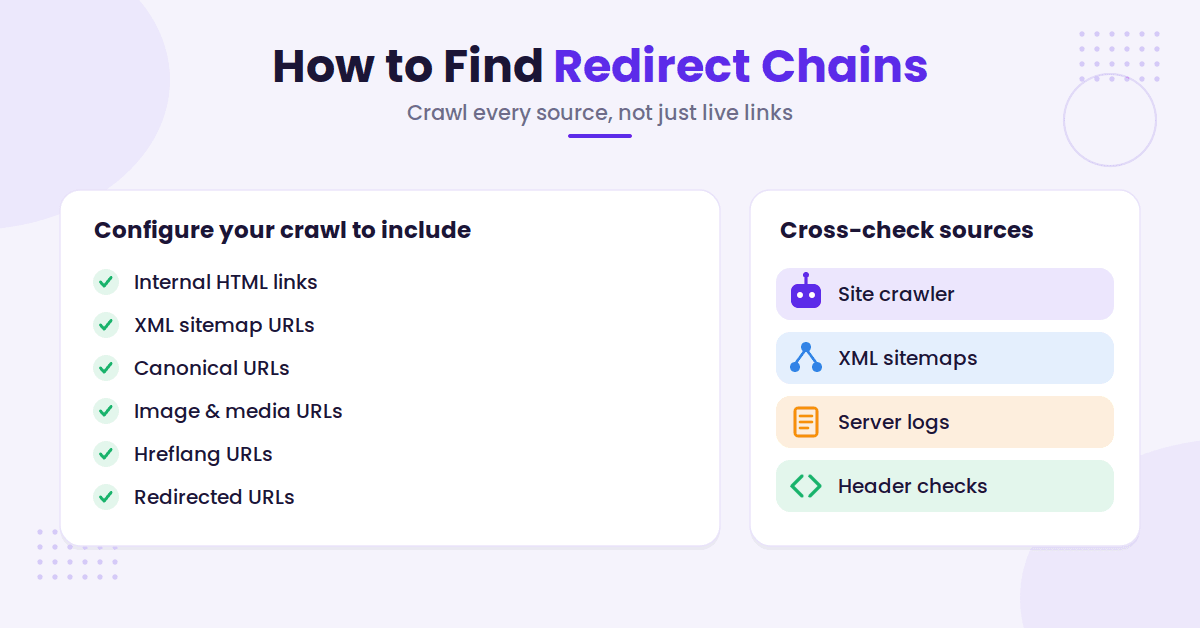
Configure the crawl to include:
- Internal HTML links
- XML sitemap URLs
- Canonical URLs
- Image and media URLs, if those matter to your site
- Hreflang URLs, if the blog uses multiple languages
- Redirected URLs from a previous crawl or migration file
After the crawl finishes, filter for redirect responses. Look for URLs with more than one hop to pinpoint problematic redirect chains. A useful export usually includes the source URL, each intermediate URL, the status code at every step, and the final target URL.
Don’t rely only on your site’s current internal links. Old URLs can remain in XML sitemaps, external backlinks, email campaigns, social posts, and paid ads. A crawl based only on live internal links might miss a redirect that still receives thousands of visits.
Your server logs provide another source of evidence. Search for requests that return 301, 302, 307, or 308 responses.
Group the requests by path and compare them with the next request from the same user agent or session. This can reveal patterns that your crawler did not discover.
For a smaller sample, inspect a URL manually with a header tool or browser developer tools. The response should show the status code and Location header. Repeat the request until you reach the final page.
The HTTP 301 status reference from MDN is useful when checking what a permanent redirect response tells the client. It also helps separate server behavior from issues caused by browser caching.
Compare Internal Links With Sitemap URLs
Internal links and sitemap URLs often tell different stories.
An old article might no longer be linked from your blog, but the old URL could still sit in an XML sitemap. A category page might link to a URL that redirects, while the sitemap lists the final destination. Both cases deserve attention.
Export these URL sets separately:
- URLs found through internal links
- URLs listed in XML sitemaps
- URLs returned by analytics and server logs
- URLs from your previous migration or redirect files
Combine the exports, remove duplicate rows, and crawl the full list. Add a column for the number of redirect hops and the specific status code for each entry. This gives you a practical view of the URLs that matter, not only the pages your crawler happened to discover.
How to Confirm a Real Redirect Chain
Not every report that mentions multiple URLs represents a problem. Some tools show a redirect source and its final destination without displaying the intermediate hops. Others count a redirect caused by a tracking parameter or a protocol change.
Open the redirect path and record every response:
https://example.com/old-post returns 301
https://example.com/blog/old-post returns 301
https://example.com/guides/old-post returns 200
That is a two-hop redirect chain.
Now check whether each redirect hop is intentional. A protocol redirect from HTTP to HTTPS may be managed at the server level.
A trailing slash rule may be added by your CMS. Neither should be ignored, but the fix may belong in your hosting or platform settings rather than your content redirect file.
Pay attention to these common patterns:
- HTTP to HTTPS, then non-www to www
- Uppercase URL to lowercase URL, then a slug change
- Old category path to a new category path, then a final article URL
- A deleted post redirected to a related post, then redirected to a category page
- A URL with a trailing slash redirected to a URL without one, then redirected again by the CMS
- A mobile or language URL redirected through several versions
A redirect chain becomes more concerning when the final destination is not a close match. For example, an old article about technical SEO that ends at a general blog homepage is not a useful replacement.
Google warns against redirecting unrelated old pages to a homepage because that can create soft 404 behavior. Use a relevant replacement, or allow the old URL to return a genuine 404 or 410 when no suitable page exists.
Also check for loops and long paths. A chain with two hops deserves cleanup. A chain with five hops may point to a larger problem in your redirect rules.
Find the Correct Final URL Before Editing Rules
The technical fix is easy once you know which URL should survive. Choosing that final destination URL takes more care.
Start with the current content. Does the final page cover the same topic as the old URL?
Does it have the correct language, category, format, and access level? Is it indexable and returning a 200 response?
Then review performance data. Use Google Search Console, analytics, and server logs to see which URLs receive impressions, clicks, backlinks, and conversions. A low-traffic URL can still have valuable links or a strong PageRank history.
Google Search Console’s Page indexing report can help you check whether important destination pages are indexed. A redirect that points to a page Google hasn’t indexed may need a content or technical fix before you change the source rule.
For each chain, ask:
- Is the final destination URL the best available version of the content?
- Does it return 200 and load without another redirect?
- Does it have a self-referencing canonical tag?
- Is it included in the correct XML sitemap?
- Do internal links point directly to it?
- Does it match the intent of the old page?
- Does the page exist in the right country or language version?
If the answer to several questions is no, don’t shorten the chain yet. Fix the destination first.
Use One Direct Redirect
Once you have identified the proper target URL, change every initial URL to point directly to it.
The clean version looks like this:
/old-post -> /guides/final-post/The messy version looks like this:
/old-post -> /blog/post -> /resources/post -> /guides/final-post/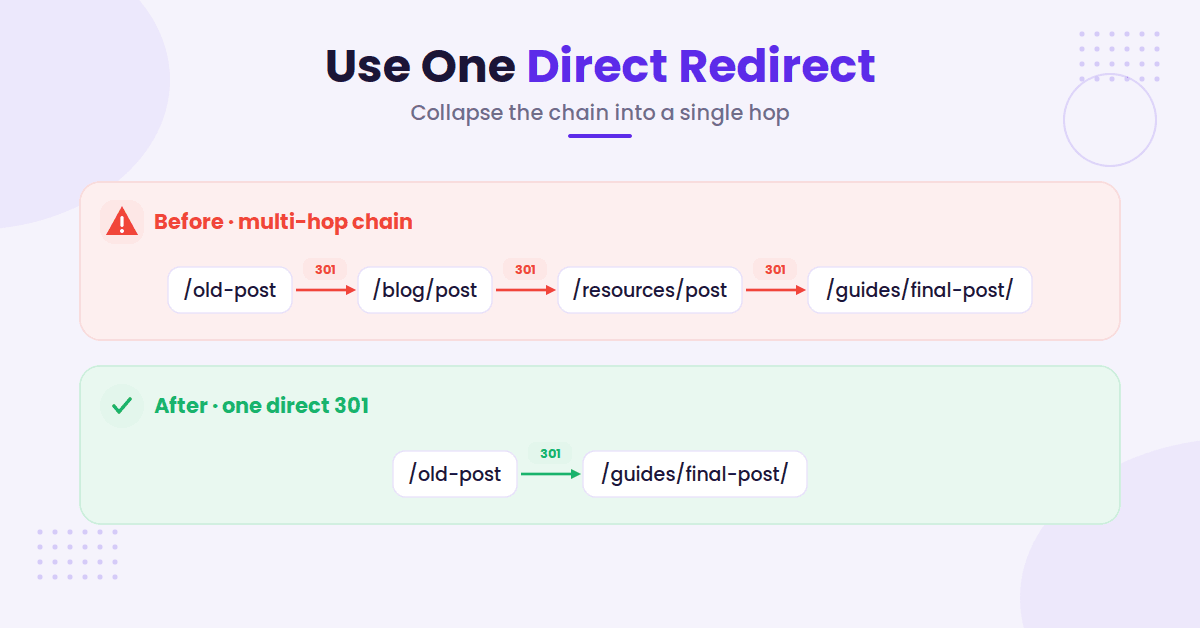
You don’t need to preserve every historical hop. You need to preserve the useful relationship between the old URL and the correct current page.
Keep a record of the old URL, new URL, status code, reason for the change, date, and owner. This record helps when someone asks why a redirect exists six months later. It also prevents a future migration from recreating the same chain.
Fix the Sources That Create Redirect Chains
Changing the redirect file alone will not clean up your site. You also need to remove references to outdated URLs throughout your site architecture.
Update your existing site navigation first. Since these pathways are under your control, they should point directly to the final destination. Search your database, templates, menus, related-post modules, author boxes, and content blocks to replace legacy links.
Then update the following:
- Canonical tags
- XML sitemaps
- Hreflang references
- Open Graph and social metadata
- Structured data URLs
- RSS feeds
- Download links
- Navigation and footer links
- Internal API responses that expose article URLs
Canonical tags deserve special attention. A page can return a 200 status code while its canonical tag points to a redirected URL.
That creates mixed instructions for crawlers. The canonical should normally use the final, preferred URL to ensure proper page indexation and discovery.
Your XML sitemap should also contain final indexable URLs, not old addresses that need redirects. Google can discover redirected sitemap URLs, but there is no good reason to keep sending crawlers through an avoidable hop.
After deployment, recrawl the changed URLs. Do not assume a successful CMS update changed every reference. Large blogs often have URLs stored in more than one database field or generated by separate templates.
One useful test is to search the entire site export for the old URL. If it still appears in your HTML, JSON, sitemap files, or structured data, you have not finished the cleanup.
Fix Redirect Chains at Scale Without Taking the Site Down
Large sites require a staged process. Editing thousands of redirect rules in a single release creates unnecessary risk.
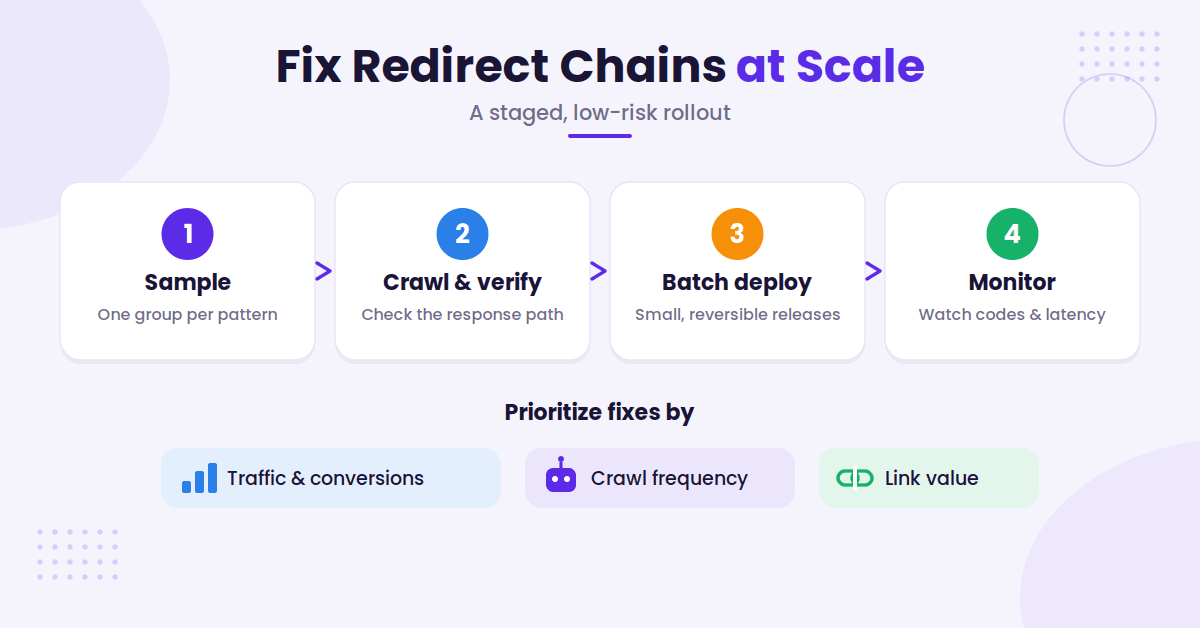
Start with a sample from each major pattern. If 10,000 chains all follow the same category migration rule, fix a small group first. Crawl those URLs, review the response path, and check analytics after deployment.
Once the pattern works, process the larger group in batches. Keep each batch small enough to roll back. Your deployment system should preserve the previous redirect configuration and make it easy to restore.
Prioritize URLs using three factors:
- Traffic and conversions: Fix chains on URLs that receive users or generate revenue. Ensuring these direct to the correct final destination URL helps maintain user intent and conversion rates.
- Crawl frequency: High-demand URLs may be requested often by search engines and users, so fixing these chains improves overall page load time and server efficiency.
- Link value: Old URLs with quality backlinks deserve a direct path to the relevant page.
Don’t prioritize only by the number of hops. A five-hop chain on a dead URL may matter less than a two-hop chain used in your navigation across every article.
Watch the server after each release. Review response codes, redirect volume, 404 errors, latency, and application logs. A rule that looks correct in a spreadsheet can still catch an unintended URL pattern.
This is where a redirect map earns its keep. Use exact matches for individual legacy URLs and carefully tested patterns for groups. Broad rules can create accidental matches, especially when old slugs share words with newer content.
Test query strings as well. Decide whether tracking parameters should remain, be removed, or pass through to the final page. Keep the handling consistent with your analytics setup.
Prevent New Redirect Chains After Migrations
The cheapest redirect chain is the one you never create.
Before changing URL structures during website migrations, export your current URLs and their performance data. Build a redirect map that sends every important old URL directly to its final destination. Do not create temporary rules that you plan to clean up later, as those temporary rules often become permanent.
Set a URL policy for the blog. Decide whether URLs use trailing slashes, lowercase characters, a preferred hostname, and HTTPS. Apply those rules at the platform or server level, not through several overlapping systems, to ensure you are not wasting your crawl budget on inefficient paths.
Give developers, editors, and SEO managers a shared launch process. A URL change should include the new canonical URL, the redirect requirement, sitemap updates, and a post-launch crawl.
Schedule recurring crawls to identify new redirect chains that may have emerged. Weekly checks work well for active publishing teams. Monthly checks may be enough for a stable site, but major migrations need daily monitoring for the first few days.
You can also add a deployment test that requests a sample of old URLs and fails when a path contains more than one redirect. That small check can catch a problem before it reaches production.
FAQs About Redirect Chains
Here are a few additional questions you might have about redirect chains.
Do redirect chains hurt SEO?
A few short chains won’t automatically cause a penalty. However, they waste crawl budget, slow down page load speeds for users, and dilute link equity that should flow directly to your target page. Large numbers of redirect chains are worth fixing, especially on high-authority pages, because they make technical signals less clear to search engines.
How many redirects are too many?
There isn’t one universal cutoff that applies to every site. Treat any avoidable redirect chain as a cleanup candidate. A direct redirect is always better than two or more hops, as each step in a chain increases latency and the risk of indexation delays.
Should every old blog post redirect to the homepage?
No. You should redirect an old post to a closely related current page. If no relevant replacement exists, a 404 or 410 may be more honest than sending users to a generic homepage. Indiscriminately redirecting pages can often lead to confusing redirect chains or even accidental redirect loops.
Is a 301 or 302 better for a permanent URL move?
Use a permanent redirect when the old URL has been replaced for good. A 301 redirect is standard for this purpose, while a 308 also indicates a permanent move. Use a temporary status only when the original URL may return later.
Can internal links to redirected URLs stay in place?
They can, but they shouldn’t. Update internal links directly to the final URL so users and crawlers do not take an unnecessary hop. Cleaning up these links prevents redirect chains from forming in the first place and makes future site audits much easier.
How do I find redirect chains in Google Search Console?
Google Search Console can show indexing and URL problems, but it is not a full crawler for identifying every redirect chain. Use it to check destination indexing status and overall search performance, then use a dedicated crawler, server logs, or header requests to map every hop.
Should I delete old redirect rules after fixing a chain?
Keep rules that protect valuable old URLs, backlinks, or known user paths. Remove duplicate and obsolete rules only after checking logs, analytics, backlinks, and previous migration records. A proper redirect cleanup should reduce configuration clutter without breaking useful history or triggering redirect loops.
Final Thoughts on Redirect Chains
Redirect chains usually grow one URL change at a time. On a large blog, they become visible only after years of migrations, slug edits, and CMS rules overlap. Properly addressing these redirect chains is a fundamental part of routine site maintenance that improves both user experience and crawl efficiency.
Find these issues using crawler data, sitemap exports, server logs, and manual header checks. Once identified, choose the correct final destination URL and point every old source directly to it while updating internal references throughout the site.
A clean redirect map gives users and search engine bots a faster, more reliable path to your content. More importantly, it provides your team with a manageable system that prevents the same problems from recurring during your next blog migration.

RightBlogger Co-Founder Andy Feliciotti focuses on website development and shares his photography and travel adventures on YouTube and his blog.




Automated SEO Blog Posts for Your Site
Research, write, publish, and share from one account.
7-day free trial. Cancel anytime.





Leave a comment
You must be logged in to comment.
Loading comments...