How to Connect Your Wix Site with RightBlogger
Generate a Wix Blog API key, then choose drafts or instant publishing for every post.
Connect your Wix site to RightBlogger and send posts with one click. You can publish instantly or send posts as drafts to review first.
What you need
- Wix Site ID
- Wix API Key
- Wix Account ID (optional for most site-level connections)
Get your credentials
1) Site ID
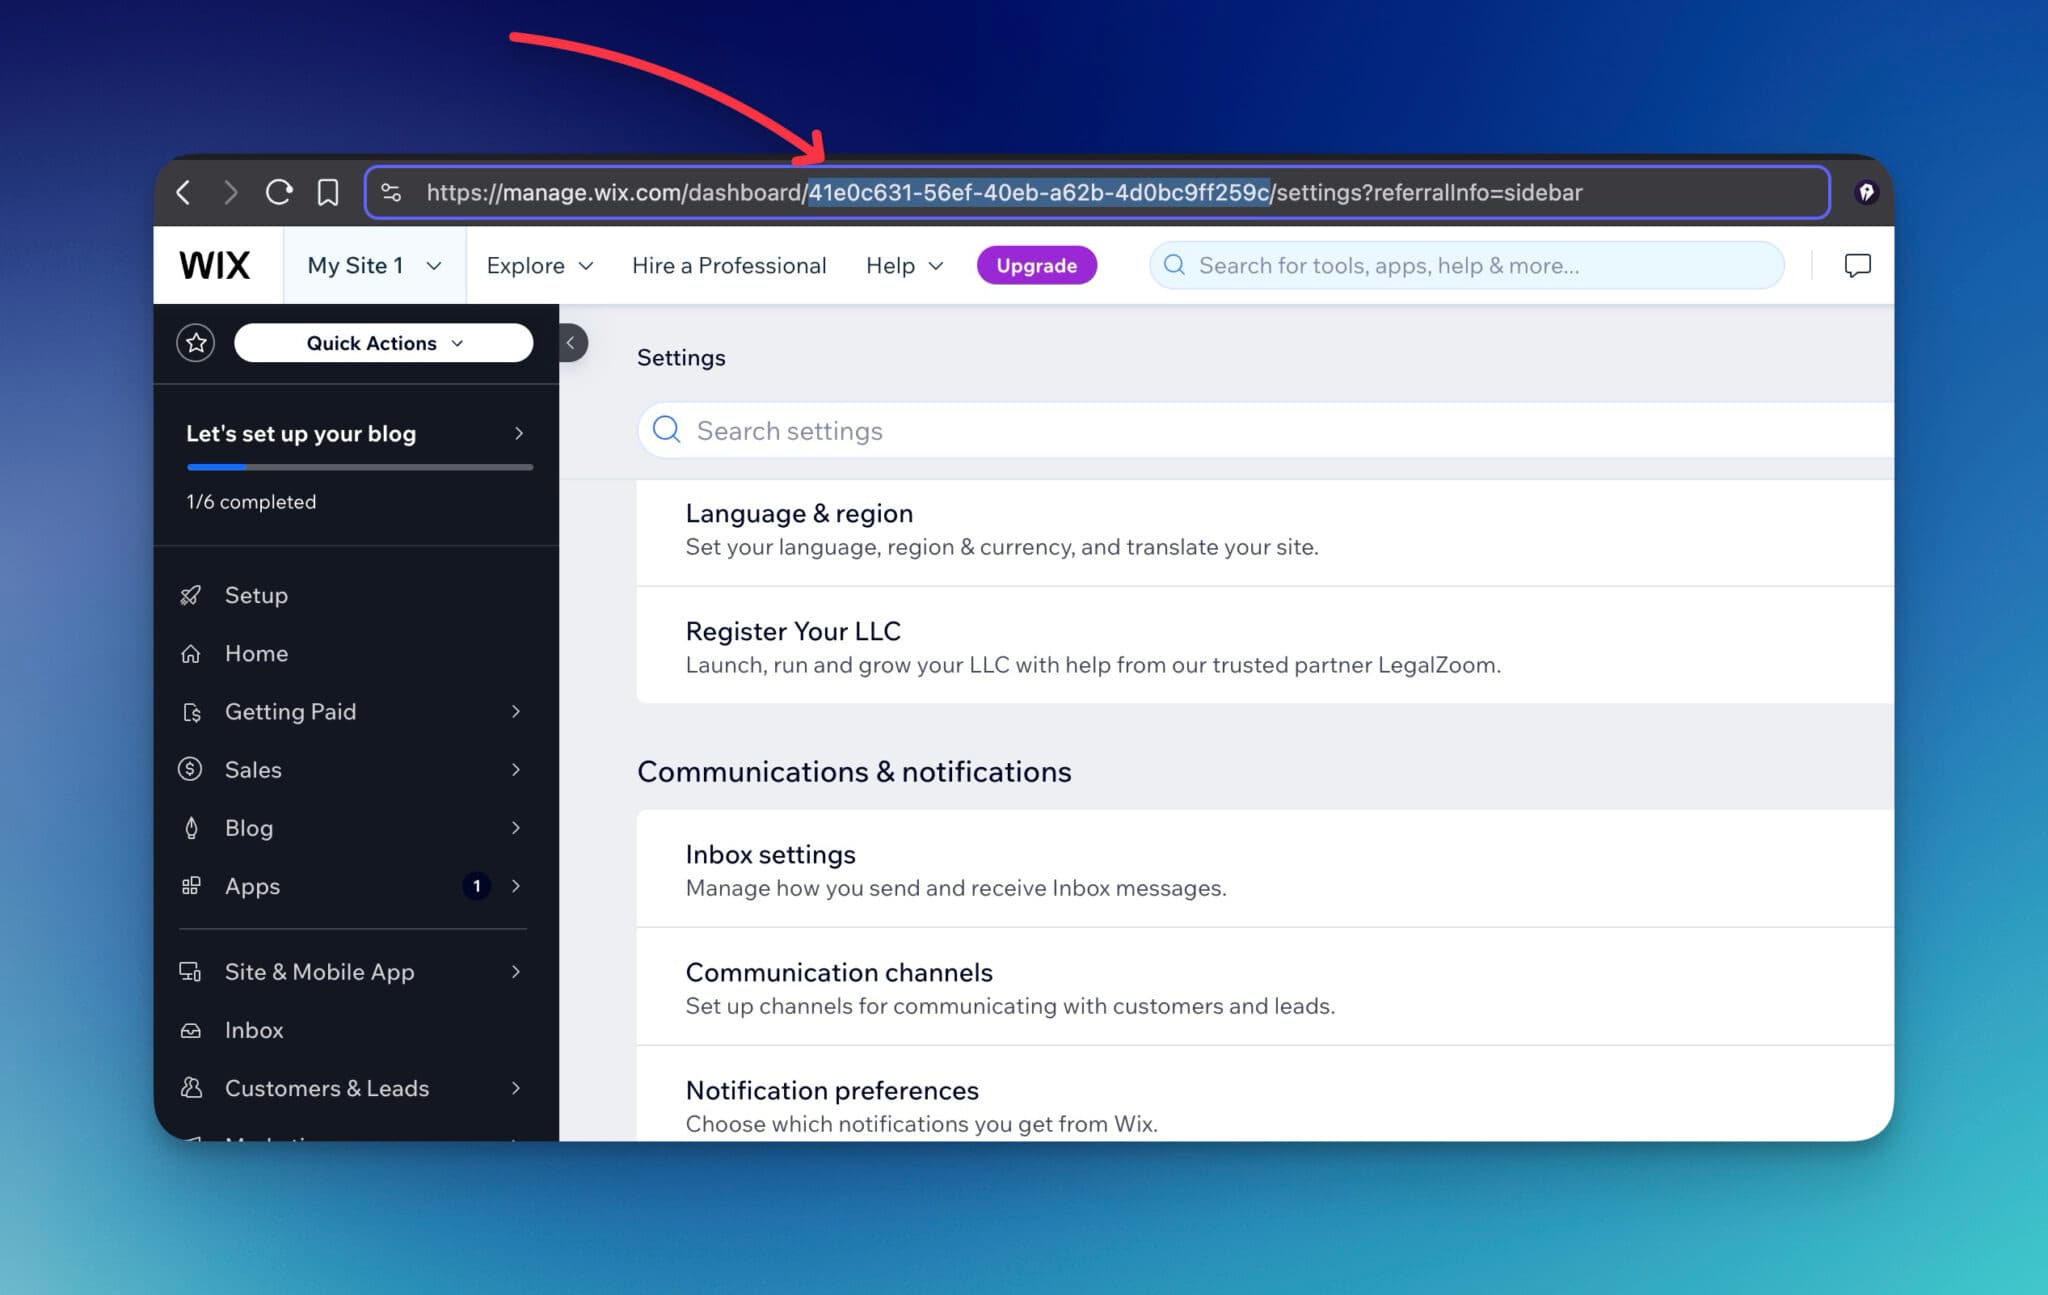
Open your Wix dashboard. The Site ID is in the URL path.
2) API Key
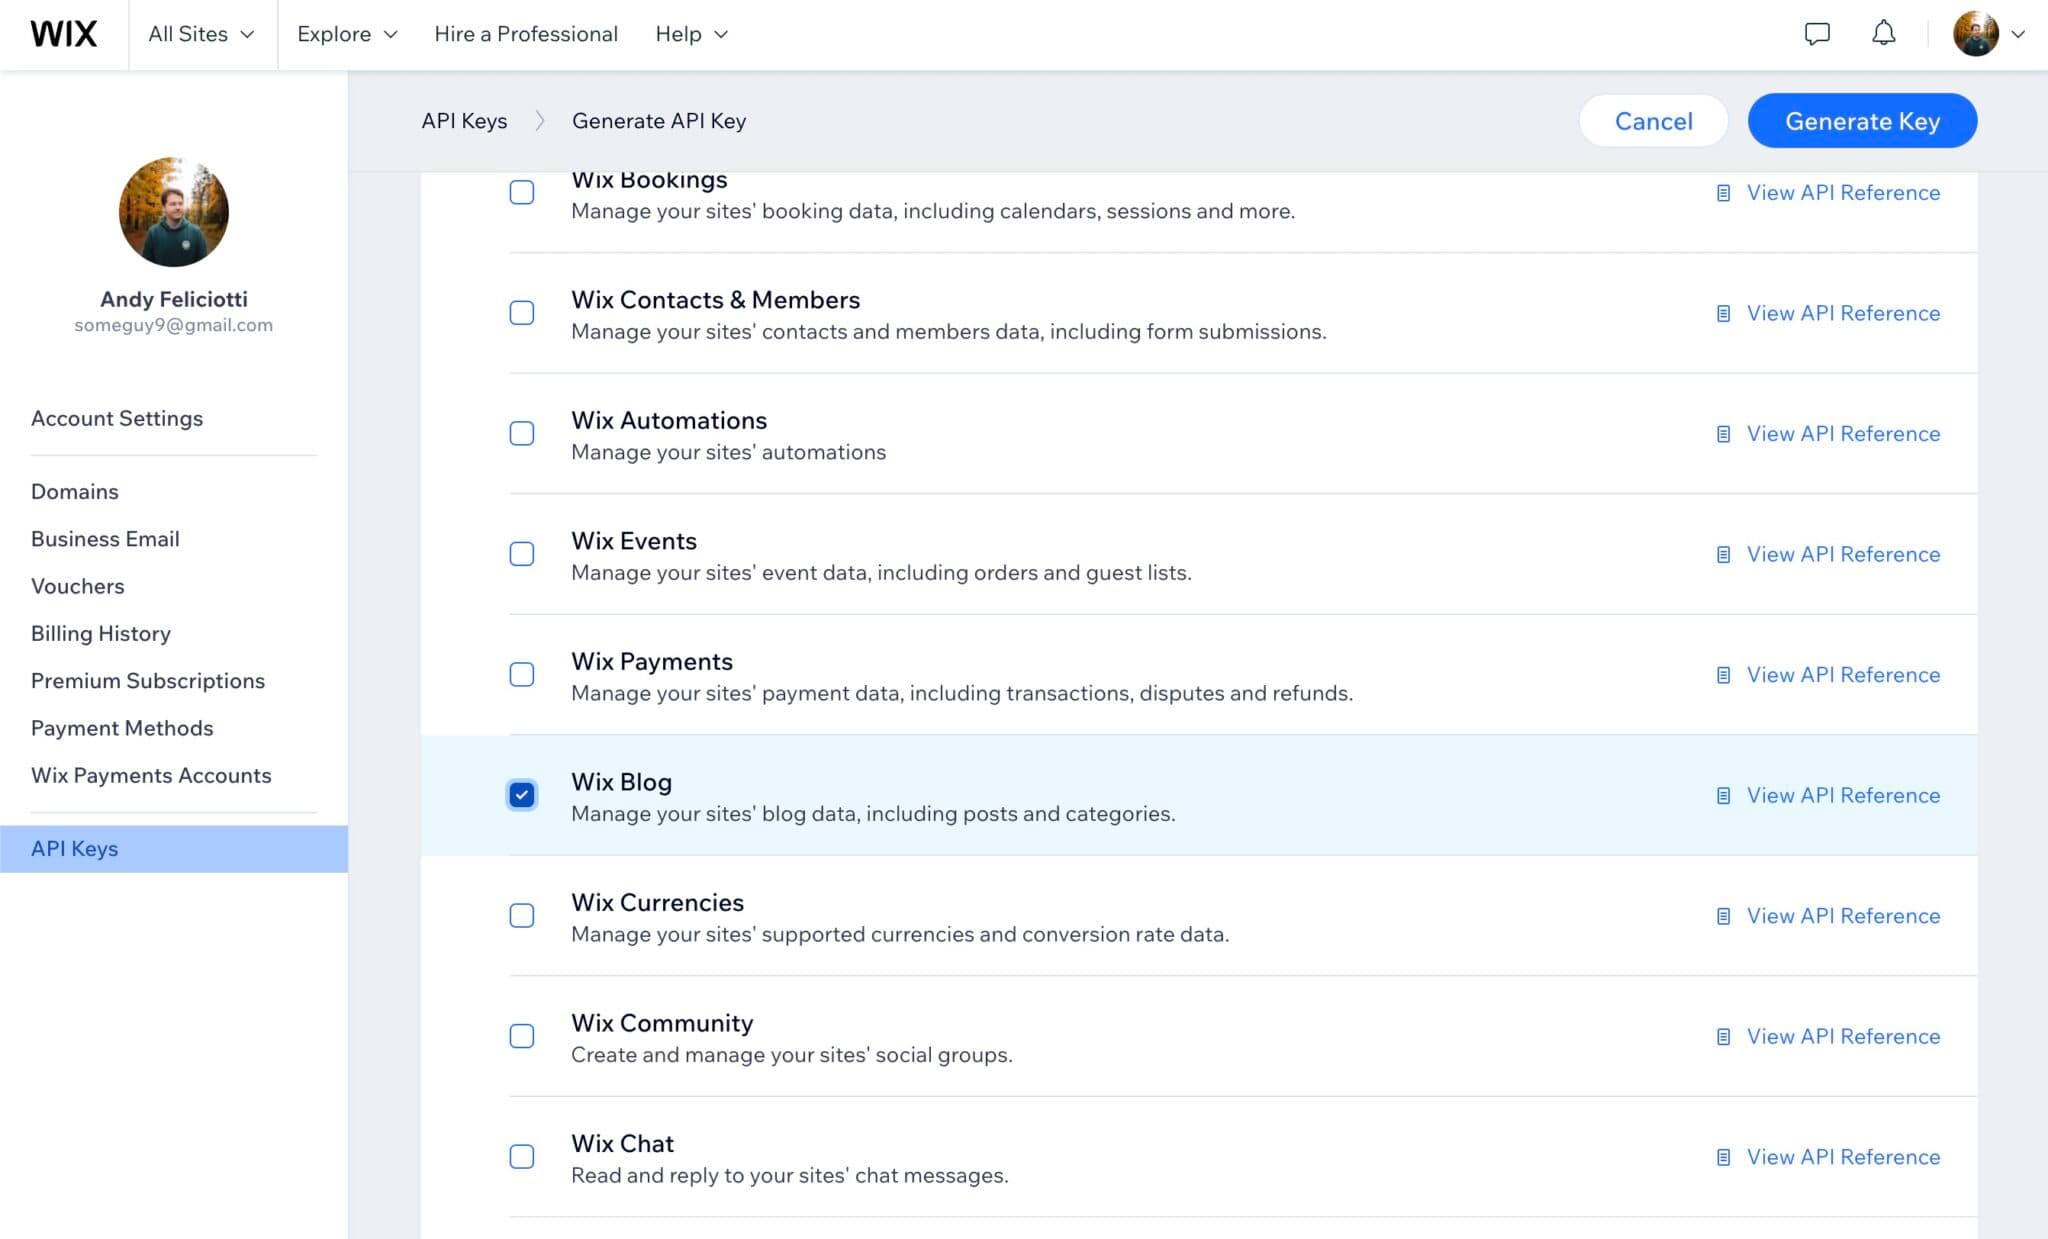
In Wix, go to Settings → API Keys → Generate API Key.
Name the key, then grant Wix Blog permissions, plus permission to read site members, which RightBlogger uses to pick the post owner. Generate and copy the token. Wix requires the account owner or a co-owner with the right permissions to create API keys.
3) Account ID, if needed
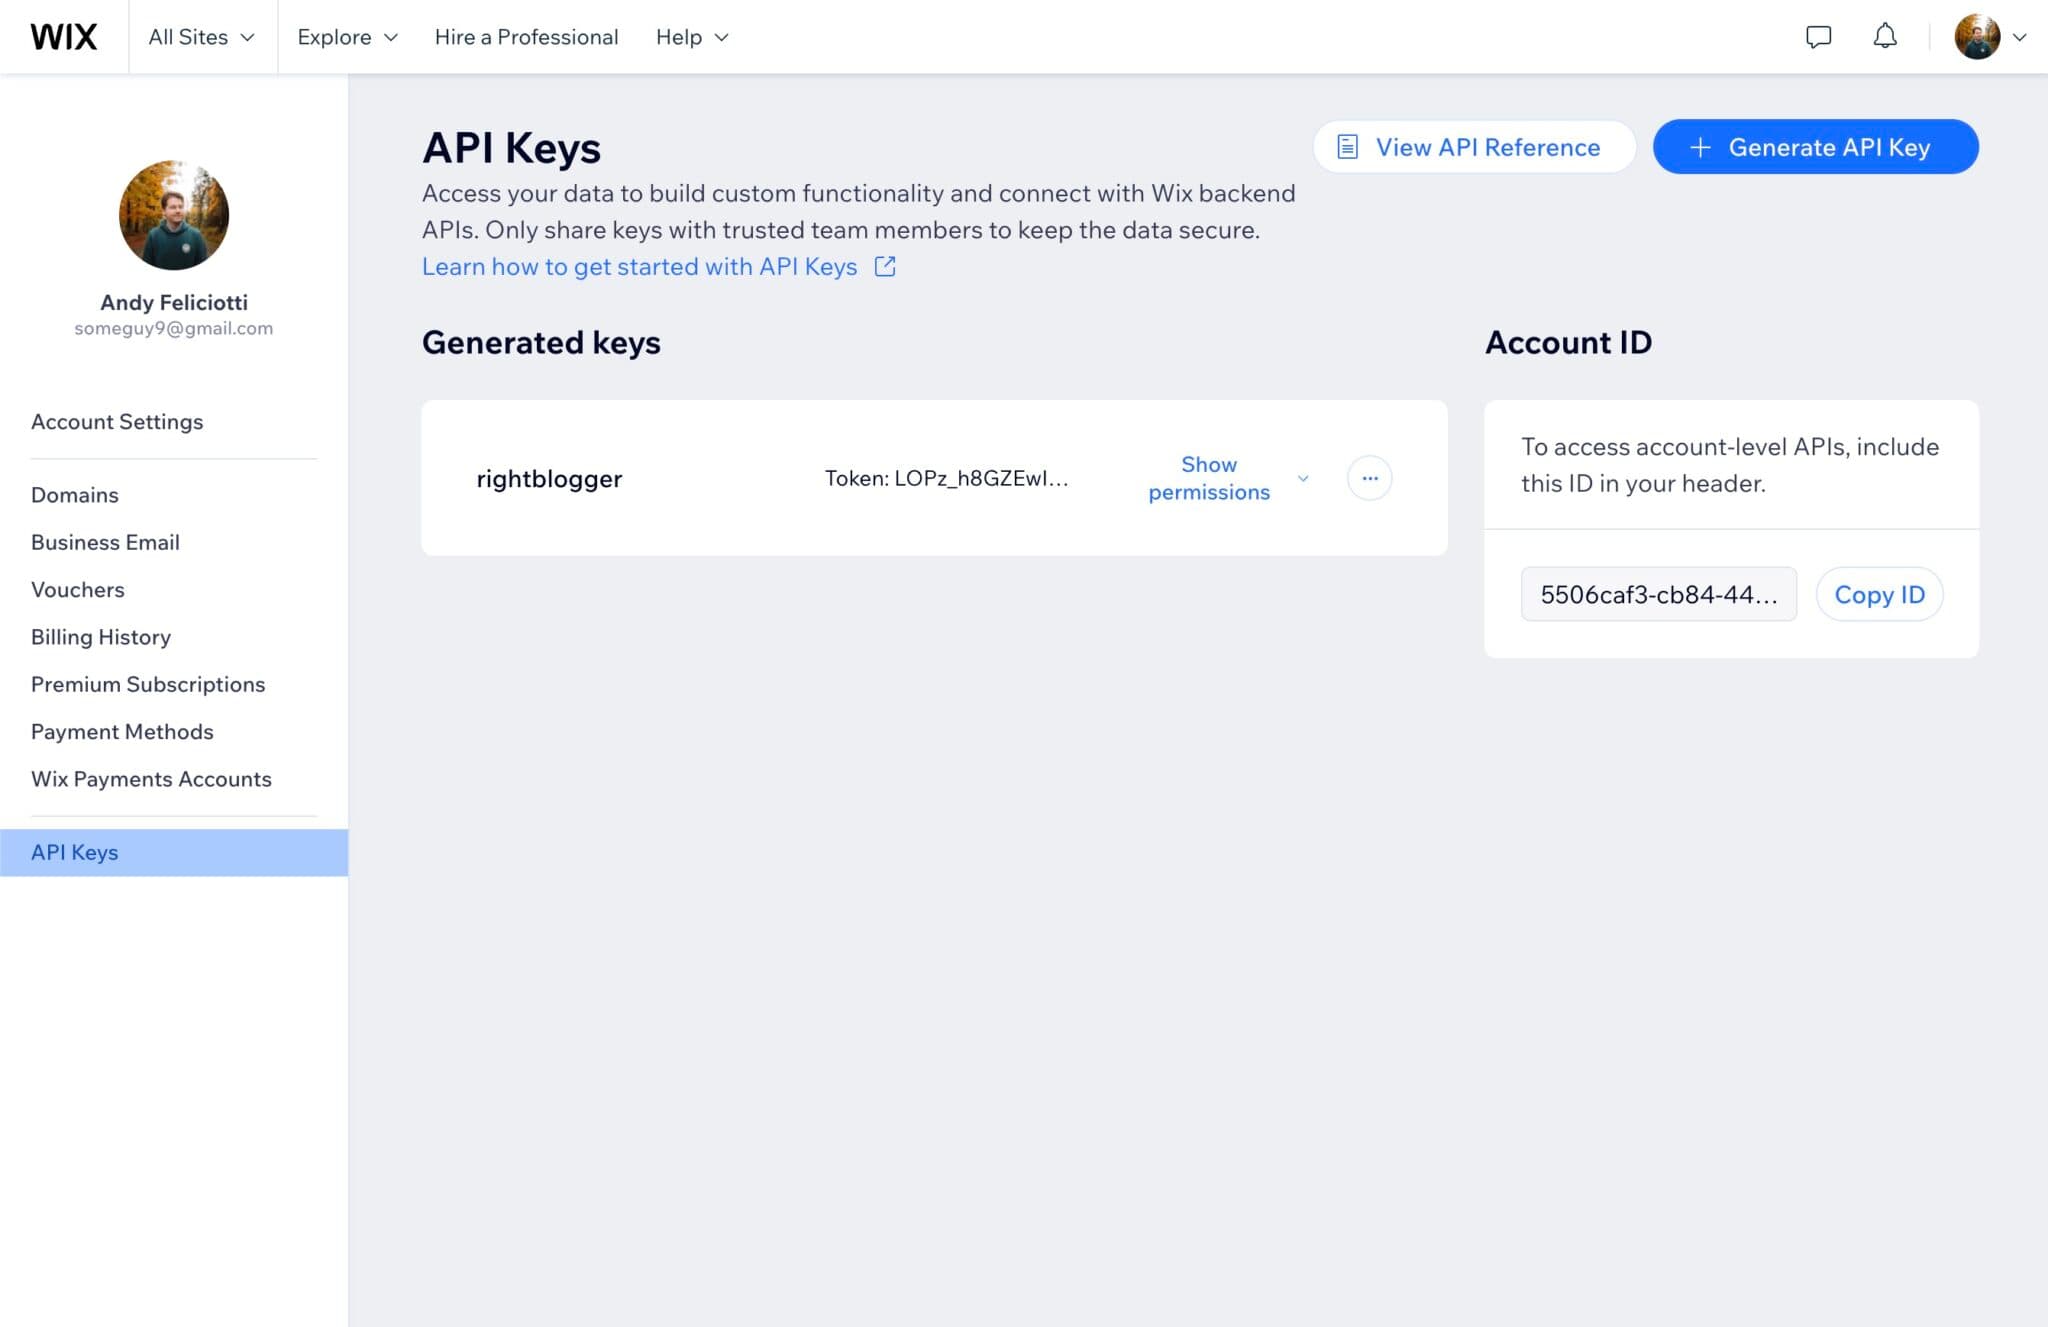
For most site-level connections, the Site ID and API key are enough. If your setup manages multiple Wix accounts or RightBlogger asks for it, copy the Account ID shown on the API Keys page.
Set it up in RightBlogger
- In RightBlogger, open Projects, then Integrations.
- Choose Wix.
- Paste your Wix Site ID and Wix API Key. Add the Wix Account ID only if your setup needs it.
- Choose Publish Immediately to post live, or leave it off to create a draft in your Wix blog.
- Click Save Changes.
Send content to Wix
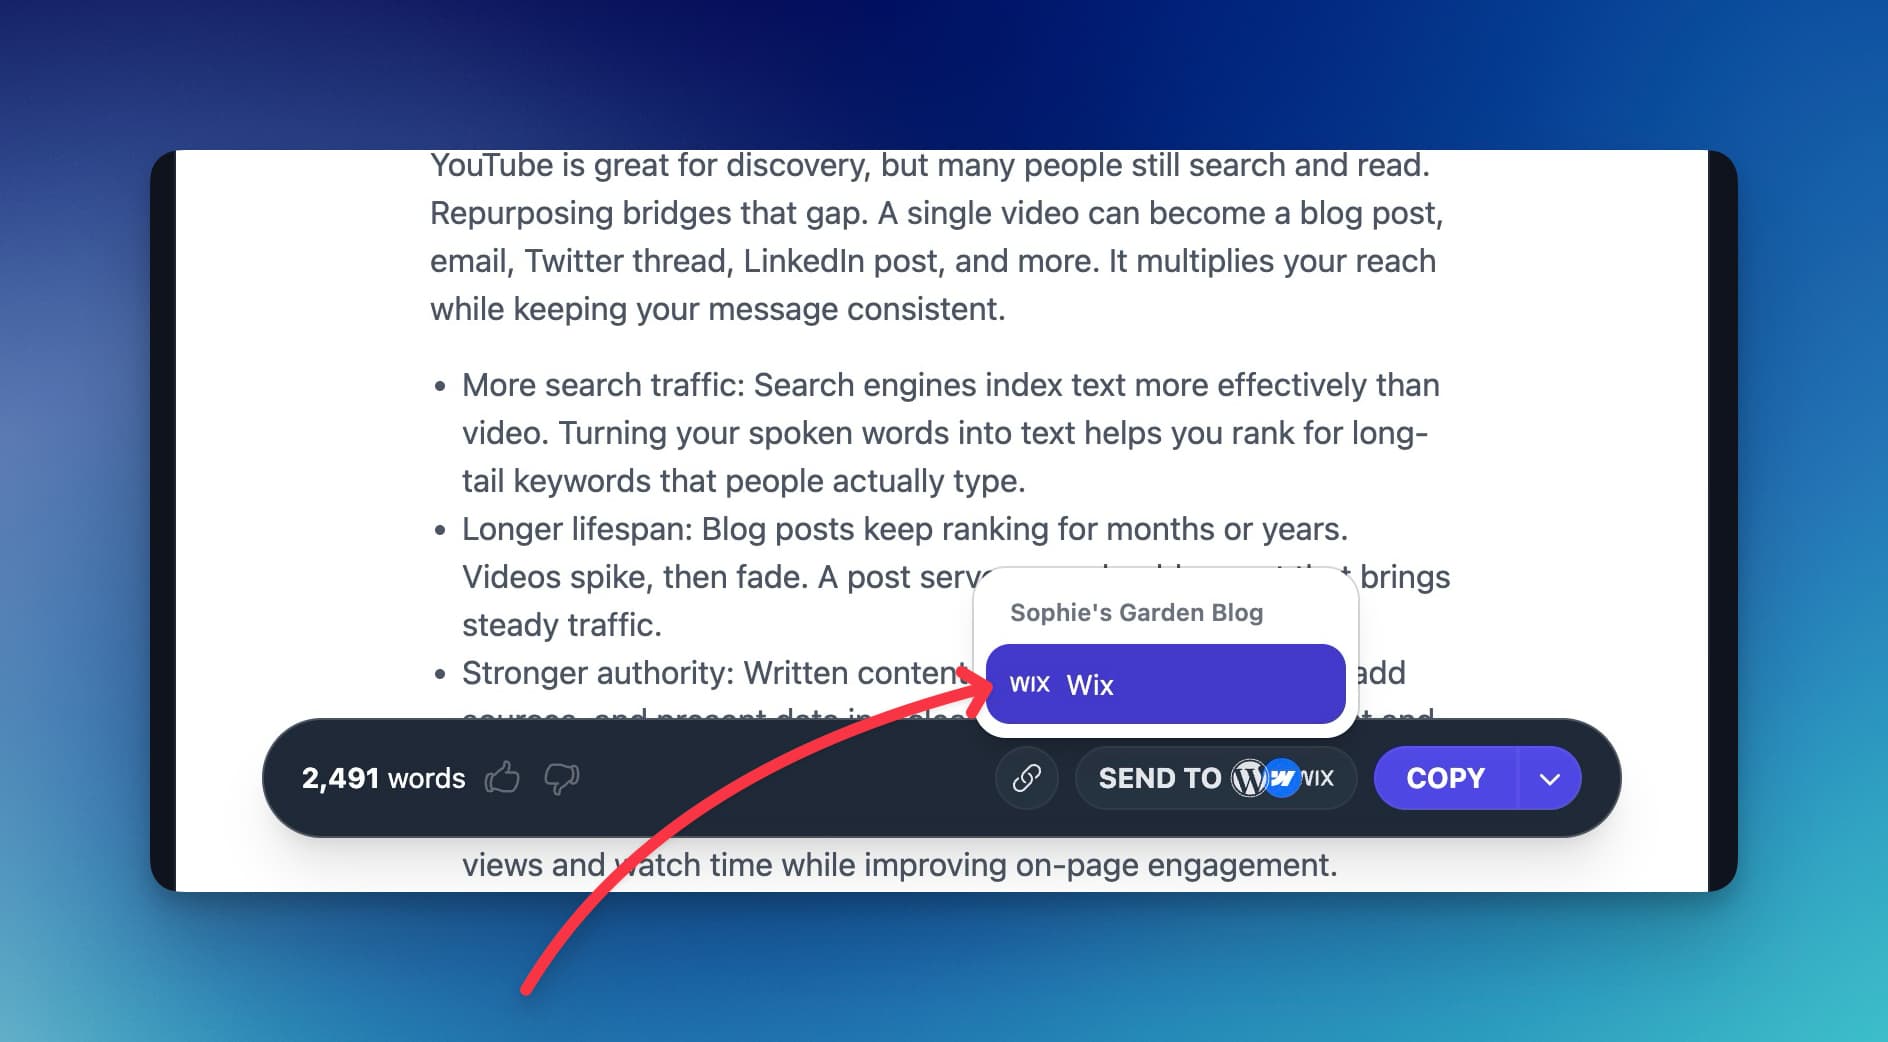
Create your article in RightBlogger. Click Send To, choose Wix, and your post will appear in Wix as a draft or live post based on your setting.
Conclusion
With the Wix integration, you can move content from RightBlogger to your blog in seconds. Keep drafts for review, or publish right away when it is ready. If you need help with keys or IDs, check the screenshots above or reach out to our team.
Automated SEO Blog Posts That Work
Try RightBlogger for free, we know you'll love it.
7-day free trial. Cancel anytime.