
Video to Blog Converter: Turn YouTube Videos Into Posts
Convert a YouTube video or transcript into an SEO-friendly blog post with AI, complete with structured sections and content you can quickly edit and publish.
The RightBlogger YouTube Video to Blog Post Generator converts YouTube videos into structured, SEO-friendly blog posts in seconds.
Got YouTube videos and want them working as blog content too? This free video to blog AI tool takes a YouTube URL (or a transcript) and writes a structured, SEO-friendly blog post from it in seconds, so the work you already did on the video keeps earning.
A video-first content model makes sense for most creators: video is where you build audience, blog posts are where you capture search demand. Without a written version, your video is invisible to Google. With one, the same content reaches readers who’d never click play, plus everyone hitting a search result.
Doing this by hand takes hours per video (transcribe, edit, restructure, add headings, optimize). This tool does it in one click and gives you a polished draft you can edit and publish.
How to Use Our Free YouTube Video to Blog Post Generator
Five quick steps:
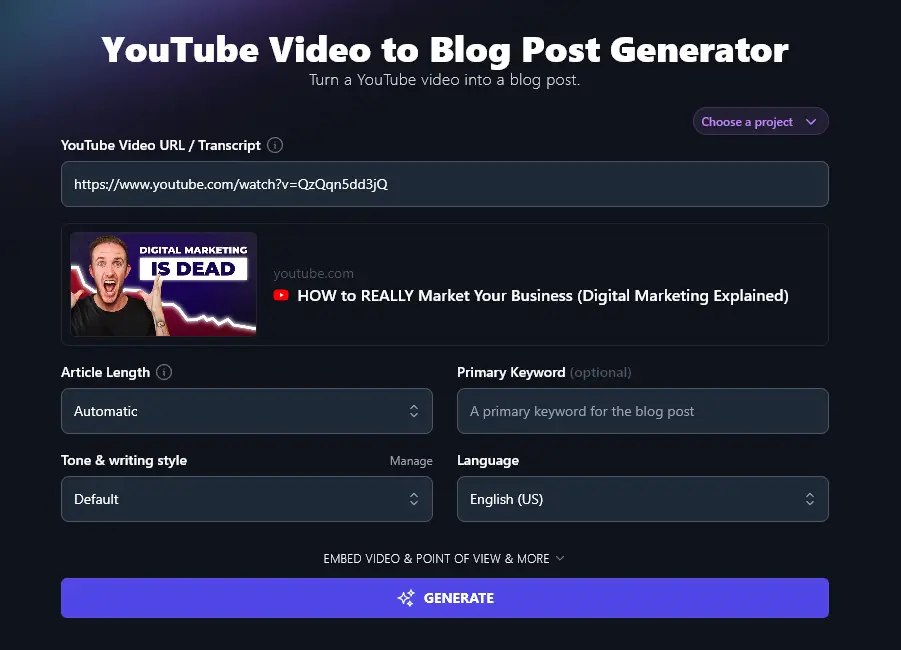
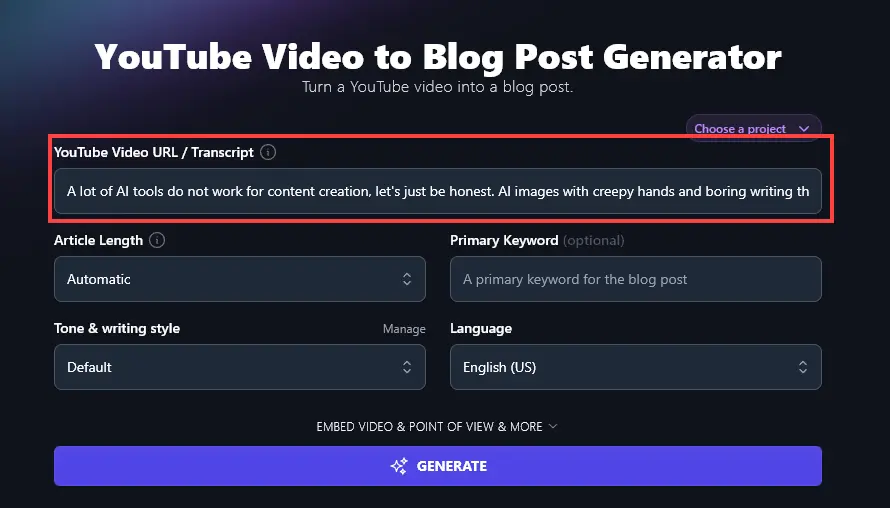
1. Enter the URL for Your YouTube Video
First, pop in the direct URL for your YouTube video. Not sure where to find this? Just go to your video on YouTube, then copy-and-paste the URL from your browser’s toolbar. Additionally the RightBlogger video to blog tool allows you to upload a video file, audio file, or podcast recording.
Tip: If your video isn’t on YouTube or is private, you can instead copy the whole transcript into this box. We’ll cover that in more detail later.
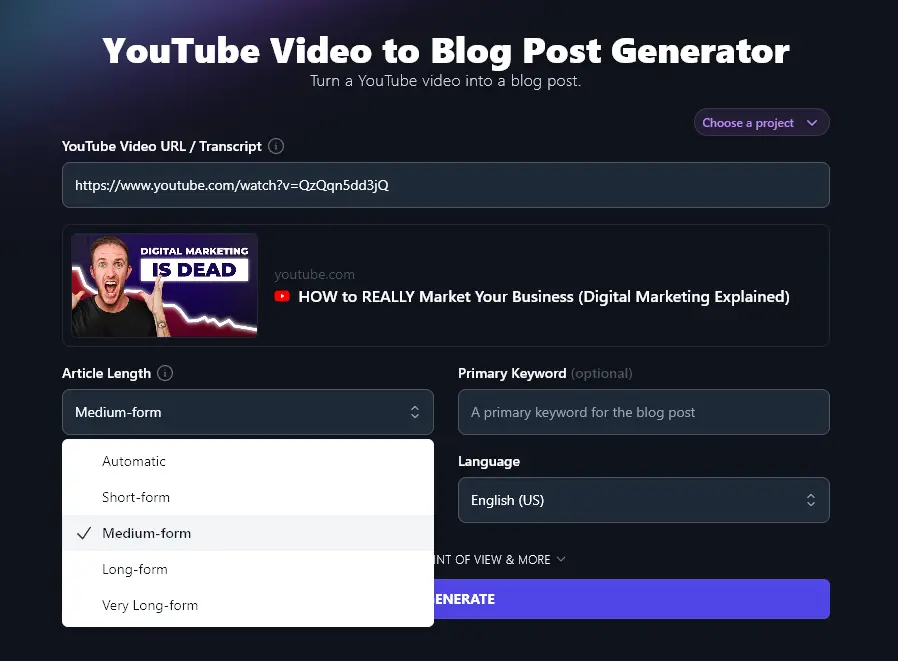
2. Specify the Length for Your Blog Post
The RightBlogger AI will automatically try to come up with a blog post of a suitable length, but if you want, you can specify how long/short the post should be here.
3. Set a Primary Keyword for Your Blog Post (Optional)
For the best SEO results, you want to have a primary keyword (search query) for each article you write.
If you’re not sure what keyword to best use for your post, our Keyword Research Tool will help.

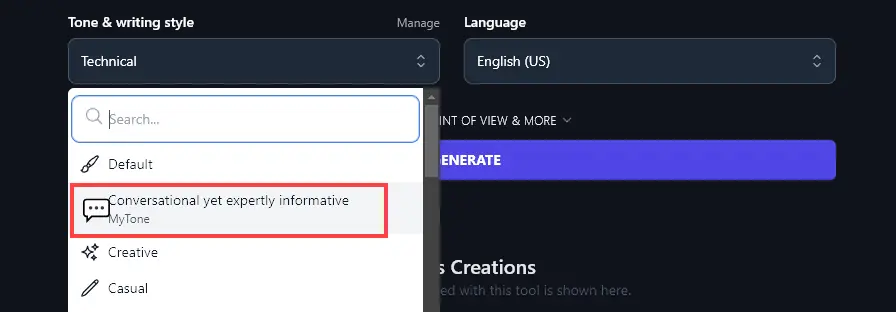
4. Choose the Tone and Writing Style for Your Blog Post
By default, the AI will write in a conversational tone that should be suitable for most blogs. But if you want to more closely match your own writing voice, select a different tone & writing style from the dropdown list.
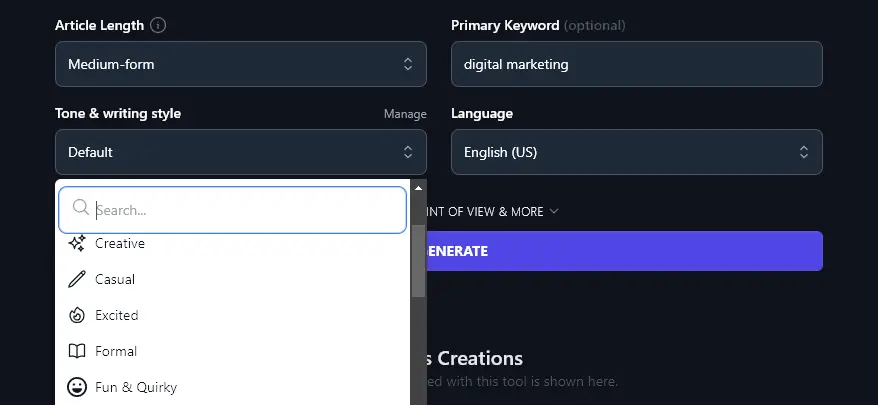
Tip: Every RightBlogger plan lets you create up to 5 custom MyTone styles to use. Just select your MyTone from the dropdown here.
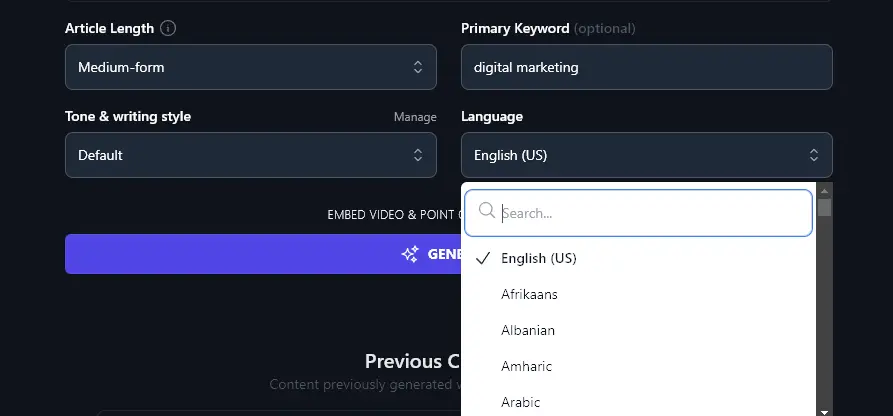
5. Select the Language for Your Blog Post
RightBlogger defaults to English (US) as that’s what the majority of our users write in. But you can choose from over 100+ different languages here, including other varieties of English (UK, Canada, and Australia).
Bonus: My Free SEO Checklist
Turning your videos into blog posts is a strong SEO move: more organic traffic, more readers, more customers.
You can go even further using my personal SEO checklist:
- Install and use the Yoast plugin or RankMath plugin for WordPress
- Make sure you’ve chosen a suitable keyword: go for medium volume and low difficulty if possible
- Include your keyword in your headings (encourages rich snippets and faster indexing on Google)
- Only have one H1 header in your post, this should be your post title at the top of the page
- Use the correct header hierarchy, with H2 subheadings and H3 sub-subheadings
- Incorporate your primary keyword naturally within the text, don’t go over the top
- Have a good mix of internal and external links, with at least 3 external links
- Craft an enticing meta description that incorporates your primary and (ideally) secondary keywords
- Include alt descriptions for all the images (photos, screenshots, illustrations, etc) in your post, using keywords within these as much as possible
- Make sure your blog post is a suitable length, for the best SEO results, that normally means at least 1,500 words
- Craft a meta title (SEO title) that uses your primary keyword and grabs attention
- Include your primary keyword in the URL (permalink) for your post
After you create a post with RightBlogger’s video to blog tool, you can go to the editor and generate an SEO report. This helps the article have a better chance of ranking by giving you the exact keywords you should reference in your post.
Each Feature, Explained (Plus Advanced Options)

The basics get you a blog post fast. The advanced fields let you fine-tune it.
A look at each option, including the advanced features:
1. YouTube Video URL OR Paste Your Full Transcript
Most bloggers use this tool by pasting in their YouTube video’s URL. The tool automatically grabs the transcript and creates your blog post.
You can also paste a whole transcript directly into this field (yes, it’ll fit). Useful when your video isn’t published yet, or when you’re working from a private video (e.g. an online course).
You could also use this feature to combine two (or more) YouTube videos into one blog post. You don’t need to transcribe the videos yourself. Just grab the transcripts using our Download YouTube Video Transcript tool, then go ahead and paste those into the YouTube Video to Blog Post Generator. If you are working with a video or audio file we have a transcription tool as well.
Tip: When pasting the URL, make sure it’s the URL for a specific video, not for your whole YouTube channel.
2. Article Length (Specify the Length You Want)
The YouTube Video to Blog Post Generator usually does a good job of choosing a sensible length for your blog post, based on the amount of content in your video.
If you want a longer or shorter post, though, just select from the options here.
Short-form posts will normally be under 1,000 words; long-form posts will be around 1,500 words. Note that if your video itself is fairly short, the tool will end up producing blog posts that are on the shorter side too.
3. Primary Keyword (What Keyword Are You Optimizing Around?)
While you don’t have to include a primary keyword for your article, I strongly recommend it. Keywords let the AI create SEO-optimized blog posts that should rank well (assuming you’ve picked an achievable, relevant keyword).
A couple of examples:
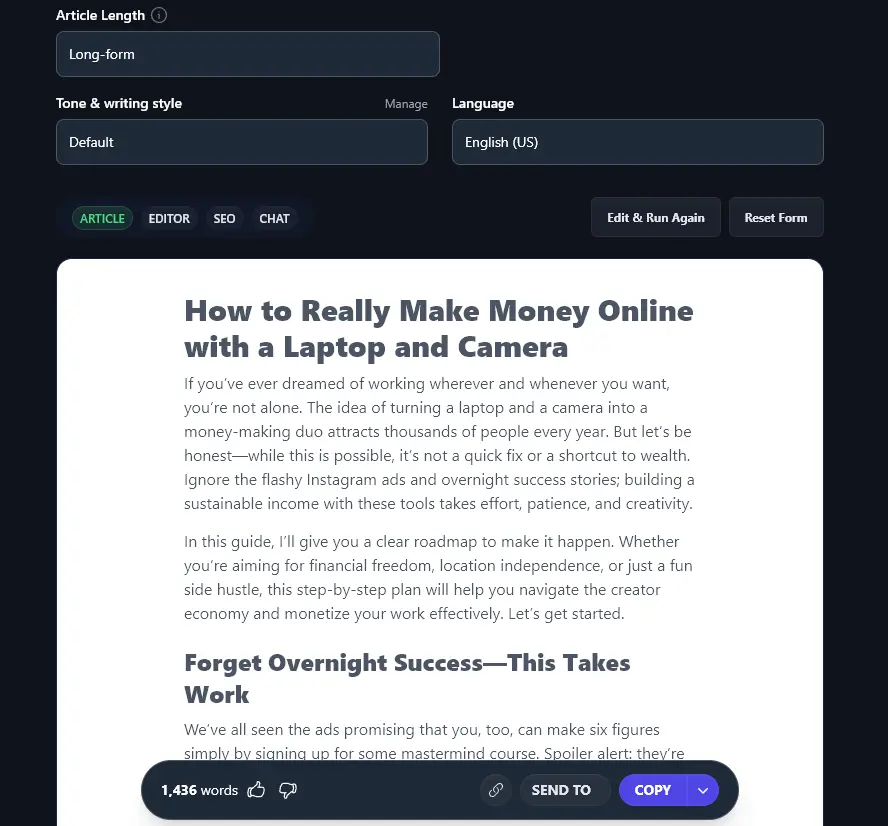
Without a keyword specified:
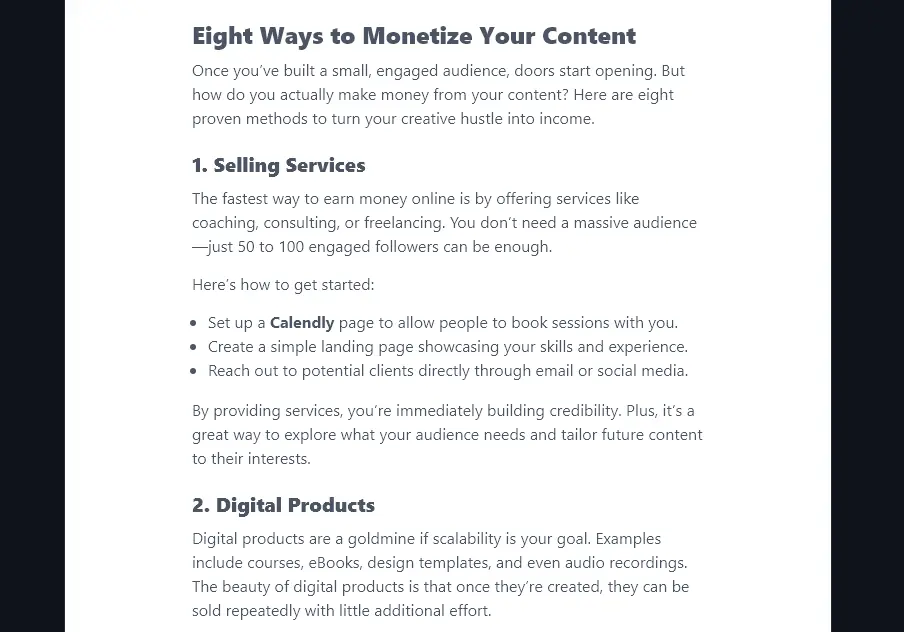
With the keyword “make money online with a laptop and camera” specified:

In the second example, the AI has incorporated the exact primary keyword phrase into a subheading, which is an important ranking factor.
4. Tone & Writing Style (Bring Your Style and Voice Into Your Post)
You can usually tell a blog post was written by ChatGPT from the bland phrasing. Like this:
In today’s digital age, all you need to kickstart a money-making venture is a laptop, a camera, and a little creativity. Whether you’re looking for a side hustle or aiming to build a full-time business, there are countless ways to turn these tools into income streams.
RightBlogger’s AI aims for a more conversational, engaging style. You can adjust this to suit your own personal style and voice.
We have 20+ different pre-set styles to choose from, including Fun & Quirky, Technical, and Direct.
Three styles with the same input:
Fun & Quirky: This guide skips the Instagram hype and empty promises of overnight success and delivers a real roadmap to time and location freedom. Spoiler alert: It’s not magic, and it’s not easy, but it’s absolutely achievable.
Technical: Building a sustainable income this way takes time, effort, and strategy. This guide will give you a step-by-step plan to set yourself on the right path, avoid the biggest mistakes, and start moving toward your goals.
Direct: This guide will show you how to actually make money online using a laptop and camera. There are no shortcuts or overnight riches, but if you’re willing to put in the work, you can build a sustainable business and create time and location freedom.
Every RightBlogger plan lets you create up to 5 customized MyTones. Plans start at $49/mo for Solo.
When you create a MyTone, you simply give the AI a sample of your writing to use as a model. It’ll then analyze your writing in depth, pinpointing your style and saving it to use from any RightBlogger tool with a Tone & Writing Style dropdown.
5. Language (Pick From 100+ Languages)
By default, RightBlogger creates content in English (US), because the majority of our users are based in the USA. But if you live somewhere else, or you’re creating content for an audience in a different country, we’ve got you covered too.
RightBlogger supports over 100 languages for content creation. Regardless of your video’s language, you can choose whatever language you want here.
For instance, your video might be in English, but you may want a Spanish blog post based on it for your multilingual website. RightBlogger can handle that with ease.
Tip: Even if your video’s language matches the output you want (e.g. your video is in French and you want the blog post to be in French too), you still need to select the output language here.
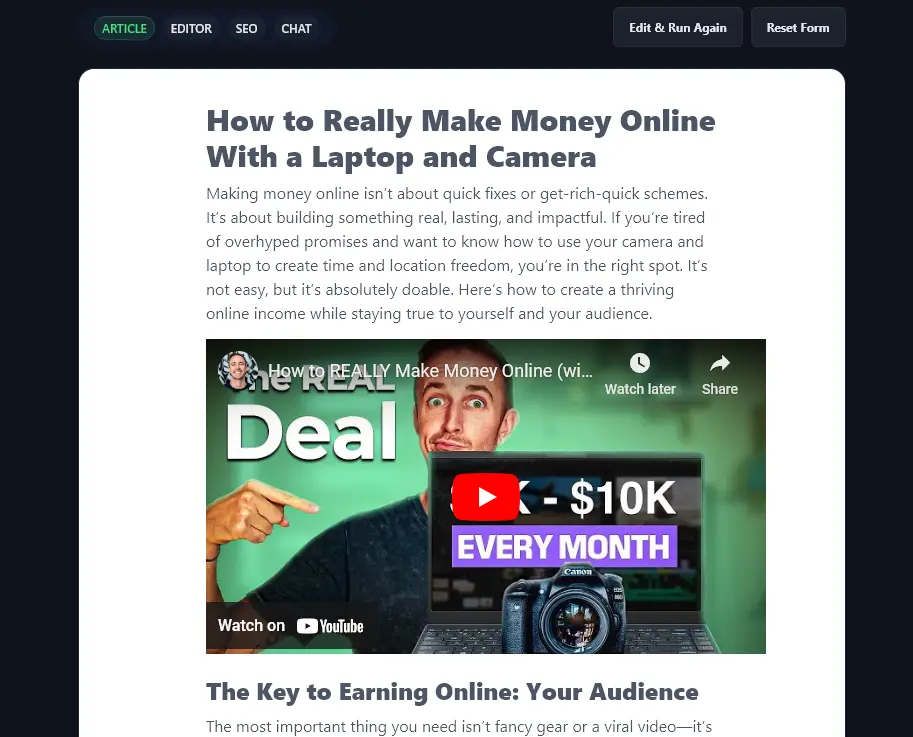
6. Embed Video (Opt to Include Your Video in Your Post … or Not!)
The Video to Blog Post tool also has a set of advanced options, which you can view by expanding the “Embed Video & Point of View & More” section.
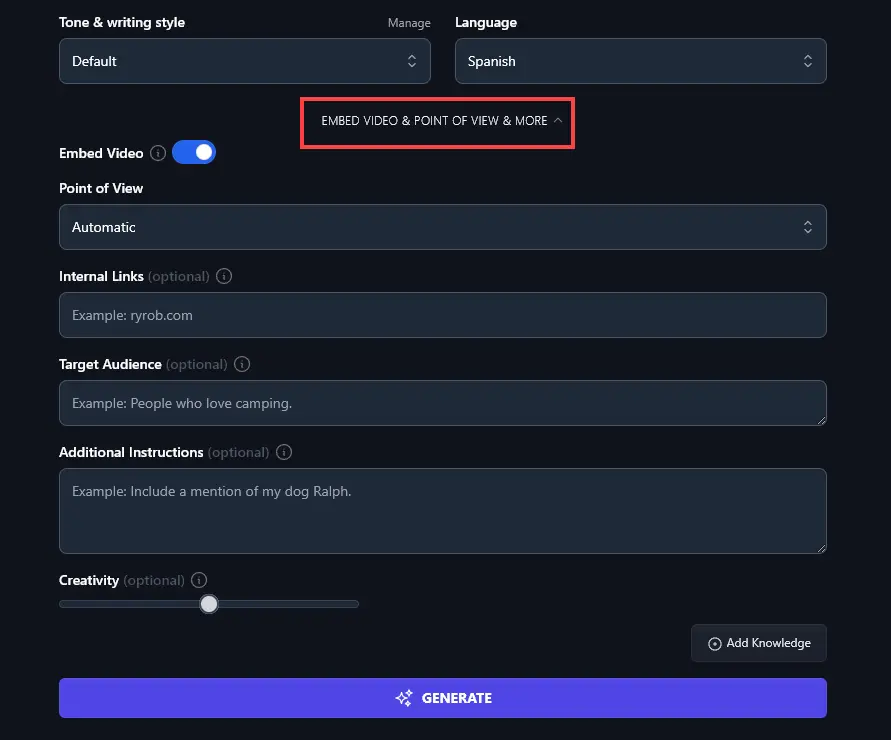
The first of these options is “Embed Video”. Having this option toggled on will include your YouTube video near the start of your article.
This is a great option in most cases: it helps boost views of your video as blog readers may opt to watch it instead of (or as well as) reading your article.
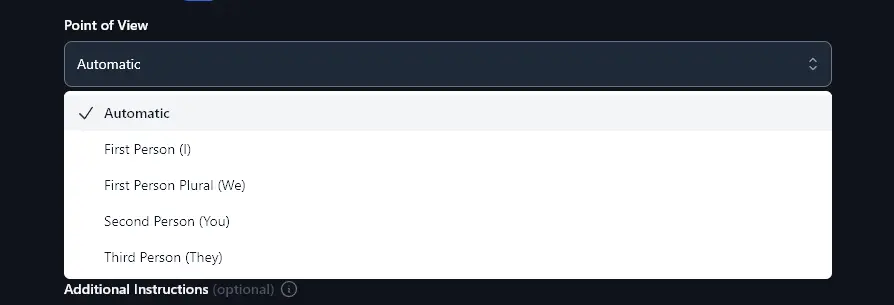
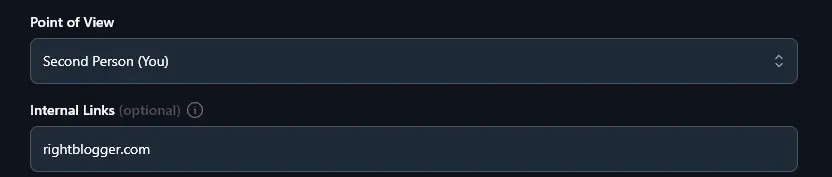
7. Point of View (Choose the Perspective for Your Post)
Do you want to write your post from your own perspective, to the reader, or in a more neutral way?
Most bloggers will write posts to “you” the reader, and this usually makes the most sense for the point of view.
But in some situations, you may want to tweak things. The Point of View feature lets you choose from different perspectives:
- First Person (I): useful if your video is primarily based on your own story or experience
- First Person Plural (we): useful if your video has two or more presenters or you’re sharing a joint story
- Second Person (you): a good option for focusing on your reader and their needs and interests
- Third Person (they): a more neutral tone that can be good if you’re talking about mistakes or problems
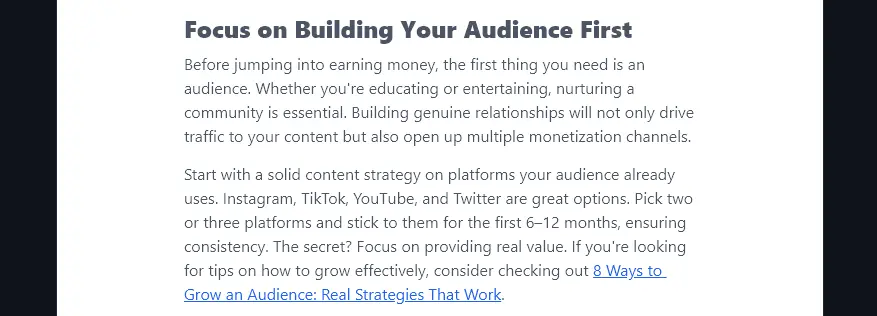
8. Internal Links (Add Your Website or Blog URL Here)
The AI can automatically include internal links in your post, if you let it know the URL of your website or blog. This is great for your SEO and also helps encourage readers to stick around for longer on your site.
Just enter your URL and the AI will do the rest.
You’ll see relevant links included throughout your article:
9. Target Audience (Who is Your Post Aimed At?)
You can specify a target audience for your post, helping the AI to tailor the content specifically to that audience’s needs and preferences.
In many cases, this will be a similar target audience to your video. However, you might find there are some important differences between your YouTube and blog audiences: for instance, maybe your YouTube audience tends to be younger whereas your blog audience is a little older. Your audiences may also have different levels of expertise.
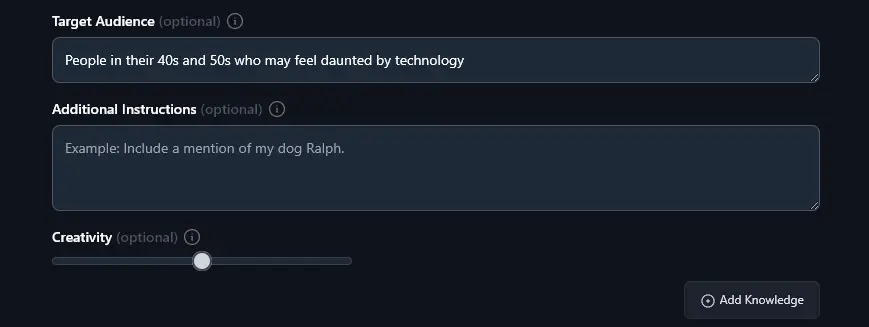
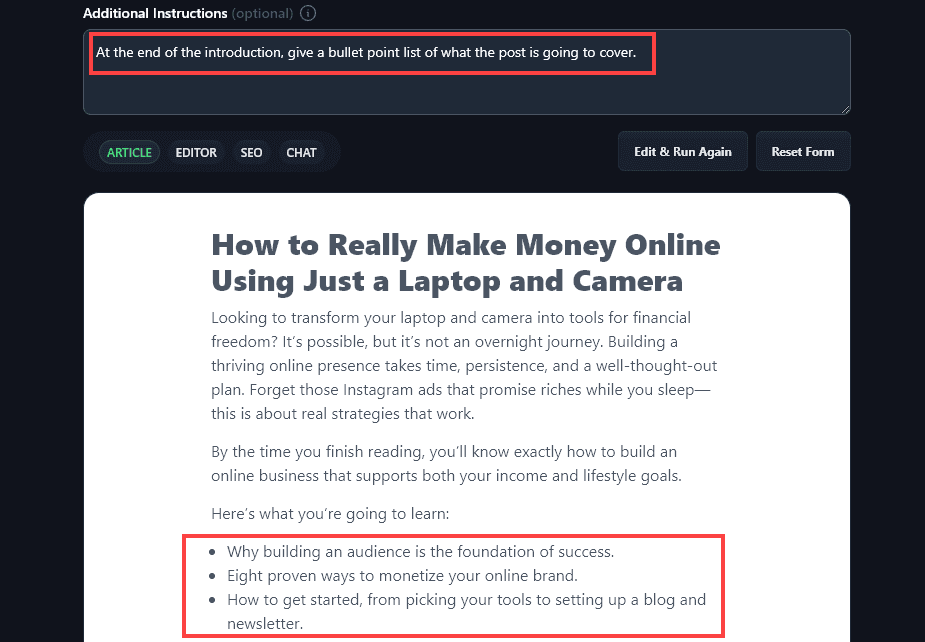
10. Additional Instructions (Give the AI More Info or Specific Constraints)
In the Additional Instructions section, you can include anything else you want.
That might be information that you want added to the AI-generated content (e.g. “add a bonus section on…”) or it could be related to how you want the post formatted, perhaps if you use specific templates for your posts.
11. Creativity (Choose How Unusual or Predictable to Make Your Post)
Finally, you can choose how “Creative” the AI should be. This essentially determines whether the AI should be predictable or unpredictable when writing your post. The more creative you ask it to be, the more unusual the generated blog post will be.

High creativity can help you avoid bland AI-like content … but it can also make your post a bit too off-beat. Low creativity keeps things simple … but it can be boring.
We usually recommend sticking with the midway point for Creativity, but you can experiment by changing the slider to see if a different setting suits your blogging style better.
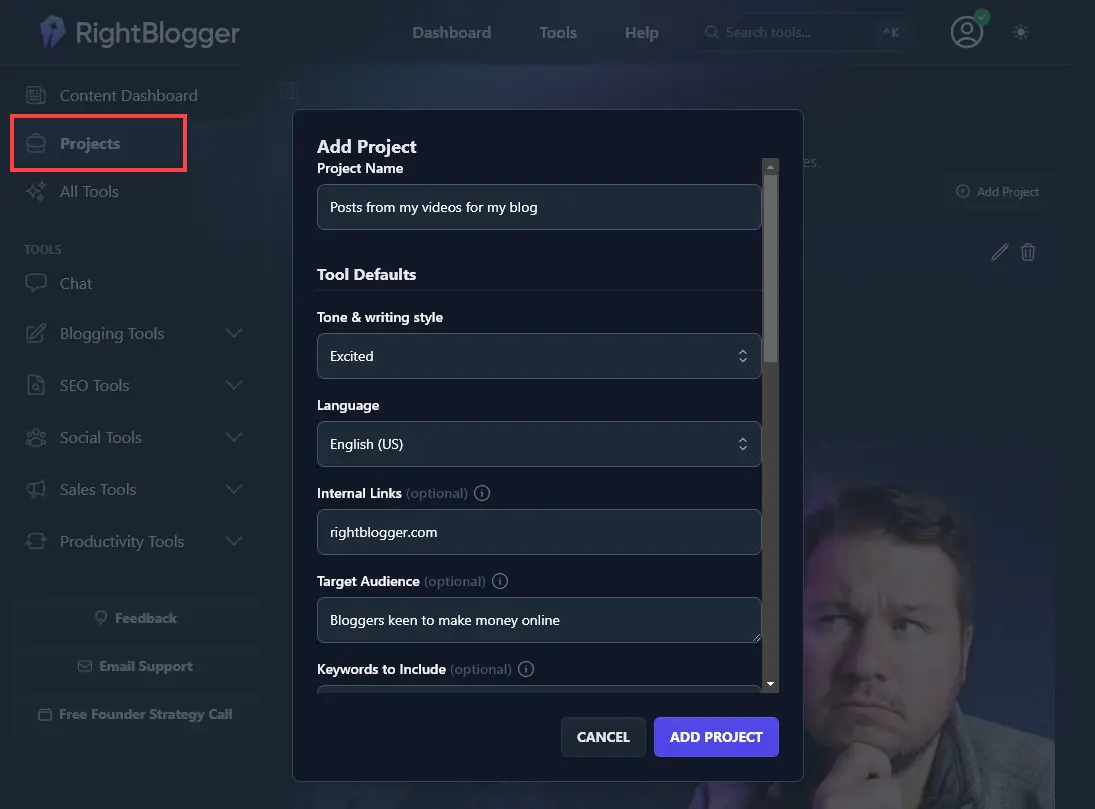
Tip: Set Up a Project if You’re Creating Multiple Blog Posts From Videos
RightBlogger’s Projects feature lets you create a project and pre-populate the information in the Video to Blog Post Tool (and all our other tools).
This will speed up your workflow if you’re creating several videos for the same blog.
AI Video to Blog Post Generator FAQs
Can I Use YouTube Videos in My Blog Post?
Yes!
Obviously, you can always use your own YouTube videos in your blog post.
When it comes to other people’s YouTube videos, it’s generally considered okay to embed these on your blog too (as embedding it will link back to their original video, on YouTube). Keep in mind, though, that if someone has violated copyright in their video, you probably don’t want to associate yourself with that.
If you’re at all unsure whether you can use a particular video within your blog content, check with a legal professional.
Can I Use TikTok, Instagram Reels, or Other Videos with This Tool?
The YouTube to blog converter also works just fine with TikTok videos. Simply paste in the TikTok URL for the video and go ahead and create your blog post.
We’ve got support for Instagram Reels coming soon, too.
If you’ve got a transcript for your video (no matter where it’s hosted!) then you can just paste the whole transcript into the tool, as well.
Can I Automate My YouTube to Blog Workflow with RightBlogger?
Yes! RightBlogger includes autoblogging tools that monitor your YouTube channel and automatically turn new videos into SEO-friendly blog posts as soon as they go live on your channel.
How Do I Embed a Video Into My Blog?
With WordPress, embedding a video is one paste. Copy the YouTube URL, paste it into the place you want it in your post, and the WordPress block editor handles the rest.
If you’re using a different blogging platform, you may need the embed HTML code for the video.
How Else Can I Write a Blog Post Using AI?
RightBlogger is packed with 100+ tools to help you with your blogging and business. When it comes to writing blog articles, we have a whole suite of AI content creation tools to help, including:
- The Article Writer: draft a full-length blog post from just a keyword or idea
- The Listicle Writer: draft a listicle-style blog post
- The Post Outline tool: come up with a detailed outline to use with AI or a human writer
- Post Introduction, Paragraph, Post Conclusion, and FAQ tools: draft your post bit by bit
If you’re at an earlier stage of the content creation process, we have AI-powered idea generators like the Post Ideas and Smart Suggest tools.
What Other AI Tools Can I Use to Help Me Grow My Business?
We have dozens of powerful AI tools in RightBlogger. Some of the best ones you can use for fast business growth are:
- The Keyword Research Tool: pinpoint the best keywords to target for great traffic
- The Backlink Checker Tool: find out the exact backlinks your competitors’ are getting
- The Feature/Benefit/Outcome Tool: write stronger sales copy for your products or services
- The Ad Copy Tool: create ad copy to draw in readers
We’ve also got loads of social media tools to help you build your following online, podcast tools, AI video script and outline tools, and much more. You could even use our AI image generator for custom visuals.
Who is the YouTube Video to Blog Post Generator Tool Designed For?
When we created the video to post tool, we had in mind both YouTubers and bloggers. Whether you’re a YouTube creator who wants to build a profitable website and business or a blogger looking to repurpose content, it should be a great fit. We had all sorts of use cases in mind, from repurposing a product tutorial to creating blog posts for beginners based on super-simple videos.
It’s also a great tool for content marketers, content creators, SEO professionals carrying out content creation for their clients, and small business owners. Basically, if you’re using both video creation and written content for your digital marketing, this tool is for you!
How Do I Sign Up for RightBlogger and How Much Does it Cost?
You can sign up for RightBlogger and start using all our tools right away. Every plan includes unlimited AI words and a 30-day money-back guarantee.
Every RightBlogger plan gives you full access to all 100+ blogging tools with unlimited AI words. You also get premium features like SEO reports, premium courses, AI Chat, MyTone, and the Knowledge Library. Plans start at $49/mo for Solo, $69/mo for Pro (our most popular, with team seats and 90 SEO reports/mo), or $199/mo for Agency.
Conclusion
A video-first workflow works best when you reuse what you already made. RightBlogger converts your YouTube content into an SEO-friendly post that readers can scan, search engines can index, and your site can link internally. After you generate the draft, run the built-in SEO report, tighten up your headings and meta, and turn each upload into a long-term asset.