New in RightBlogger: Automatic Internal Links & Project Presets
Add relevant links from Google-indexed pages while loading saved settings for each site.


We have two new exciting updates inside RightBlogger today that we couldn’t wait to show you, and I’m confident will help you create even stronger content (that gets results), faster: automatic internal links and Projects.
If you’re the dive right in type, you can head over to Projects inside your account and start getting things setup right now, or stay with us here and we’ll walk you through what’s goin on with these two awesome new features…

Here are the two major new features we’ll be touring today:
- Automatic Internal Links: Now inside the Article Writer and Video to Blog tools (coming soon to more), you can automatically ask the AI to link internally to relevant content already published across your site, as fits throughout the content you’re creating. This will significantly improve your site-wide SEO over the long haul, and saves a lot of time & effort chasing down relevant internal links to include during the editing process.
- Projects: You can now create presets for all your favorite settings, and easily organize the content you create inside RightBlogger. If you create a lot of content using our tools, and often find yourself toggling certain settings in similar ways, Project presets will save you a ton of time. If you’re creating & managing content for multiple sites, businesses, or clients, then Projects is really going to improve your workflows & organization.
Automatic Internal Links
First up, let’s talk internal links. This is one of the most requested features we’ve had over the past few months, and we wanted to do this right. You can now automatically add relevant internal links to your articles while drafting them.
This is a game changer for all of us who want to improve our site’s SEO (as we publish new content) without spending tons of time combing through old blog posts & pages we should link to during the creation & editing processes.
Andy’s going to walk you through how internal links work:

How the New Internal Links Feature Works
So, what’s the deal with internal links? If you’re not using them effectively in your blog content, then you’re missing out on a fundamental SEO best practice.
🔗 Internal linking is all about creating a web of content that links your site together, helping users navigate your website, and keeping them on your pages longer. Google loves this too, because it also enables their search crawlers (a backbone of what powers their algorithm) to better understand what your site is about and how your content should be ranked in search results. More internal links = people and search engines better understanding your site.
Now, here’s where RightBlogger’s internal links feature comes in:
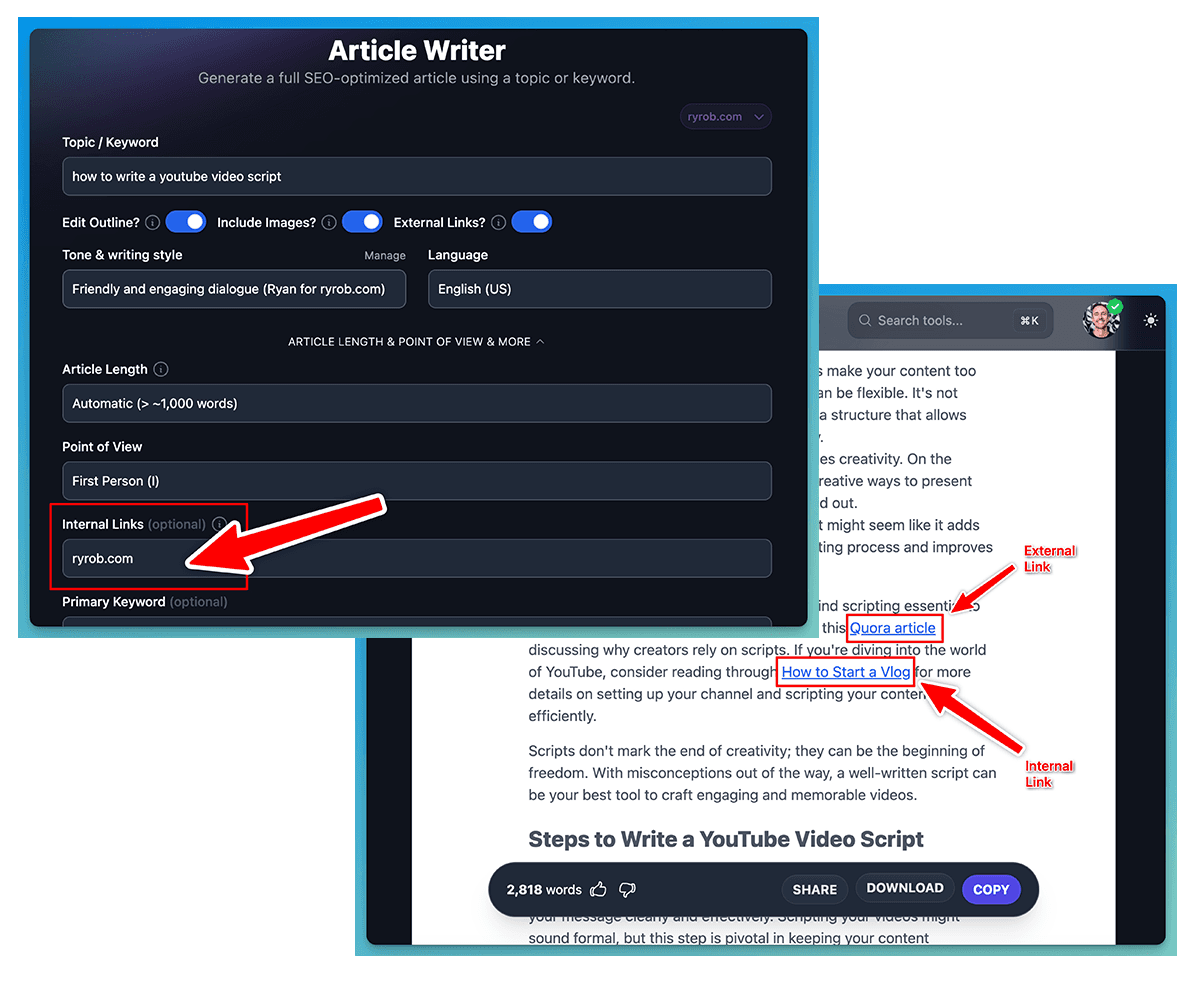
With internal links inside the Article Writer and Video to Blog tools, you simply add your domain name into the internal links field (under Advanced options), and boom, RightBlogger pulls in relevant, indexed pages from your site and incorporates them as internal links with relevant anchor text in your content as you create.
This feature uses Google’s index of your site to pull in those pages, so just be aware, if your site isn’t public yet (or you block search engines from crawling your site), this feature may not work for you yet.
👋 Pro tip: Inside Projects, you can set a default site URL to be scanned for relevant internal links anytime you create content using these tools inside RightBlogger. Just select which Project you want to work with when beginning your creation process, and you’ll see that (plus more presets) automatically fill in.
Why Internal Linking Matters (a LOT) for SEO
If you want a little more on why internal linking is such a big deal, I’ve got you covered. There are three major wins you get when you thoughtfully internally link your content together:
- Keep Visitors Engaged: When readers find helpful, relevant links in your content, they’re more likely to click through to other pieces you’ve written, too. That means more time spent on your site, and the more pieces of content a reader consumes, the more likely they are to deepen their relationship with you.
- Improve Your Site’s Overall SEO: Google loves a well-structured site. By linking relevant post-after-post, you’re signaling that your content is meaningful and consistent. Plus, you’re making it much easier for search engines to crawl your site. Internal linking is a powerful SEO strategy that a lot of content creators often overlook.
- Boost Individual Page Authority: When you interlink your content, you’re also giving older posts a chance to shine again. Those internal connections help spread any “SEO value” from high-performing articles to other important posts on your site. These multiple connections throughout your blog contribute to better individual rankings, too.
Manually Review Your Links: AI as an Assistant (Not a Replacement)
It’s important to remember that AI-generated content won’t always be perfect, and it benefits greatly from your review. Not all internal link choices will be flawless every time, and some link opportunities could still be left on the table.
This feature will take about 90% of the internal linking work off your plate, but I recommend manually reviewing every link to make sure everything aligns perfectly with the content, because you know best, which pieces of content you want to point your readers towards, next.
Projects: Organize Content & Define Presets for Your Settings
If you create a lot of content inside RightBlogger, then you’ve felt the pain of constantly retyping (or copying & pasting) the same settings over and over again… or you’re digging through your work to find the settings that worked so well for that one article you created last week.
Good news, RightBlogger Projects is here to fix that. This new feature simplifies your creation process by helping you organize your content and set up presets for the settings you like best, at the Project level. It’s really useful for working with multiple sites and if you create a lot of content (like I do) using RightBlogger.
Check out this walkthrough from Andy to see exactly how Projects works:

What is RightBlogger Projects?
The Projects feature in RightBlogger is a content organization tool. It groups your work into ‘projects’ and allows you to save key settings (like language, writing style, and internal links) all in one place. Whether you’re managing multiple clients, deal with more than one blog, or just want to move faster with the content you create, Projects helps you keep your work structured, quick, and consistent.
The Perks of Using Projects
- Save Presets for Every Project: Save your most-used creative settings like tone, audience, internal links, target audience, point of view, keywords, creativity, knowledge and even additional instructions. Why toggle your favorite settings the same way each time, if you don’t have to?
- Organize Content By Project: You’ll now get all your content neatly categorized by project inside your Content Dashboard, making it easy for you to manage various clients, multiple different blogs, or projects you’re working on.
How to Get Started with Projects: Step-by-Step Walkthrough
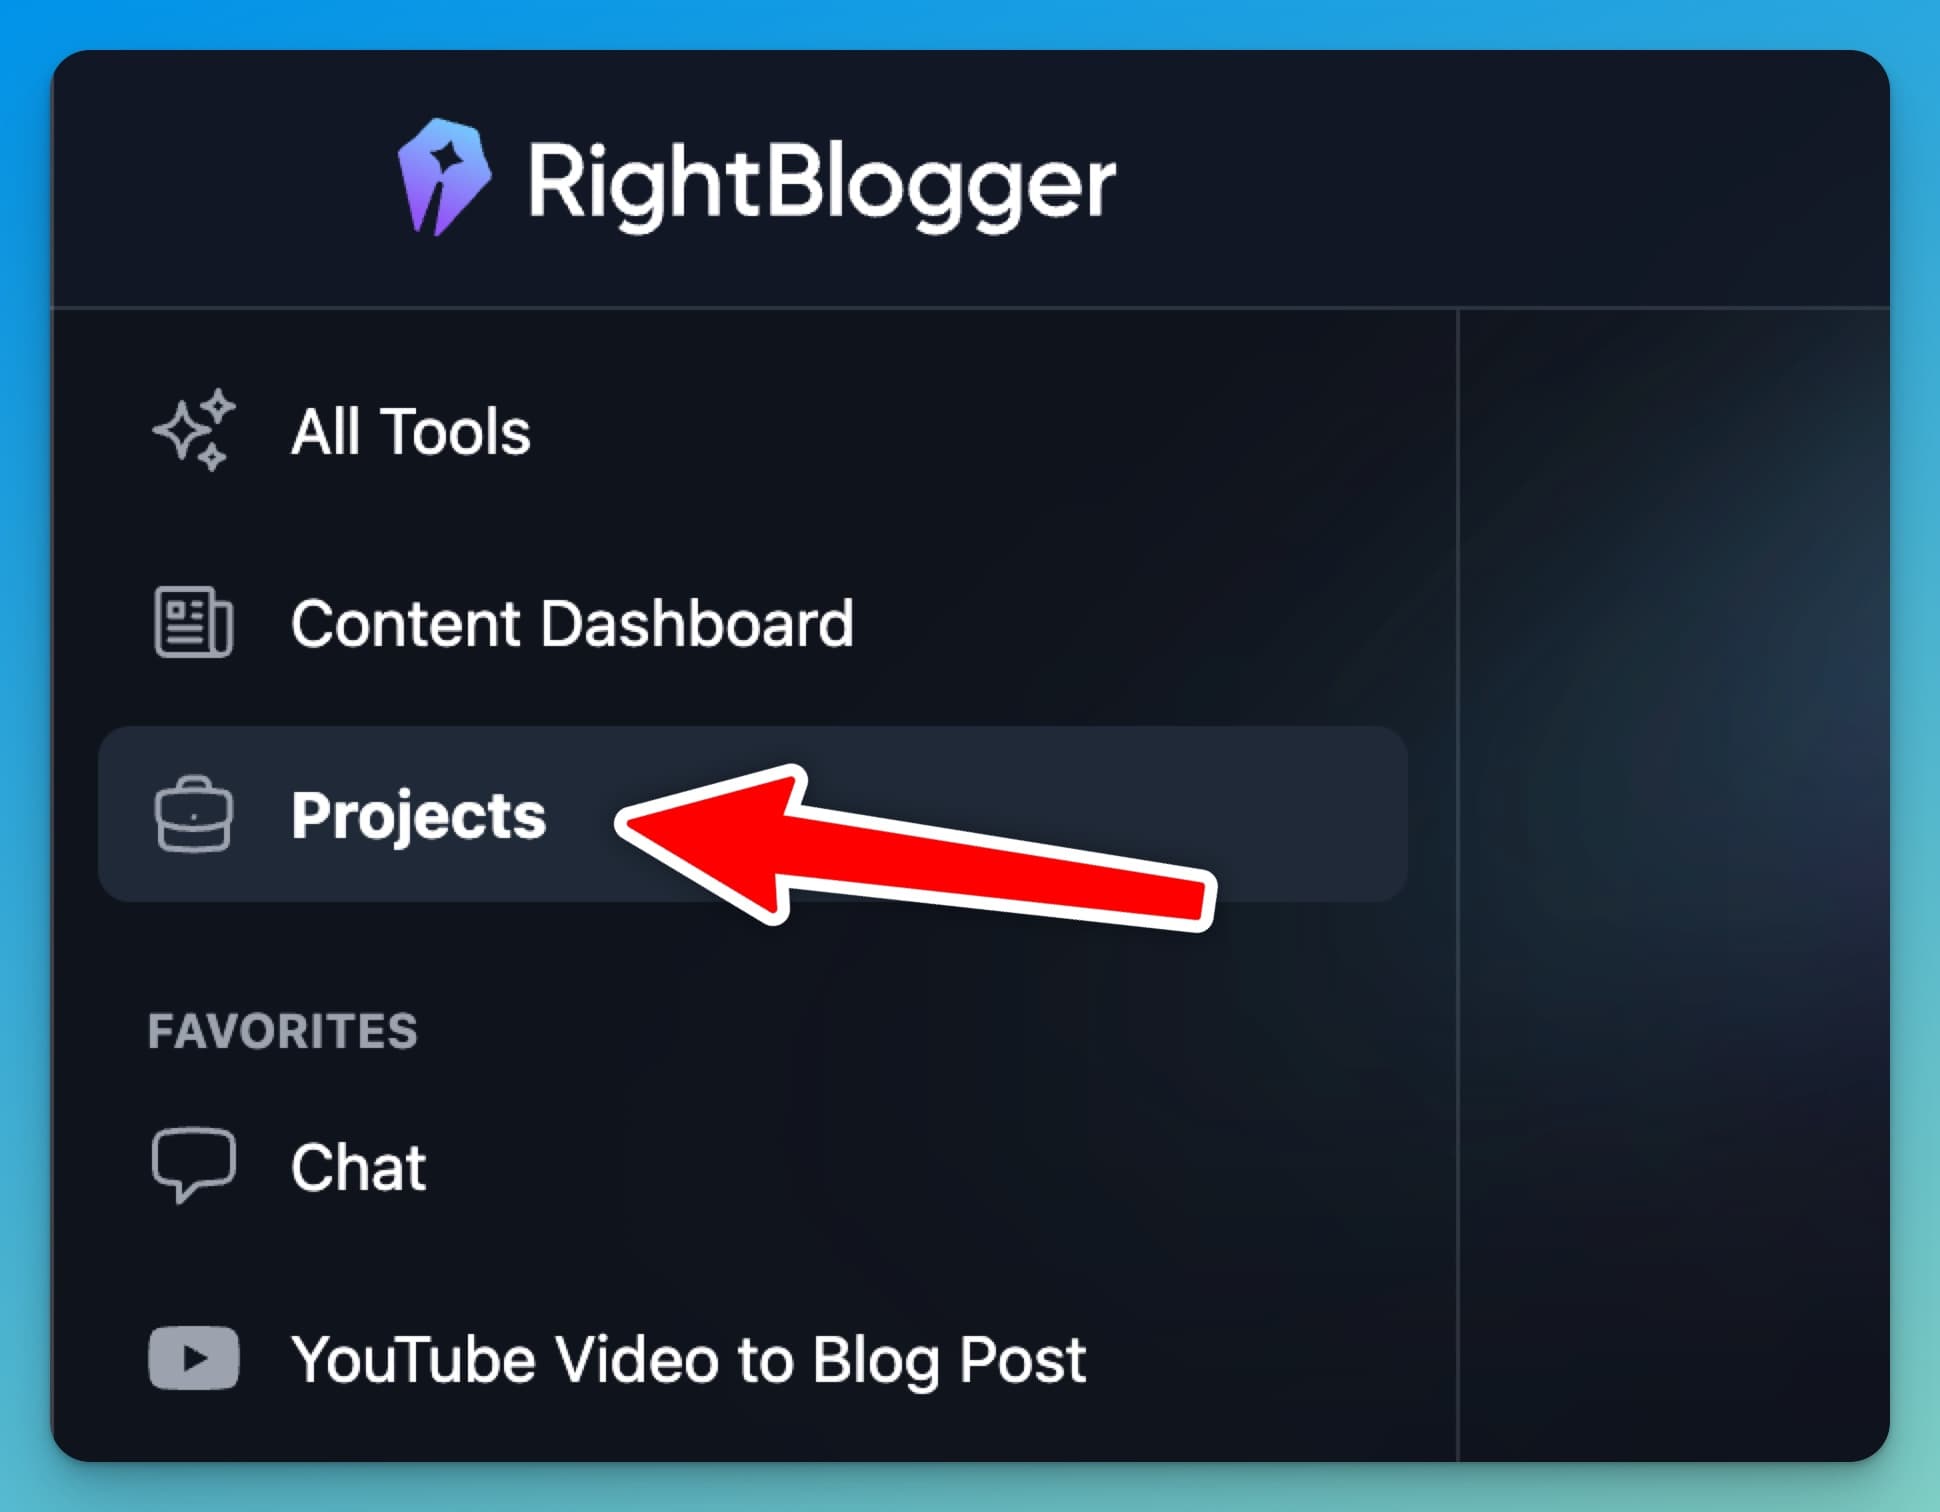
1. Create a New Project
When you’re logged into RightBlogger, you’ll find the ‘Projects’ tab on the lefthand menu just below Content Dashboard:
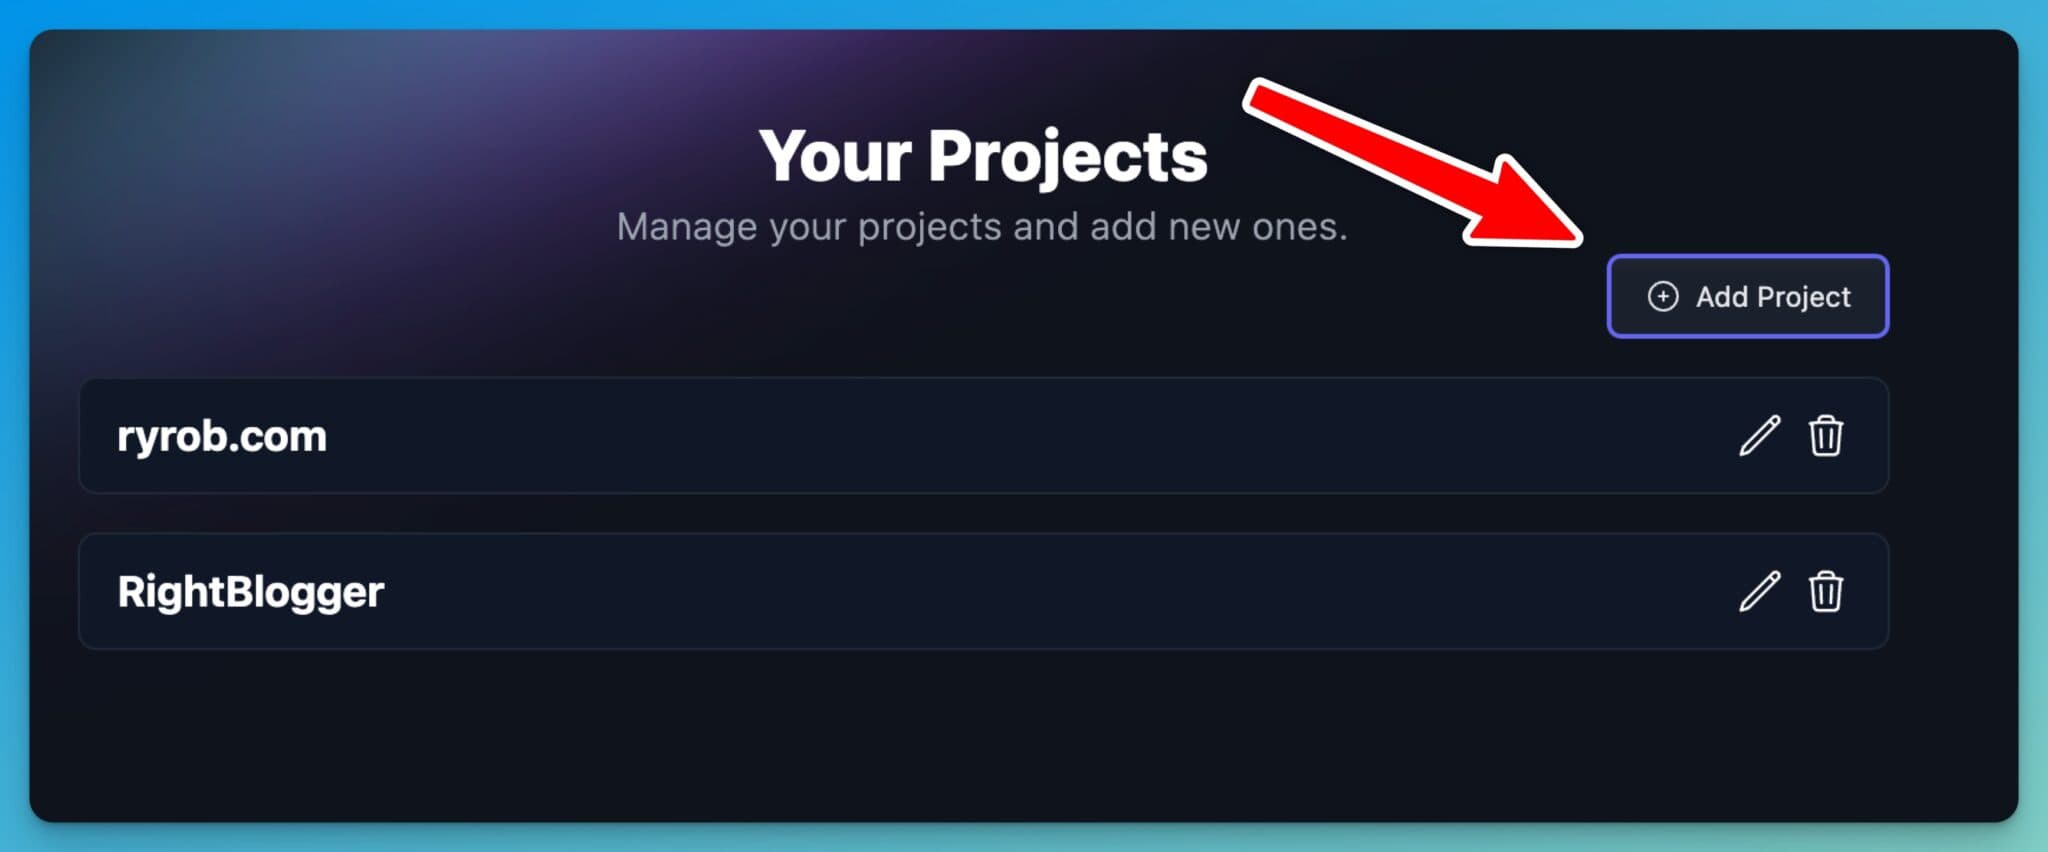
I already set up a couple in my account, but it’s super simple to create a new project. Once you’re on the Projects page, just hit “Add Project,” name your project, and choose the settings that match your project needs.
Since these settings will be the default whenever you work with a Project during your content creation process, it’s smart to spend a few minutes really dialing in these project-wide settings to make your creation process that much faster & easier at scale.
Here are all the settings you can define inside each of your Projects:
- Set the tone (I highly recommend choosing one of your MyTones that’ll write in your voice, style & tone)
- Define the target audience (i.e. gluten-free home cooks, real estate agents, content marketers)
- Automatically add internal links in all your creations
- Default a language to create all your project’s content in
- Include a comma-separated list of keywords by default in your creations
- Choose the same point of view you like writing in each time you create
- Include a set of your favorite additional instructions for things like formatting you like, words to avoid, or other personalizations
- Set the creativity level for your content
- Use a particular set of knowledge pieces from inside your account
Once everything looks good, just hit Add Project, and you’re ready to go!
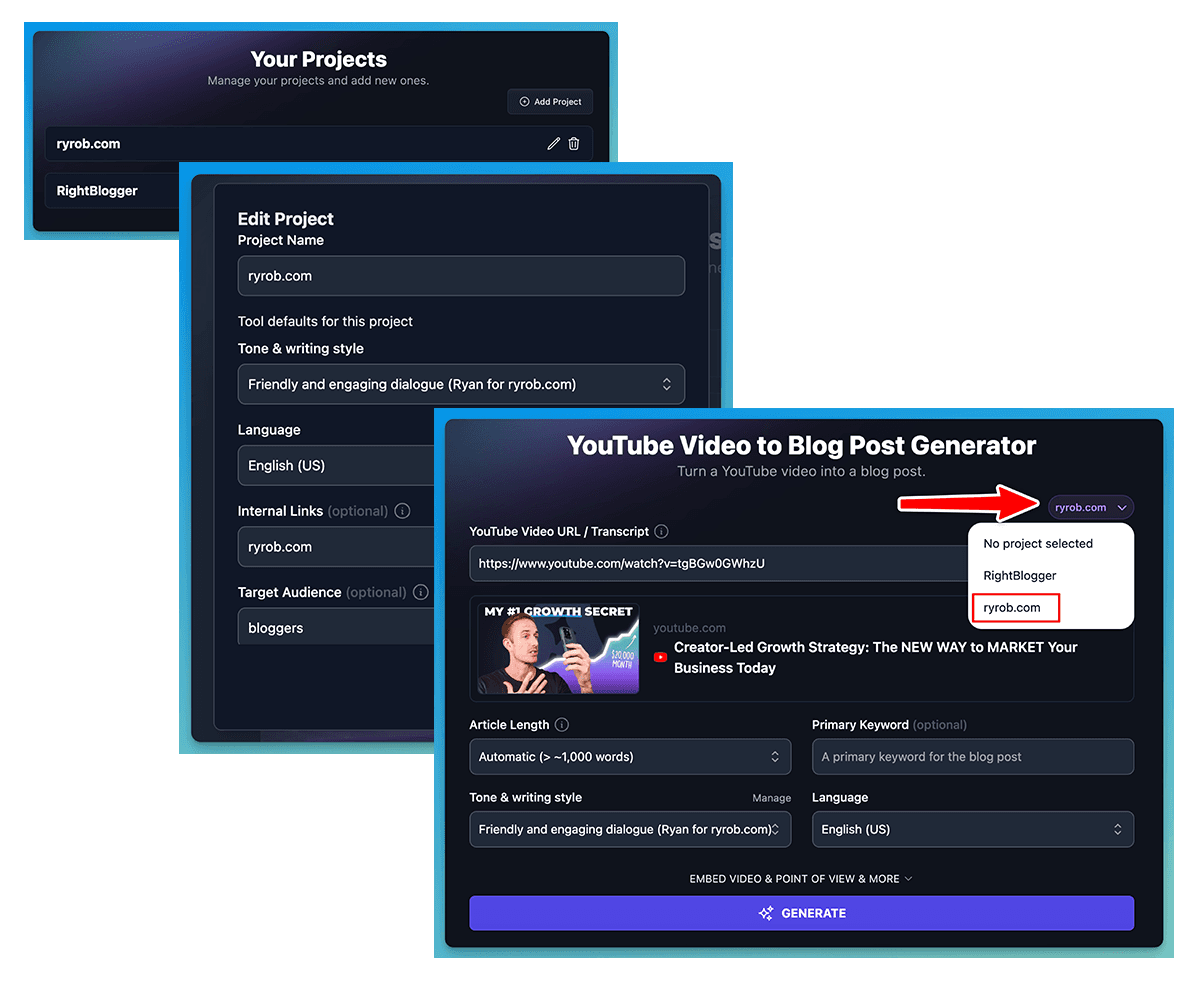
2. Using Projects with Content Creation Tools
Here’s where things get really cool. When you’re using tools like the Paragraph Generator or Blog Post Ideas Generator, you’ll notice a “Choose a Project” button at the top right.

Click that, select your project, and, boom, your settings will load instantly. No more redoing parameters like tone or target audience every time you go to create long-form content in RightBlogger.
Just be careful! If you’ve already made changes on a tool page, selecting a project will overwrite those details. I recommend selecting your project first, before you start toggling any other settings in a tool.
Better Organized Content in Your Dashboard
One of my favorite features of Projects is how easy it makes content organization inside your Content Dashboard. Once Projects is enabled, your dashboard gets a new column that shows which piece of content belongs to which project.
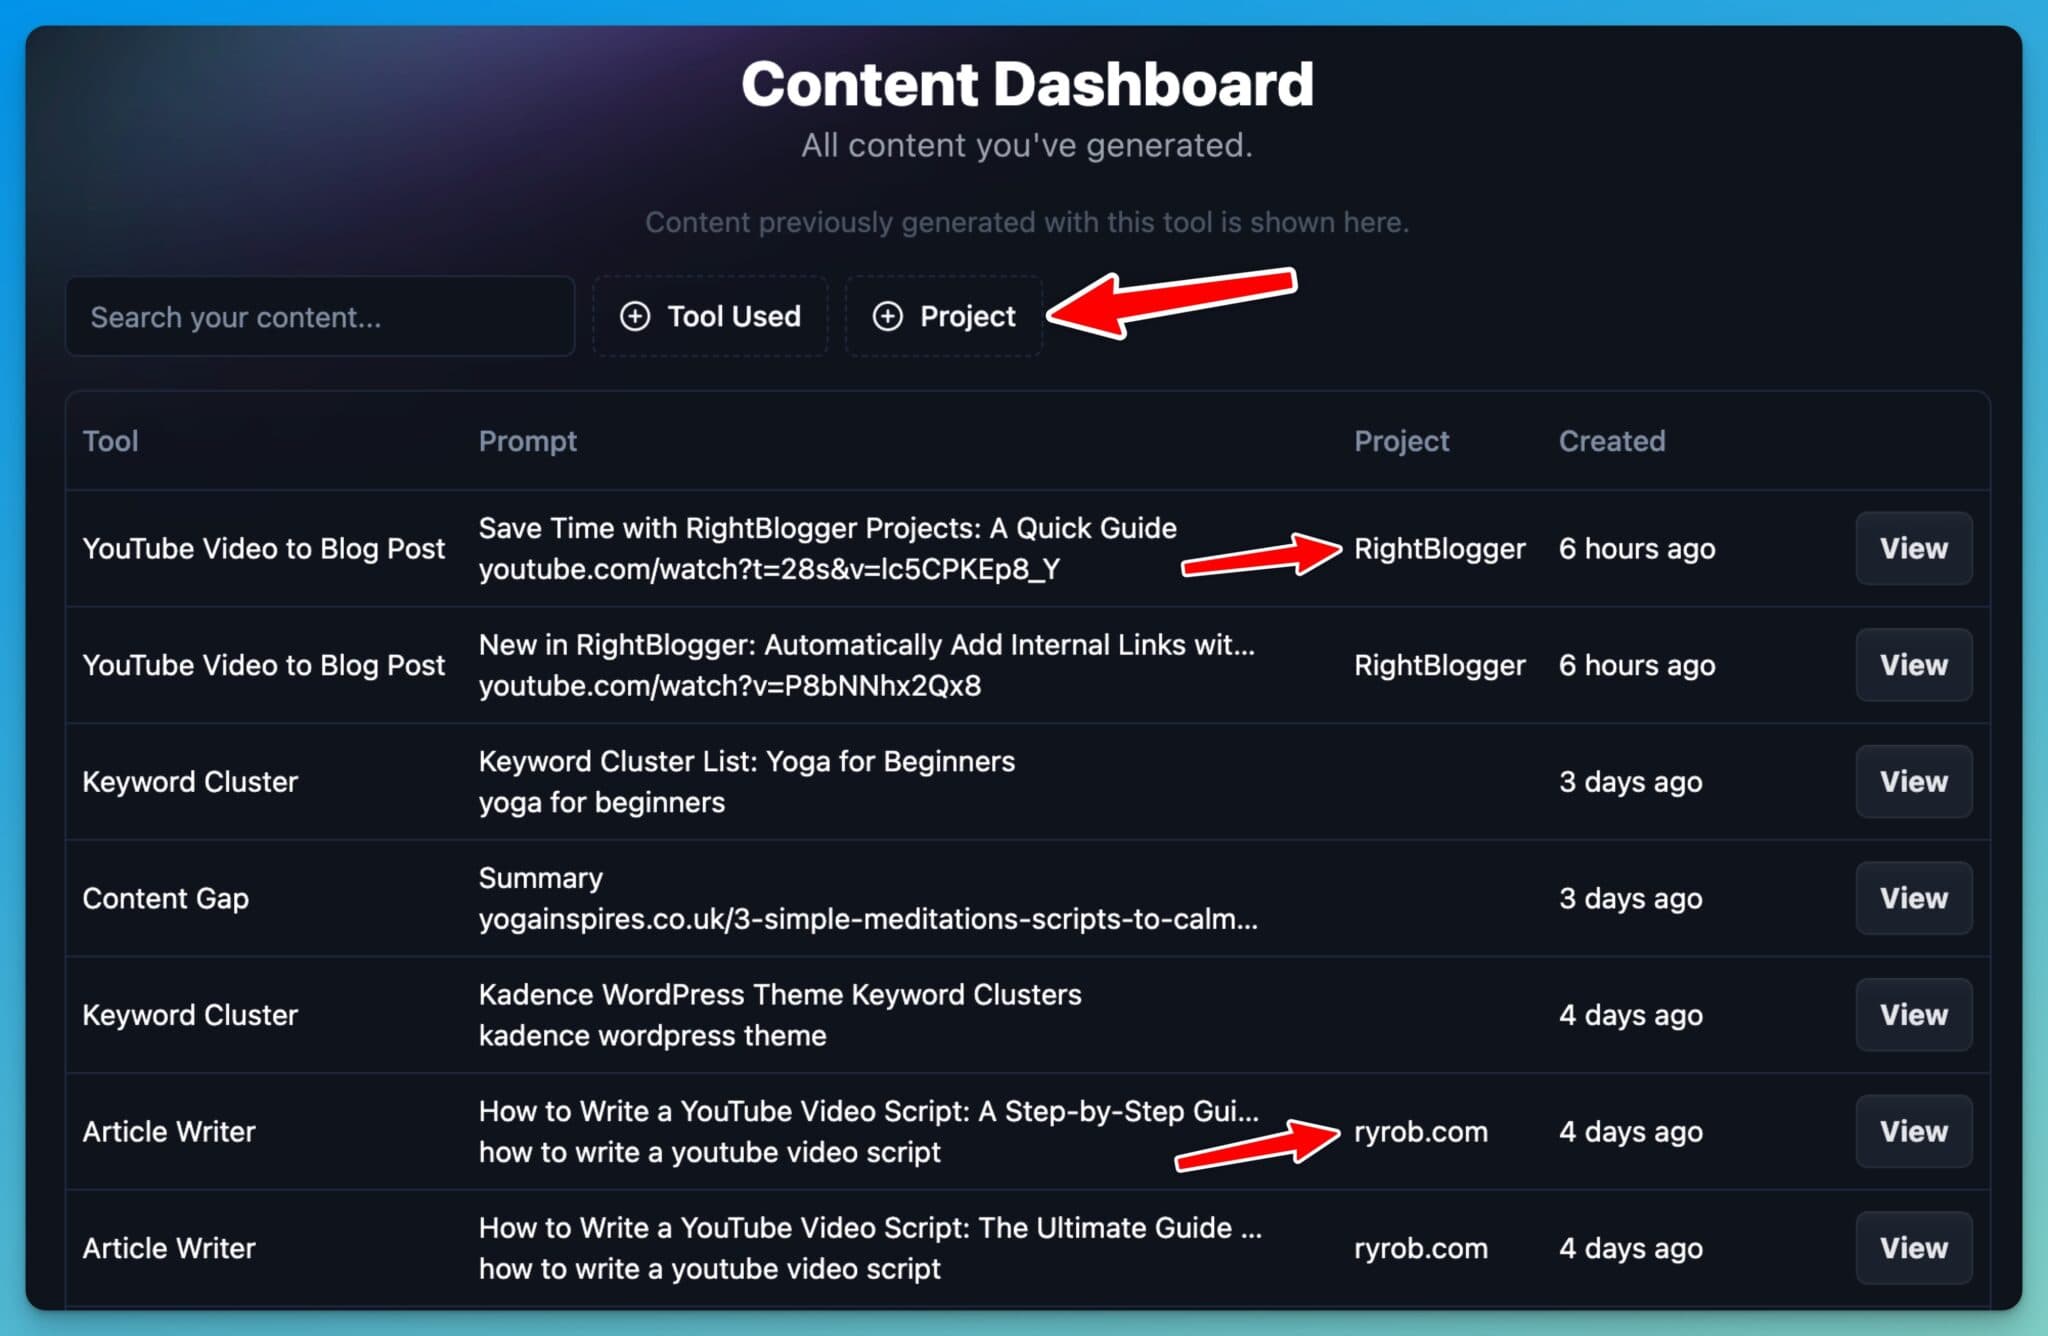
If you’ve got multiple clients or blogs you’re managing, you can just filter by the specific project and see all the relevant content in one place.
Share Your Feedback with Us
We’re always looking for ways to improve RightBlogger, and especially the Projects feature. Whether you’ve run into a snag or have a suggestion on how to make this feature even more useful, we want to hear from you.
Feel free to use our public Feedback Board, or shoot us a quick email to contact@rightblogger.com or by using the Contact button located at the bottom of our site.
We hope you enjoy these two quick updates and if there’s a feature you’re craving, just let us know!

Article by
RightBlogger Co-Founder, Ryan Robinson helps creators grow online businesses and calls himself a recovering side project addict.


New:Site Agent
Automated SEO Blog Posts That Work
Try RightBlogger for free, we know you'll love it.
- Automated Content
- Blog Posts in One Click
- Unlimited Usage


Leave a comment
You must be logged in to comment.
Loading comments...