How to Write a Blog Post with AI (Using Free Tools) to Get SEO Traffic
Start with a low-difficulty keyword, then refine the outline and draft before publishing.

Yes, you can absolutely write a blog post with AI and still get an avalanche of Google traffic… if you go about it the right way. And trust me, it’s a big if. But that’s why you’re here, and I’ll show you how.
Google has no problem with AI (artificial intelligence) being used to create blog content. In fact, their own guidelines explain that they are “rewarding high-quality content, however it’s produced.“
The key here though, is high-quality. Every aspect of your blog post needs to be great, the relevance of the idea itself, the structure of the content, the points you make, the writing style, and the quality of your editing.
It might sound like a big ask. And it is! You’re not going to get there with just a basic ChatGPT prompt. Instead, you either need significant prompt engineering experience, or you need a high-quality AI tool that’s designed around writing long-form content. Enter: RightBlogger’s SEO Article Writer.

RightBlogger’s Article Writer is one of our most powerful and flexible AI-powered tools… it can produce incredible results, both engaging content and SEO traffic.
You can try it out completely free with a free RightBlogger account, creating articles up to 2,000 words long and using almost all the Article Writer’s advanced features.
Complete Blog Automation in Minutes
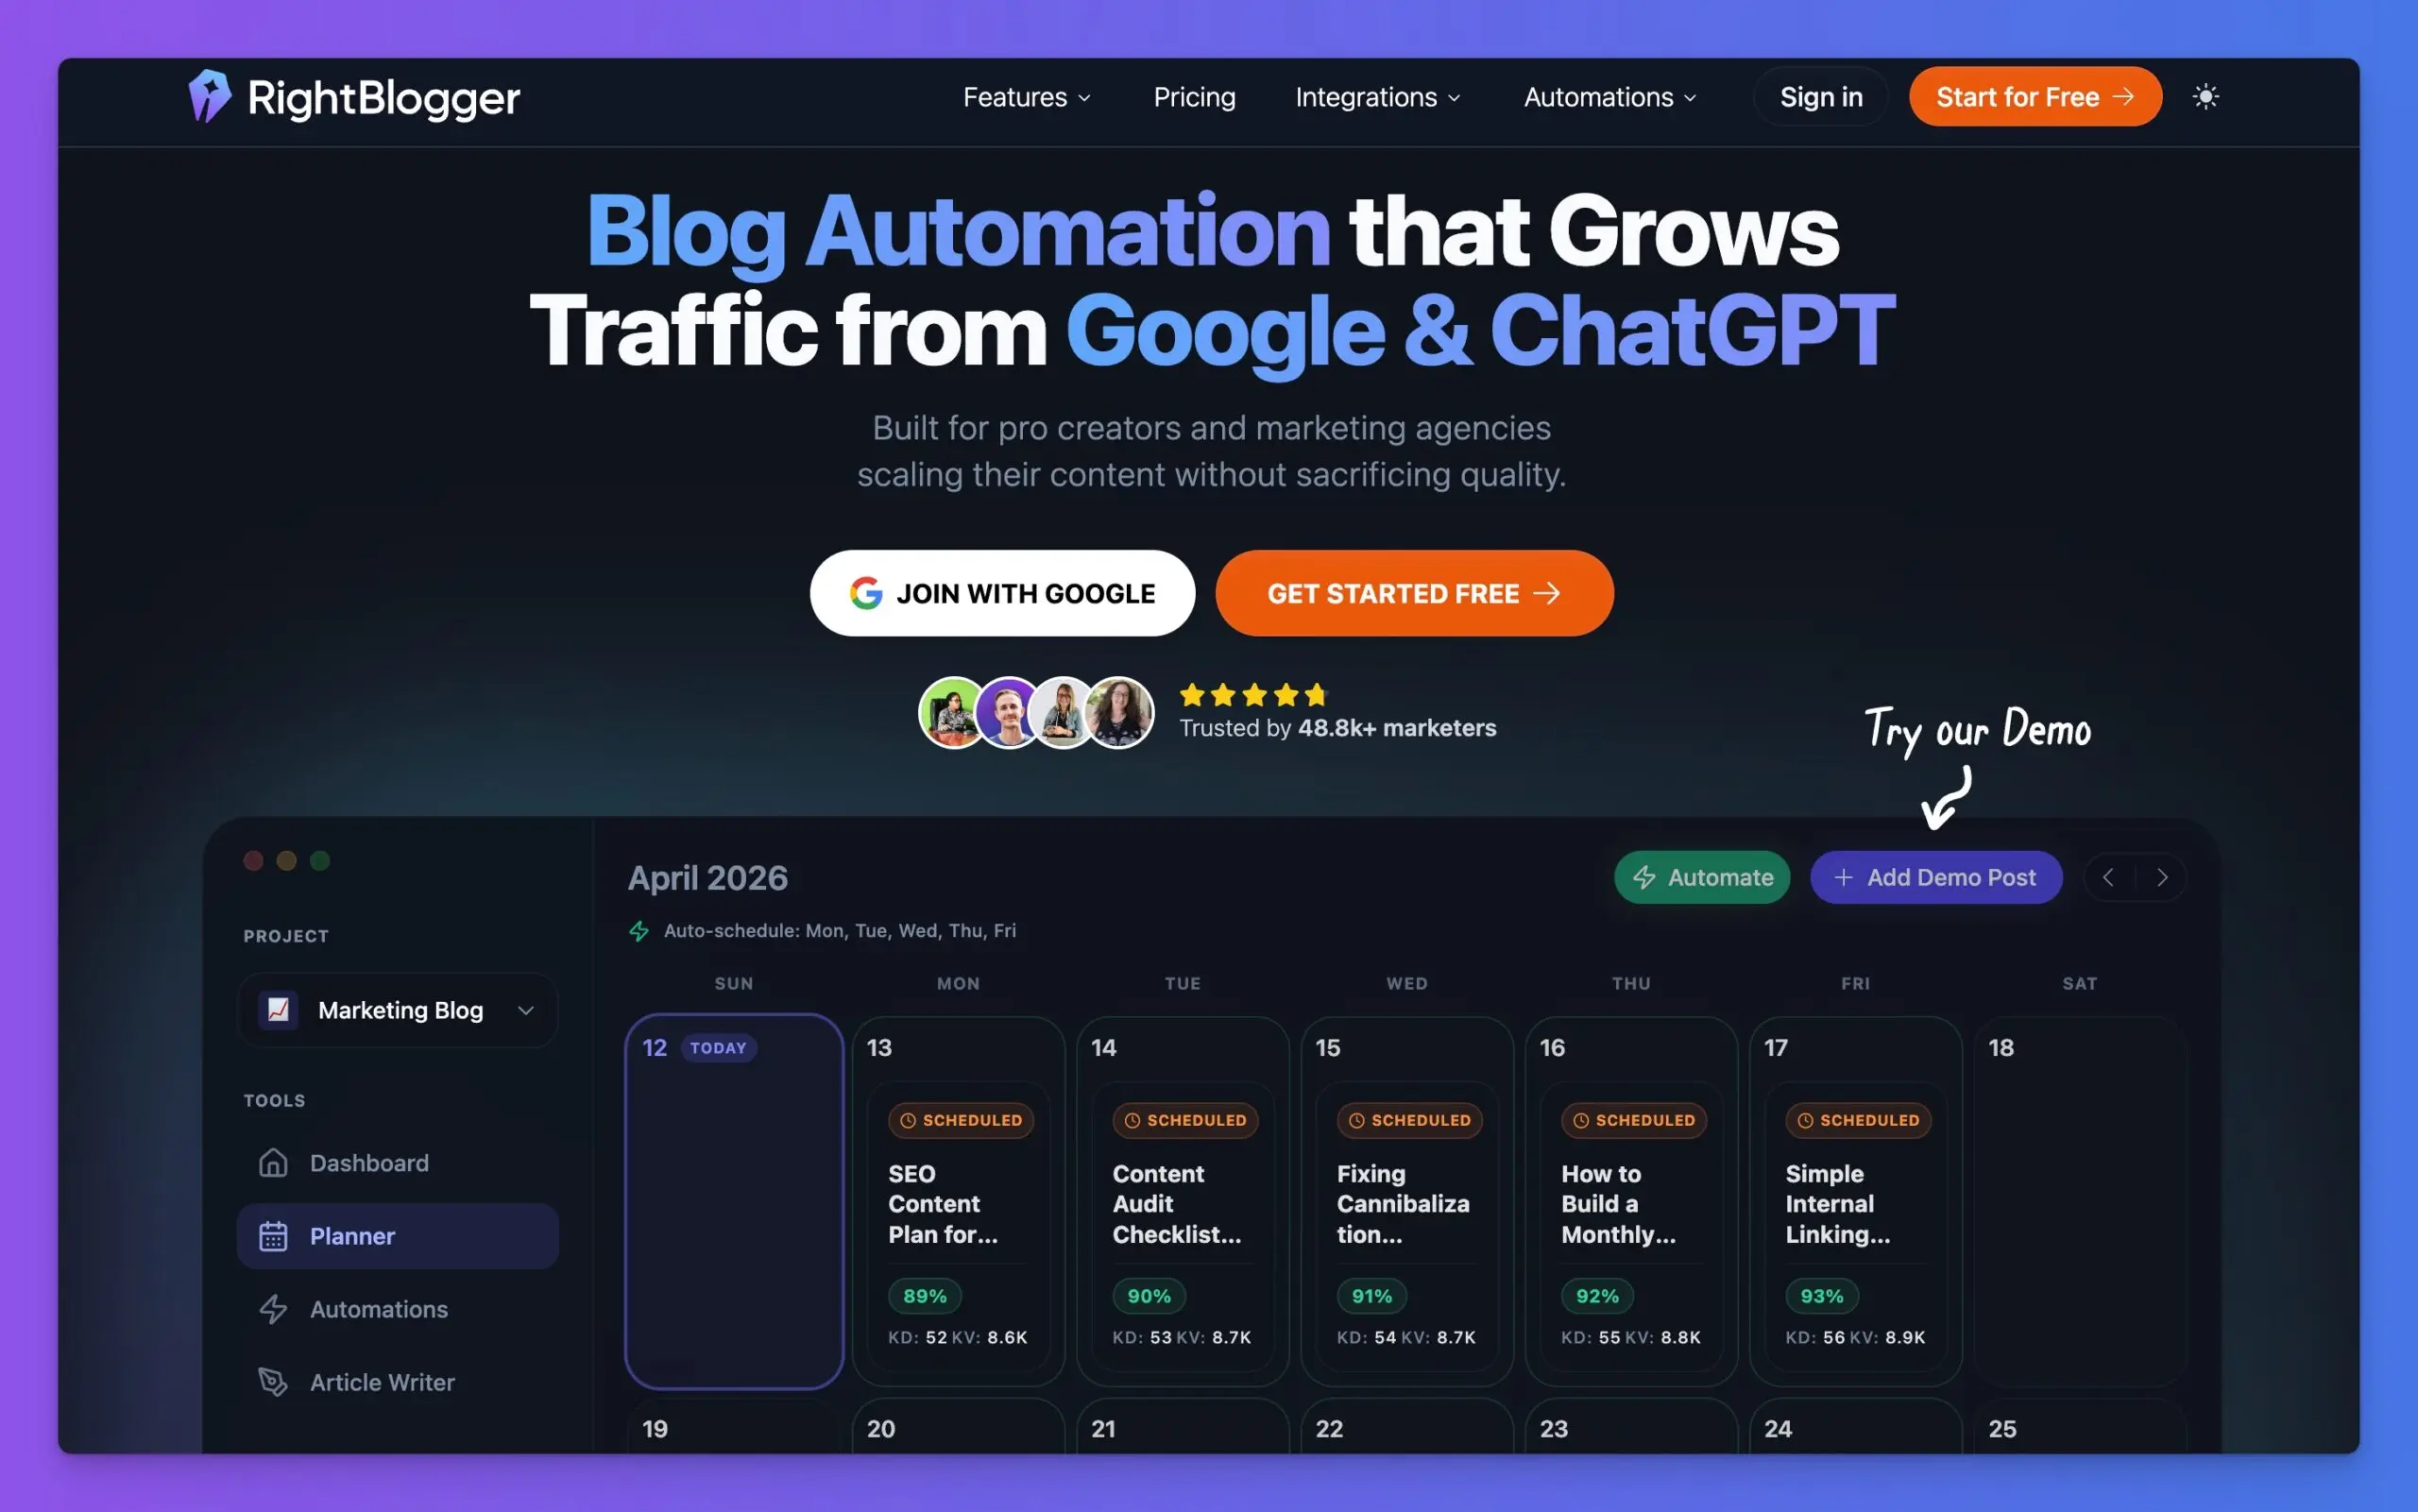
Join 48,879+ marketing agencies, pro creators, and marketing teams in using RightBlogger’s powerful blog automation system. You’ll drive more traffic from Google and ChatGPT with our AEO & SEO automated publishing. Plus, you’ll access our library of 80+ standalone tools, online courses, a private community, and more.
In this guide, we’ll take a closer look at the Article Writer, everything it can do, and how to write a blog post with AI (step-by-step).
How to Write a Blog Post with AI (Using RightBlogger’s Article Writer)

Now, let’s run through the process of writing a blog post using AI tools like our Article Writer.
1. Choose the Right Keyword for Your AI Blog Post
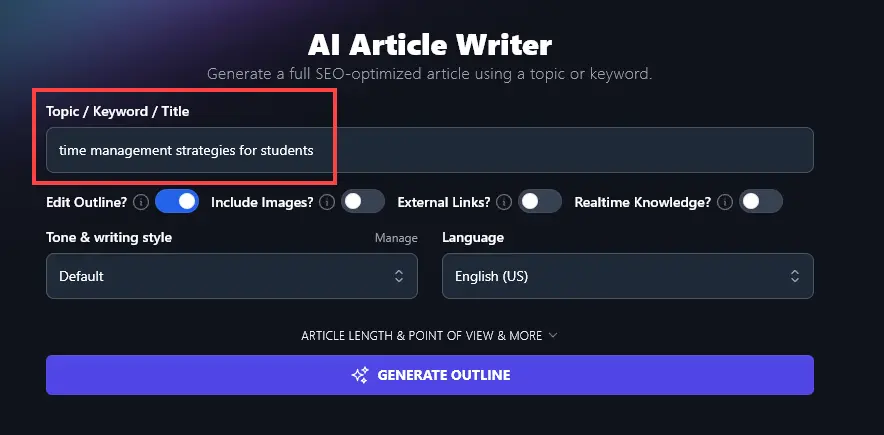
First, make sure you’ve got a great primary keyword in mind, something that matches a real audience pain point, challenge, or problem area you’re going to help your people solve. Enter this into the Keyword/Topic box.
Tip: If you’ve already got a full title, incorporating your keyword, you can instead add the whole title here.
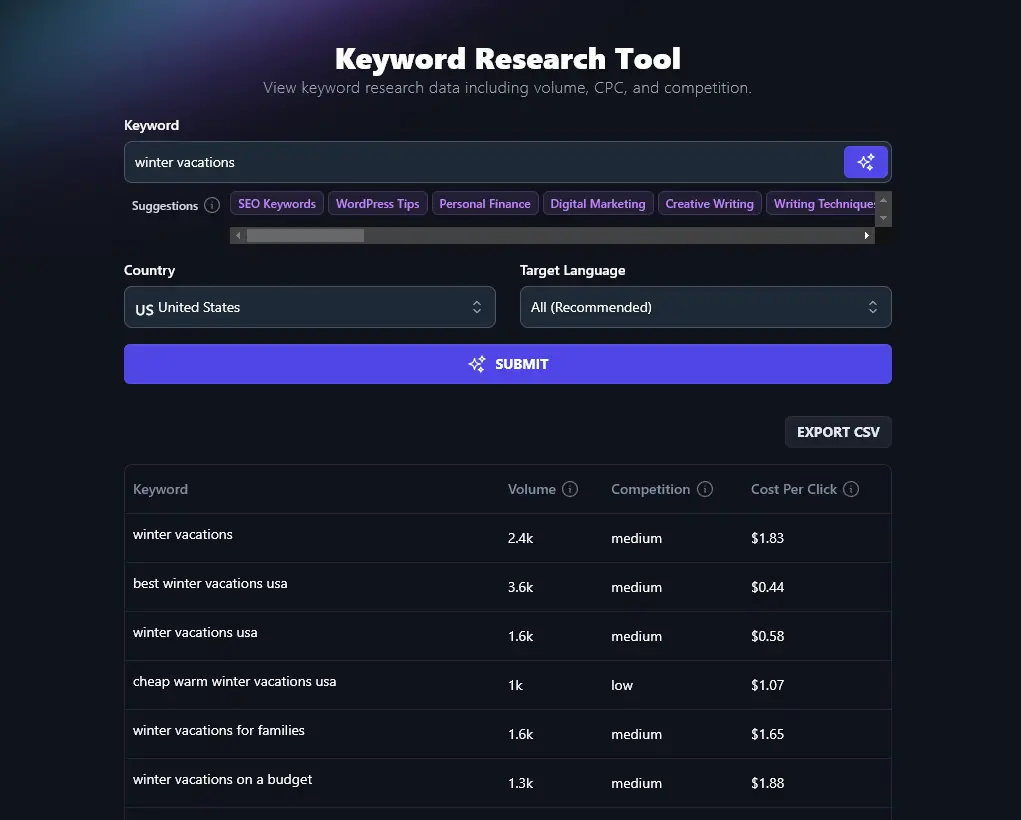
Not sure what your keyword should be?
Use the free Keyword Research Tool to pinpoint a low difficulty and medium volume (1,000–10,000 monthly searches) keyword.
2. Setup Your Advanced AI Article Writer Options
The Article Writer has a wide range of advanced options so you can tailor the output to exactly what you need in your content.
Tip: Without you, the AI blog posts you write (using any tool) are going to sound bland and uninspired. Garbage in, garbage out, as they say. It’s super important you add as much detail into the creation process as possible, if you want an output that’ll actually deliver real results.

I recommend choosing:
- Edit Outline? Yes. This lets you refine exactly what the AI will include in your blog post. You’ll be able to move sections around, add or remove sections, and reword subheadings.
- Include Images? Maybe. Images are good for your SEO (search engine optimization). If you already have your own images or plan to create/source images, you can leave this option switched off.
- Include Links? Yes. Linking out to other reputable sites can improve your own SEO.
- Realtime Knowledge? Maybe. This lets the AI find up-to-date information for your article, which is most relevant when you’re creating time-sensitive or news-oriented content and you want up-to-the-day level updates on the topics at hand.
3. Choose the Perfect Tone and Writing Style
If you’ve tried to use AI to write blog posts, you might have been put off by the stilted writing style. I’m sure you know what I mean – articles that sound like this:
In today’s fast-paced world, it’s easy to get caught up in day-to-day expenses, subscriptions, and the pressure to keep up with trends. However, one of the most important financial habits you can develop is saving money regularly. Whether you’re saving for a rainy day, a big purchase, or retirement, boosting your savings is essential for financial stability.
Filler phrases like “in today’s fast-paced world” are a dead giveaway that this is written by an AI. And words like “however” “essential” and “stability” are all quite formal. The reader is probably already yawning within a few sentences.
In RightBlogger, we’ve fixed this in all our AI writing tools with our Tone & Writing Style dropdown. You can choose from a whole range of tones for your blog post, like Casual, Excited, Authoritative, Passionate, and Professional.

Tip: On any RightBlogger plan (starting at $49/mo), you can also use our MyTone feature. This lets you create up to 5 completely custom tones. The AI can read a sample of your writing and analyze the tone, saving this to use across all RightBlogger’s content creation tools.
4. Select Your Language (or Version of English) for Your AI-Generated Content
Writing in a language other than English? Or in UK vs US English? RightBlogger has you covered.
Our AI can produce content in over 100 different languages. We also have 4 different varieties of English to choose from, for the US, UK, Canada, and Australia.

5. Generate Your Blog Post
Go ahead and generate your blog post.
If you chose to edit your outline (which I strongly recommend), you’ll first see an outline that you can adjust however you like.

Once you’re happy with the outline, you can generate the full post:
You’ll want to read through and check you’re happy with the content before publishing it. You might want to tweak the introduction and conclusion in particular to fit with your own style.
Using the Advanced Options in the Article Writer
Even on our free plan, you get access to most of the Article Writer’s advanced options. You can open these up by clicking on the “Point of View & Blank Outline? & More” link.

Let’s take a quick look at all the options you can adjust:
- Article Length: Every plan includes unlimited article length. All plans let you generate as many articles as you want with unlimited AI words.
- Point of View: Do you want to write to “you”, the reader, or in a more neutral third-person (“they”) way? Set that here.
- Blank Outline? If you’ve already created an outline, this option gives you the opportunity to upload it before the article is generated.
- Include Relevant Video? The AI will try to find a suitable video to go with your article.
- Internal Links: Add your URL and the AI will include links to (relevant) content on your site.
- Primary Keyword: Enter the keyword you want this article optimized around.
- Target Audience: Give details of your target audience so the AI can tailor the article to them.
- Additional Instructions for Outline: Add any extra information for the outline (e.g. “include a section on…”)
- Additional Instructions for Article: Add any extra information for the article (e.g. “include an exercise for the reader at the end”).
- Creativity: You can adjust this to get the AI to be more (or less!) creative and unpredictable in its response.
Using the Chat Feature to Refine Your Draft Blog Post
On any RightBlogger plan, you’ll get a Chat option for your finished article.

You can use this to have the AI adjust your article however you want. For instance, if the tone isn’t quite right, you could say, “Rewrite this article in a more engaging, conversational tone.” RightBlogger understands normal language, so you can give it instructions in the Chat in the same way you’d ask a human writer for edits.
Using the Editor to Manually Edit Your Blog Post
The Editor tab lets you make any manual edits you want to your post. Rewrite sentences, change headings, add bold text … you can use it just like a word processor.
You can even get AI help with your editing. Just highlight the piece of text you want to change and click “Ask AI”. You’ll see a range of options, like “Paraphrase”, “Expand Text,” and more.

Getting SEO Elements (Meta Tags and More) for Your Blog Post
RightBlogger can instantly create a meta title (SEO title), meta description, permalink (URL/slug), and primary keyword for your post. Just click on the SEO tab to get all of these, and boost your SEO optimization with zero effort.

Adding Images to Your Blog Post
The Images tab lets you search a range of free stock websites for images you can use in your post. It’ll also create title cards for social media.

Write a Blog Post Using the Article Writer Today, For Free
RightBlogger’s Article Writer is an incredibly powerful tool for bloggers and content writers, especially when you know how to fine-tune the different options to create an article that suits you and your blog perfectly.
It can easily get you 95% of the way there to a finished post, and you can use the Editor or Chat features to get the AI to make any revisions you want.
You can get started with a RightBlogger account and create blog posts of any length with unlimited AI words, plus full access to all of our blogging tools.
Want to automate your blog and unlock team collaboration? Our Pro plan at $69/mo adds team seats, 90 SEO reports per month, and premium courses. Every plan includes unlimited AI words with no caps at all.
Complete Blog Automation in Minutes
Join 48,879+ marketing agencies, pro creators, and marketing teams in using RightBlogger’s powerful blog automation system. You’ll drive more traffic from Google and ChatGPT with our AEO & SEO automated publishing. Plus, you’ll access our library of 80+ standalone tools, online courses, a private community, and more.

Article by
RightBlogger Co-Founder, Ryan Robinson teaches 500,000 readers and jokes that he is a recovering side project addict.


Automated SEO Blog Posts That Work
Try RightBlogger for free, we know you'll love it.


Leave a comment
You must be logged in to comment.
Loading comments...