Free TikTok Safe Zone Template (UI Overlay PNG)
Download a free 4K transparent PNG that shows exactly what TikTok covers.


There’s literally nothing worse than uploading a video to TikTok and having all the important parts get cut off by UI elements. Things like captions or visual elements are unreadable in TikTok’s interface. This is typically due to TikTok overlaying comments and other interface elements over your video.
This is where having a TikTok safe zone template comes in handy. RightBlogger has made this free to download TikTok UI overlay so you can easily see where to put elements while editing your videos for TikTok and Reels.
Be sure to also check out RightBlogger’s TikTok idea generator tool (you can try it free ☺️)
Of course this overlay is helpful for other platforms as well like Instagram Reels and YouTube Shorts. TikTok has made this format of viewing so popular. A general rule of thumb is that if the video works in TikTok and it’ll work on these other social platforms.
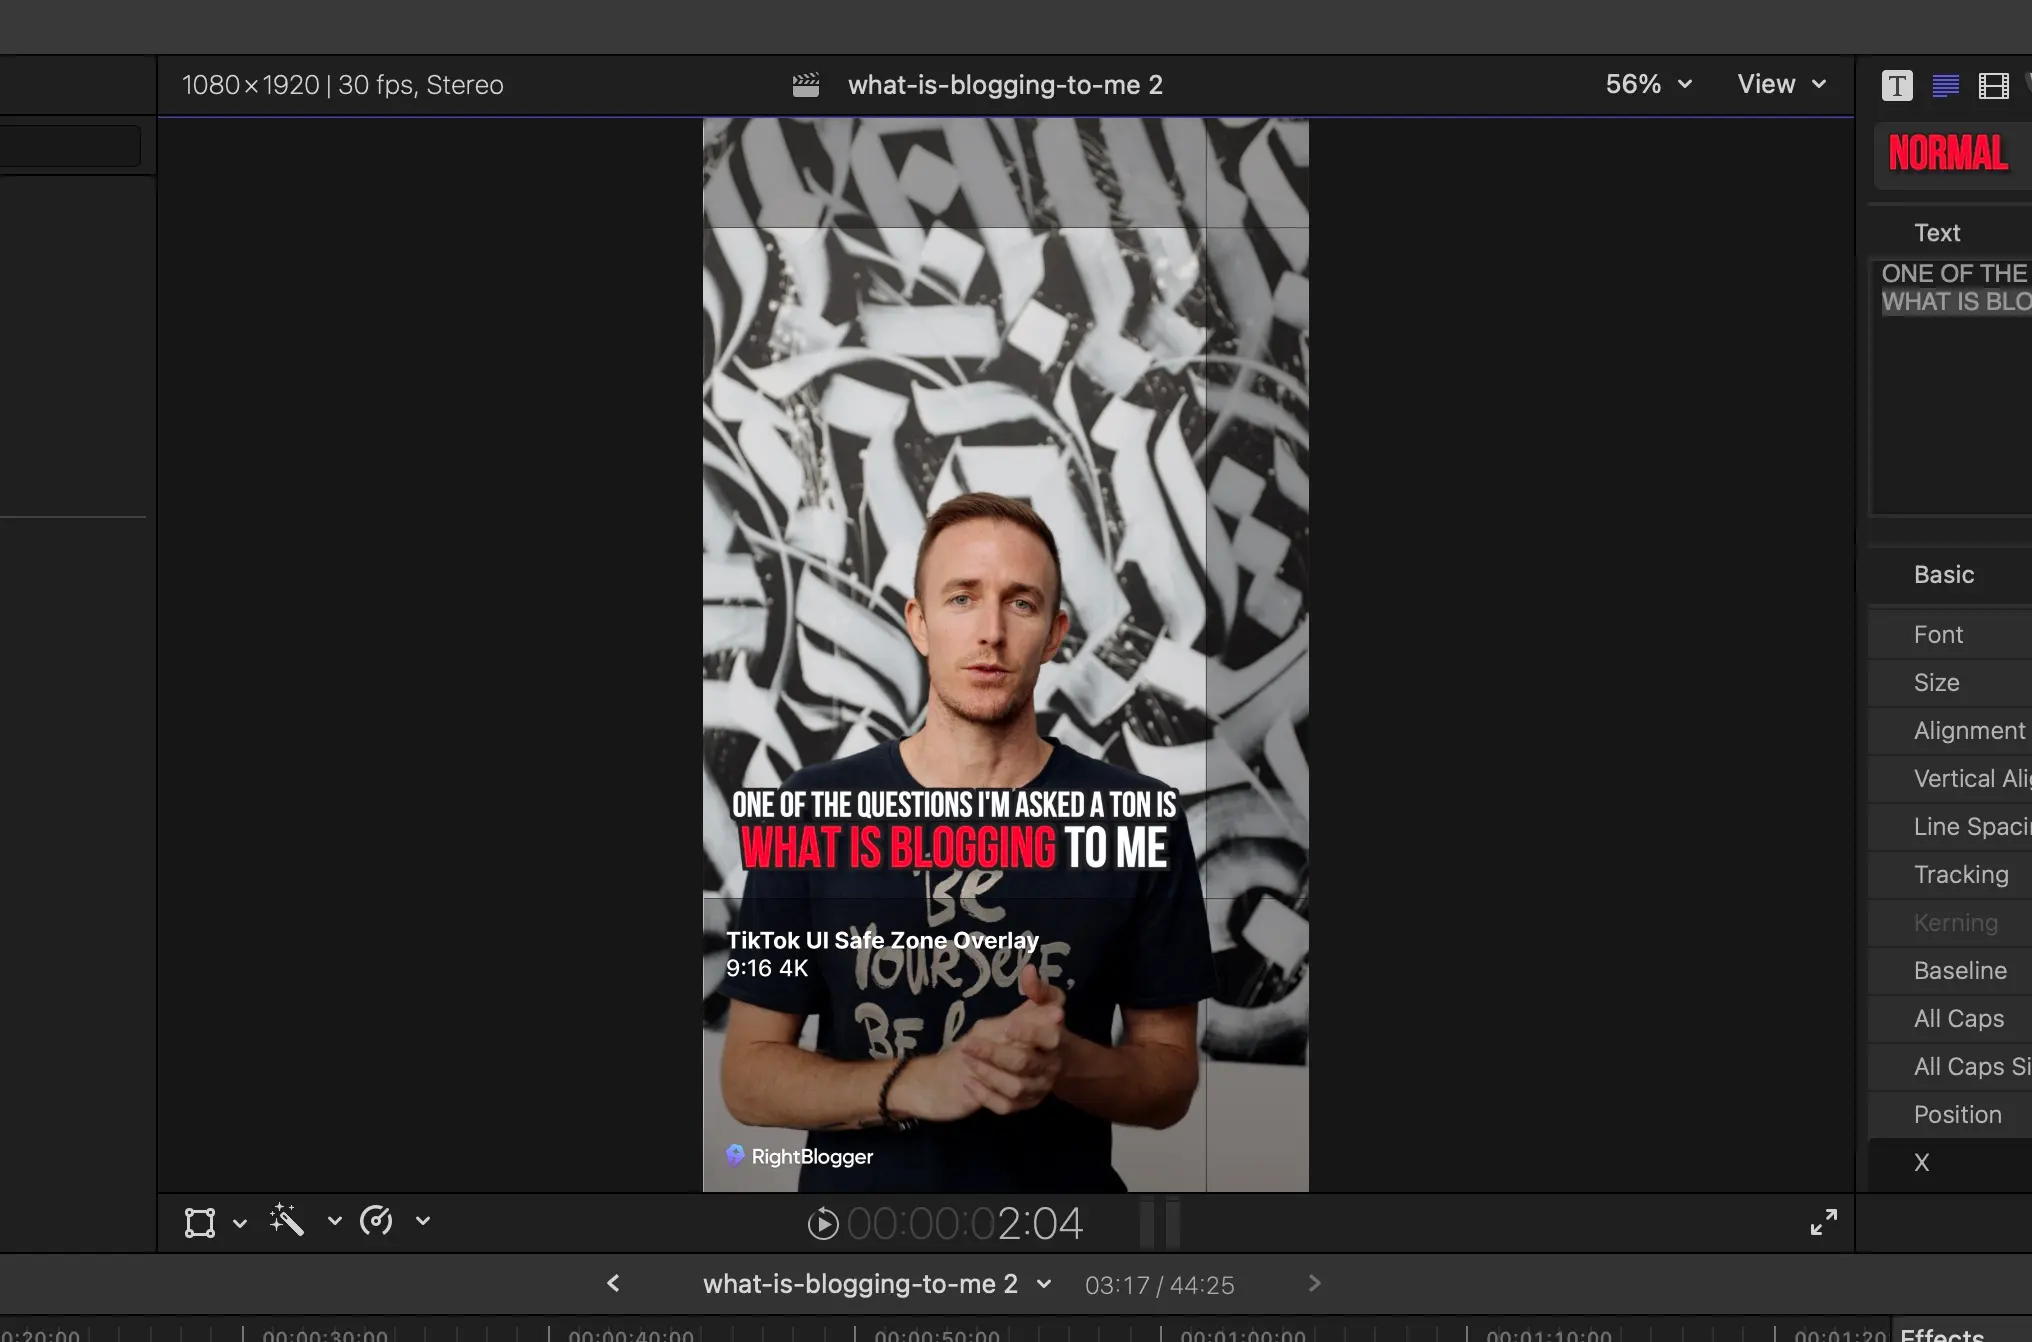
We made this template as a 4K resolution transparent PNG so you can easily add it to any video editing software. Simple place the template on top of your video to preview how the TikTok will obstruct your video content.
Creating videos for TikTok and Reels becomes a breeze with the help of RightBlogger’s free TikTok UI overlay template, ensuring your content shines without important elements getting obscured by the interface.
How to Add TikTok Safe Zone to Final Cut Pro
If you use Final Cut Pro you can add a custom overlay image to your editing interface by clicking the “View” button. In this select “Choose Custom Overlay”, here you can select the PNG overlay.
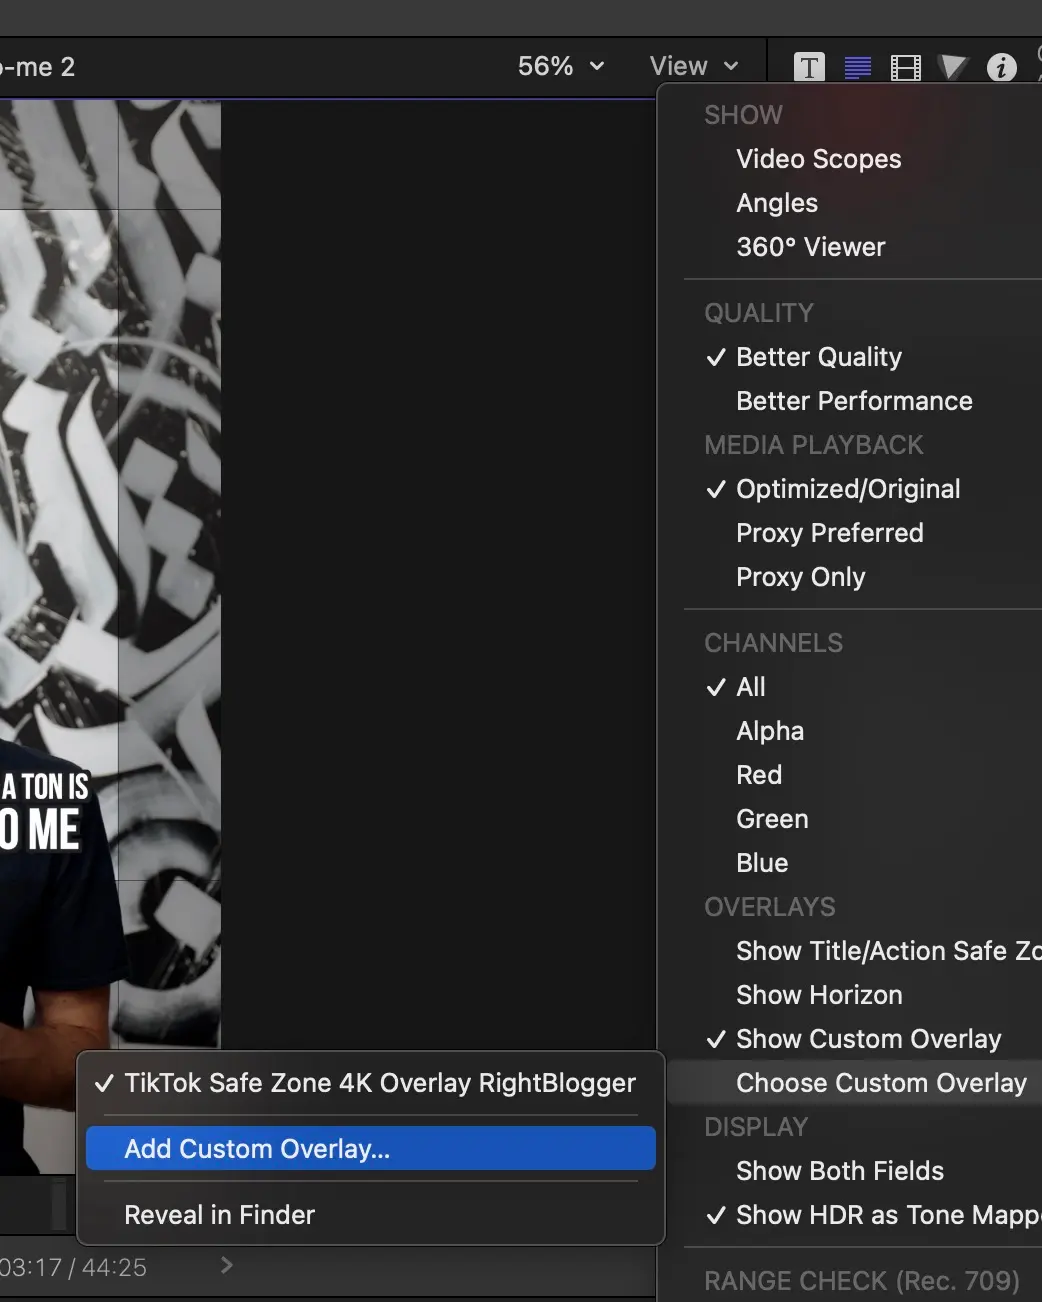
Adding the TikTok safe zone template this way is an easy way to always have it for video projects where it’s needed. Final Cut Pro will also scale the overlay so it will work for 4K or 1080p vertical projects (and be sure to peep my picks for the best free Final Cut Pro plugins if that’s your jam).
Why TikTok’s Safe Zone Matters for Your Videos
Ever spend ages perfecting a video, adding great visuals and cool text, only to upload it to TikTok and find half your caption hidden by the like button? Or maybe a key part of the video is blocked by your username?
It’s a common frustration.
This is exactly why knowing about TikTok’s safe zone is super important. The app puts buttons, your username, the video description, and other interface elements right on top of your video. These elements take up more screen space than you might realize, especially along the bottom and right edges.
If you don’t pay attention to the safe zone, you risk:
- Important Stuff Gets Hidden: People might not be able to read your text, captions, or see your logo clearly.
- Key Visuals Get Blocked: The main focus of your video, like someone’s face or a crucial action, could get awkwardly cut off.
- Viewers Get Annoyed: If people can’t easily see or read everything, they’re more likely to just keep scrolling.
- It Looks Less Pro: Videos that keep important things clear of the interface simply look cleaner and better thought out.
Think of the safe zone like knowing where not to place your essential content. By keeping the main things people need to see – faces, text, logos, the main action – inside this “safe” area while you’re editing, you make sure everyone can actually see it clearly on TikTok.
It helps get your message across, makes your video look good, and means your hard work doesn’t get lost behind a button. It’s an easy step that makes a big difference!
FAQ
How does the TikTok safe zone overlay improve my videos? It shows where app buttons and text fields appear, so you can keep important visuals and text from getting covered.
Can I use this overlay template in any video editor? Yes, the PNG format is compatible with most editing programs, including Final Cut Pro, Adobe Premiere, and CapCut.
Does the safe zone overlay work for Instagram Reels and YouTube Shorts? Yes, since both platforms have similar interface layouts, the overlay can guide you to keep important content visible.
Is the TikTok safe zone overlay free to use? Yes, the overlay linked here is free to download and use for your projects.
Will my video look correct if I only use the TikTok safe zone? Most short-form platforms copy TikTok’s design, so using the TikTok safe zone usually ensures your content is clear on Reels and Shorts too.
Conclusion
In conclusion, this TikTok Safe Zone Template is an essential tool for content creators on this popular social media platform. By providing a clear and user-friendly interface, this template ensures that your videos will always be perfectly framed, avoiding any important content being cut off.
Since it’s just a PNG overlay you can easily adjust the safe zone for any video editing software or resolutions, resulting in visually appealing and professional-looking videos that stand out from the crowd.
Plus it works for YouTube Shorts and Meta Reels since their interfaces are fairly similar to TikTok.
Designing visuals for LinkedIn too? Our LinkedIn banner size guide covers the same kind of crop-and-overlap math for personal profile and company page banners.
Need ideas for your short form TikTok videos? You’ll love RightBlogger’s TikTok content idea generator.

Article by
RightBlogger Co-Founder, Andy Feliciotti builds websites and shares photography, travel, and video tips on YouTube.
New:Site Agent
Automated SEO Blog Posts That Work
Try RightBlogger for free, we know you'll love it.
- Automated Content
- Blog Posts in One Click
- Unlimited Usage


Leave a comment
You must be logged in to comment.
Loading comments...